
Car
Mahindra XEV 9S
Model overview, prices and all available variants
Ex-showroom price range
₹22.49 L - ₹27.99 L
12 variants available
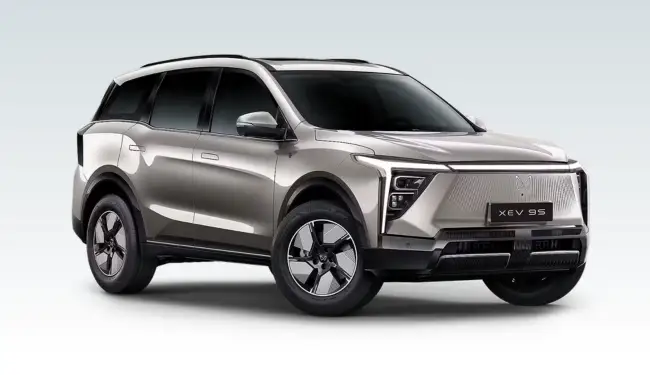
Representative model image from
Pack One Above 59.0 kWh No Charger (Base Model).
The Mahindra XEV 9S is one of 12 available Mahindra XEV 9S variants. Its ex-showroom price is On request. See the specifications and features below for this exact variant.
Mahindra XEV 9S Specifications
- Engine
- It runs on a 998 cc K-Series petrol engine . Small specification differences can show up based on the fuel setup.
- Performance
- In the petrol variant, it can deliver up to 68 bhp and 91.1 Nm of torque.
- Gearbox
- There is a 5-speed manual option. Some variants come with a 5-speed AMT or AGS automatic.
- Fuel Types
- You can choose Petrol or CNG depending on the variant.
- Space and Size
- This is a 5-seat, 5-door hatchback . Length is 3,530 mm, width is 1,490 mm, and height is 1,520 mm.
- Features
- Features depend on the variant. Some versions may include central locking, an engine immobiliser, child safety locks, body-coloured bumpers, steel wheels, and other comfort items.
This is the common model page.
No variant is selected here. Each variant below has its own separate URL and detail page.
All Variants & Price (12)
| Variant | Fuel | Transmission | Price * | |
|---|---|---|---|---|
| Pack One Above 59.0 kWh No Charger (Base Model) | Electric | 1-Speed Automatic (Reduction Gear) | ₹22.49 L | View Details |
| Pack One Above 59.0 kWh 11.2kW Charger | Electric | 1-Speed Automatic (Reduction Gear) | ₹22.99 L | View Details |
| Pack One Above 79.0 kWh No Charger | Electric | 1-Speed Automatic (Reduction Gear) | ₹23.99 L | View Details |
| Pack One Above 79.0 kWh 11.2kW Charger | Electric | 1-Speed Automatic (Reduction Gear) | ₹24.49 L | View Details |
| Pack Two Above 70.0 kWh No Charger | Electric | 1-Speed Automatic (Reduction Gear) | ₹23.99 L | View Details |
| Pack Two Above 70.0 kWh 11.2kW Charger | Electric | 1-Speed Automatic (Reduction Gear) | ₹24.49 L | View Details |
| Pack Two Above 79.0 kWh No Charger | Electric | 1-Speed Automatic (Reduction Gear) | ₹25.49 L | View Details |
| Pack Two Above 79.0 kWh 11.2kW Charger | Electric | 1-Speed Automatic (Reduction Gear) | ₹25.99 L | View Details |
| Pack Three 79.0 kWh No Charger | Electric | 1-Speed Automatic (Reduction Gear) | ₹26.49 L | View Details |
| Pack Three 79.0 kWh 11.2kW Charger | Electric | 1-Speed Automatic (Reduction Gear) | ₹26.99 L | View Details |
| Pack Three Above 79.0 kWh No Charger | Electric | 1-Speed Automatic (Reduction Gear) | ₹27.49 L | View Details |
| Pack Three Above 79.0 kWh 11.2kW Charger | Electric | 1-Speed Automatic (Reduction Gear) | ₹27.99 L | View Details |
| Specification | Pack One Above 59.0 kWh No Charger (Base Model) | Pack One Above 59.0 kWh 11.2kW Charger | Pack One Above 79.0 kWh No Charger | Pack One Above 79.0 kWh 11.2kW Charger | Pack Two Above 70.0 kWh No Charger | Pack Two Above 70.0 kWh 11.2kW Charger | Pack Two Above 79.0 kWh No Charger | Pack Two Above 79.0 kWh 11.2kW Charger | Pack Three 79.0 kWh No Charger | Pack Three 79.0 kWh 11.2kW Charger | Pack Three Above 79.0 kWh No Charger | Pack Three Above 79.0 kWh 11.2kW Charger |
|---|---|---|---|---|---|---|---|---|---|---|---|---|
| Engine & Transmission | ||||||||||||
| Engine | 0 cc | 0 cc | 0 cc | 0 cc | 0 cc | 0 cc | 0 cc | 0 cc | 0 cc | 0 cc | 0 cc | 0 cc |
| Engine Type | Permanent Magnet Synchronous Motor | Permanent Magnet Synchronous Motor | Permanent Magnet Synchronous Motor | Permanent Magnet Synchronous Motor | Permanent Magnet Synchronous Motor | Permanent Magnet Synchronous Motor | Permanent Magnet Synchronous Motor | Permanent Magnet Synchronous Motor | Permanent Magnet Synchronous Motor | Permanent Magnet Synchronous Motor | Permanent Magnet Synchronous Motor | Permanent Magnet Synchronous Motor |
| Fuel Type | Electric | Electric | Electric | Electric | Electric | Electric | Electric | Electric | Electric | Electric | Electric | Electric |
| Acceleration (0-100 kmph) | 8.2 seconds | 8.2 seconds | 7.0 seconds | 7.0 seconds | 7.5 seconds | 7.5 seconds | 7.0 seconds | 7.0 seconds | 7.0 seconds | 7.0 seconds | 7.0 seconds | 7.0 seconds |
| Mileage (ARAI) | 521 km/full charge | 521 km/full charge | 679 km/full charge | 679 km/full charge | 600 km/full charge | 600 km/full charge | 679 km/full charge | 679 km/full charge | 679 km/full charge | 679 km/full charge | 679 km/full charge | 679 km/full charge |
| City Mileage | 380-400 km/full charge | 380-400 km/full charge | 450-500 km/full charge | 450-500 km/full charge | 400-430 km/full charge | 400-430 km/full charge | 450-500 km/full charge | 450-500 km/full charge | 450-500 km/full charge | 450-500 km/full charge | 450-500 km/full charge | 450-500 km/full charge |
| Max Torque | 380 Nm | 380 Nm | 380 Nm | 380 Nm | 380 Nm | 380 Nm | 380 Nm | 380 Nm | 380 Nm | 380 Nm | 380 Nm | 380 Nm |
| Max Motor Performance | 228 bhp & 380 Nm | 228 bhp & 380 Nm | 282 bhp & 380 Nm | 282 bhp & 380 Nm | 241 bhp & 380 Nm | 241 bhp & 380 Nm | 282 bhp & 380 Nm | 282 bhp & 380 Nm | 282 bhp & 380 Nm | 282 bhp & 380 Nm | 282 bhp & 380 Nm | 282 bhp & 380 Nm |
| Emission Standard | Zero Emission Vehicle (ZEV) | Zero Emission Vehicle (ZEV) | Zero Emission Vehicle (ZEV) | Zero Emission Vehicle (ZEV) | Zero Emission Vehicle (ZEV) | Zero Emission Vehicle (ZEV) | Zero Emission Vehicle (ZEV) | Zero Emission Vehicle (ZEV) | Zero Emission Vehicle (ZEV) | Zero Emission Vehicle (ZEV) | Zero Emission Vehicle (ZEV) | Zero Emission Vehicle (ZEV) |
| Battery | 59 kWh Lithium Iron Phosphate (LFP) Battery Pack | 59 kWh Lithium Iron Phosphate (LFP) Battery Pack | 79 kWh Lithium Iron Phosphate (LFP) Battery Pack | 79 kWh Lithium Iron Phosphate (LFP) Battery Pack | 70 kWh Lithium Iron Phosphate (LFP) Battery Pack | 70 kWh Lithium Iron Phosphate (LFP) Battery Pack | 79 kWh Lithium Iron Phosphate (LFP) Battery Pack | 79 kWh Lithium Iron Phosphate (LFP) Battery Pack | 79 kWh Lithium Iron Phosphate (LFP) Battery Pack | 79 kWh Lithium Iron Phosphate (LFP) Battery Pack | 79 kWh Lithium Iron Phosphate (LFP) Battery Pack | 79 kWh Lithium Iron Phosphate (LFP) Battery Pack |
| Top Speed | 202 kmph | 202 kmph | 202 kmph | 202 kmph | 202 kmph | 202 kmph | 202 kmph | 202 kmph | 202 kmph | 202 kmph | 202 kmph | 202 kmph |
| Highway Mileage | 340-360 km/full charge | 340-360 km/full charge | 400-420 km/full charge | 400-420 km/full charge | 360-380 km/full charge | 360-380 km/full charge | 400-420 km/full charge | 400-420 km/full charge | 400-420 km/full charge | 400-420 km/full charge | 400-420 km/full charge | 400-420 km/full charge |
| Battery Charging | 20 Mins (180 kW DC Fast Charger 20-80%) / Home Charger Sold Separately | 20 Mins (180 kW DC Fast Charger 20-80%) / 5H 30M (11.2 kW AC Home Charger Included) | 20 Mins (180 kW DC Fast Charger 20-80%) / Home Charger Sold Separately | 20 Mins (180 kW DC Fast Charger 20-80%) / 7H 30M (11.2 kW AC Home Charger Included) | 20 Mins (175 kW DC Fast Charger 20-80%) / Home Charger Sold Separately | 20 Mins (175 kW DC Fast Charger 20-80%) / 6H 30M (11.2 kW AC Home Charger Included) | 20 Mins (180 kW DC Fast Charger 20-80%) / Home Charger Sold Separately | 20 Mins (180 kW DC Fast Charger 20-80%) / 7H 30M (11.2 kW AC Home Charger Included) | 20 Mins (180 kW DC Fast Charger 20-80%) / Home Charger Sold Separately | 20 Mins (180 kW DC Fast Charger 20-80%) / 7H 30M (11.2 kW AC Home Charger Included) | 20 Mins (180 kW DC Fast Charger 20-80%) / Home Charger Sold Separately | 20 Mins (180 kW DC Fast Charger 20-80%) / 7H 30M (11.2 kW AC Home Charger Included) |
| Drivetrain | RWD (Rear Wheel Drive) | RWD (Rear Wheel Drive) | RWD (Rear Wheel Drive) | RWD (Rear Wheel Drive) | RWD (Rear Wheel Drive) | RWD (Rear Wheel Drive) | RWD (Rear Wheel Drive) | RWD (Rear Wheel Drive) | RWD (Rear Wheel Drive) | RWD (Rear Wheel Drive) | RWD (Rear Wheel Drive) | RWD (Rear Wheel Drive) |
| Electric Motor Assist | Yes (Full Electric Drive) | Yes (Full Electric Drive) | Yes (Full Electric Drive) | Yes (Full Electric Drive) | Yes (Full Electric Drive) | Yes (Full Electric Drive) | Yes (Full Electric Drive) | Yes (Full Electric Drive) | Yes (Full Electric Drive) | Yes (Full Electric Drive) | Yes (Full Electric Drive) | Yes (Full Electric Drive) |
| Max Power (bhp@rpm) | 228 bhp | 228 bhp | 282 bhp | 282 bhp | 241 bhp | 241 bhp | 282 bhp | 282 bhp | 282 bhp | 282 bhp | 282 bhp | 282 bhp |
| Range | 521 km | 521 km | 679 km | 679 km | 600 km | 600 km | 679 km | 679 km | 679 km | 679 km | 679 km | 679 km |
| Driving Range | 521 km | 521 km | 679 km | 679 km | 600 km | 600 km | 679 km | 679 km | 679 km | 679 km | 679 km | 679 km |
| Others | Coast-to-Coast Triple 31.24cm Super Screens, Panoramic Sunroof, 6 Airbags, ESP | 11.2 kW Smart AC Home Charger Included, Coast-to-Coast Triple Screens, Panoramic Sunroof | Coast-to-Coast Triple 31.24cm Super Screens, Panoramic Sunroof, 6 Airbags, ESP | 11.2 kW Smart AC Home Charger Included, Coast-to-Coast Triple Super Screens, Panoramic Sunroof | 12.3-inch HD Triple-screen Display, 16 Harman Kardon Dolby Atmos Speakers, Front Seat Ventilation, 360-Degree Camera | 11.2 kW Smart AC Home Charger Included, 12.3-inch HD Triple-screen Display, 16 Harman Kardon Dolby Atmos Speakers | Pack Two High Trim, 12.3-inch HD Triple-screen Display, 16 Harman Kardon Dolby Atmos Speakers, Front Seat Ventilation | 11.2 kW Smart AC Home Charger Included, 12.3-inch HD Triple-screen Display, 16 Harman Kardon Dolby Atmos Speakers | Pack Three Premium Trim, Level 2 ADAS, Intelligent Cockpit HUD, Premium Leatherette Seats | 11.2 kW Smart AC Home Charger Included, Level 2 ADAS, Intelligent Cockpit HUD, Premium Leatherette Seats | Pack Three Premium Trim, Level 2 ADAS, Intelligent Cockpit HUD, Premium Leatherette Seats | 11.2 kW Smart AC Home Charger Included, Level 2 ADAS, Intelligent Cockpit HUD, Premium Leatherette Seats |
| Electric Motor | Yes | Yes | Yes | Yes | Yes | Yes | Yes | Yes | Yes | Yes | Yes | Yes |
| Max Engine Torque (Nm@rpm) | 380 Nm | 380 Nm | 380 Nm | 380 Nm | 380 Nm | 380 Nm | 380 Nm | 380 Nm | 380 Nm | 380 Nm | 380 Nm | 380 Nm |
| Pure Electric Driving Mode | Yes (Always Electric) | Yes (Always Electric) | Yes (Always Electric) | Yes (Always Electric) | Yes (Always Electric) | Yes (Always Electric) | Yes (Always Electric) | Yes (Always Electric) | Yes (Always Electric) | Yes (Always Electric) | Yes (Always Electric) | Yes (Always Electric) |
| Transmission | 1-Speed Automatic (Reduction Gear) | 1-Speed Automatic (Reduction Gear) | 1-Speed Automatic (Reduction Gear) | 1-Speed Automatic (Reduction Gear) | 1-Speed Automatic (Reduction Gear) | 1-Speed Automatic (Reduction Gear) | 1-Speed Automatic (Reduction Gear) | 1-Speed Automatic (Reduction Gear) | 1-Speed Automatic (Reduction Gear) | 1-Speed Automatic (Reduction Gear) | 1-Speed Automatic (Reduction Gear) | 1-Speed Automatic (Reduction Gear) |
| E20 Compatibility | No (Not Applicable for Electric) | No (Not Applicable for Electric) | No (Not Applicable for Electric) | No (Not Applicable for Electric) | No (Not Applicable for Electric) | No (Not Applicable for Electric) | No (Not Applicable for Electric) | No (Not Applicable for Electric) | No (Not Applicable for Electric) | No (Not Applicable for Electric) | No (Not Applicable for Electric) | No (Not Applicable for Electric) |
| Suspensions, Brakes, Steering & Tyres | ||||||||||||
| Spare Wheel | Space Saver Steel Wheel | Space Saver Steel Wheel | Space Saver Steel Wheel | Space Saver Steel Wheel | Space Saver Steel Wheel | Space Saver Steel Wheel | Space Saver Steel Wheel | Space Saver Steel Wheel | Space Saver Steel Wheel | Space Saver Steel Wheel | Space Saver Steel Wheel | Space Saver Steel Wheel |
| Wheels | 18-inch Steel Wheels with Covers | 18-inch Steel Wheels with Covers | 18-inch Steel Wheels with Covers | 18-inch Steel Wheels with Covers | 18-inch Alloy Wheels | 18-inch Alloy Wheels | 18-inch Alloy Wheels | 18-inch Alloy Wheels | 19-inch Diamond-Cut Alloy Wheels | 19-inch Diamond-Cut Alloy Wheels | 19-inch Diamond-Cut Alloy Wheels | 19-inch Diamond-Cut Alloy Wheels |
| Steering Type | Power-assisted (Electric) | Power-assisted (Electric) | Power-assisted (Electric) | Power-assisted (Electric) | Power-assisted (Electric) | Power-assisted (Electric) | Power-assisted (Electric) | Power-assisted (Electric) | Power-assisted (Electric) | Power-assisted (Electric) | Power-assisted (Electric) | Power-assisted (Electric) |
| Front Suspension | MacPherson Strut Front Suspension with FDD & MTV-CL | MacPherson Strut Front Suspension with FDD & MTV-CL | MacPherson Strut Front Suspension with FDD & MTV-CL | MacPherson Strut Front Suspension with FDD & MTV-CL | McPherson Strut i-link Independent Suspension & Stabilizer bar | McPherson Strut i-link Independent Suspension & Stabilizer bar | McPherson Strut i-link Independent Suspension & Stabilizer bar | McPherson Strut i-link Independent Suspension & Stabilizer bar | McPherson Strut i-link Independent Suspension & Stabilizer bar | MacPherson Strut i-link Independent Suspension & Stabilizer bar | MacPherson Strut i-link Independent Suspension & Stabilizer bar | MacPherson Strut i-link Independent Suspension & Stabilizer bar |
| Rear Brake Type | Disc | Disc | Disc | Disc | Disc | Disc | Disc | Disc | Disc | Disc | Disc | Disc |
| Tyre Construction | Radial - Tubeless | Radial - Tubeless | Radial - Tubeless | Radial - Tubeless | Radial - Tubeless | Radial - Tubeless | Radial - Tubeless | Radial - Tubeless | Radial - Tubeless | Radial - Tubeless | Radial - Tubeless | Radial - Tubeless |
| Front Tyres | 235 / 60 R18 | 235 / 60 R18 | 235 / 60 R18 | 235 / 60 R18 | 235 / 60 R18 | 235 / 60 R18 | 235 / 60 R18 | 235 / 60 R18 | 245 / 45 R19 | 245 / 45 R19 | 245 / 45 R19 | 245 / 45 R19 |
| Minimum Turning Radius(m) | 5.4 m | 5.4 m | 5.4 m | 5.4 m | 5.4 m | 5.4 m | 5.4 m | 5.4 m | 5.4 m | 5.4 m | 5.4 m | 5.4 m |
| Rear Suspension | Multi-link Rear Suspension with FDD & MTV-CL | Multi-link Rear Suspension with FDD & MTV-CL | Multi-link Rear Suspension with FDD & MTV-CL | Multi-link Rear Suspension with FDD & MTV-CL | Multi-link (5-link) Independent Suspension & Stabilizer bar | Multi-link (5-link) Independent Suspension & Stabilizer bar | Multi-link (5-link) Independent Suspension & Stabilizer bar | Multi-link (5-link) Independent Suspension & Stabilizer bar | Multi-link (5-link) Independent Suspension & Stabilizer bar | Multi-link (5-link) Independent Suspension & Stabilizer bar | Multi-link (5-link) Independent Suspension & Stabilizer bar | Multi-link (5-link) Independent Suspension & Stabilizer bar |
| Front Brake Type | Disc | Disc | Disc | Disc | Disc | Disc | Disc | Disc | Disc | Disc | Disc | Disc |
| Four Wheel Steering | No | No | No | No | No | No | No | No | No | No | No | No |
| Rear Tyres | 235 / 60 R18 | 235 / 60 R18 | 235 / 60 R18 | 235 / 60 R18 | 235 / 60 R18 | 235 / 60 R18 | 235 / 60 R18 | 235 / 60 R18 | 245 / 45 R19 | 245 / 45 R19 | 245 / 45 R19 | 245 / 45 R19 |
| Dimensions & Weight | ||||||||||||
| Kerb Weight(kg) | 1950-2020 kg | 1960-2030 kg | 2010-2080 kg | 2020-2090 kg | 1980-2050 kg | 1990-2060 kg | 2010-2080 kg | 2020-2090 kg | 2030-2100 kg | 2040-2110 kg | 2030-2100 kg | 2040-2110 kg |
| Height(mm) | 1747 mm | 1747 mm | 1747 mm | 1747 mm | 1747 mm | 1747 mm | 1747 mm | 1747 mm | 1747 mm | 1747 mm | 1747 mm | 1747 mm |
| Width(mm) | 1900 mm | 1900 mm | 1900 mm | 1900 mm | 1900 mm | 1900 mm | 1900 mm | 1900 mm | 1900 mm | 1900 mm | 1900 mm | 1900 mm |
| Length(mm) | 4737 mm | 4737 mm | 4737 mm | 4737 mm | 4737 mm | 4737 mm | 4737 mm | 4737 mm | 4737 mm | 4737 mm | 4737 mm | 4737 mm |
| Ground Clearance | 201 mm | 201 mm | 201 mm | 201 mm | 201 mm | 201 mm | 201 mm | 201 mm | 201 mm | 201 mm | 201 mm | 201 mm |
| Wheelbase(mm) | 2762 mm | 2762 mm | 2762 mm | 2762 mm | 2762 mm | 2762 mm | 2762 mm | 2762 mm | 2762 mm | 2762 mm | 2762 mm | 2762 mm |
| Capacity | ||||||||||||
| Fuel Tank Capacity(L) | Not Applicable (EV) | Not Applicable (EV) | Not Applicable (EV) | Not Applicable (EV) | Not Applicable (EV) | Not Applicable (EV) | Not Applicable (EV) | Not Applicable (EV) | Not Applicable (EV) | Not Applicable (EV) | Not Applicable (EV) | Not Applicable (EV) |
| Doors | 5 Doors | 5 Doors | 5 Doors | 5 Doors | 5 Doors | 5 Doors | 5 Doors | 5 Doors | 5 Doors | 5 Doors | 5 Doors | 5 Doors |
| Bootspace(L) | 500 Litres | 500 Litres | 500 Litres | 500 Litres | 500 Litres | 500 Litres | 500 Litres | 500 Litres | 500 Litres | 500 Litres | 500 Litres | 500 Litres |
| Seating Capacity | 7 Seater | 7 Seater | 6 Seater | 6 Seater | 7 Seater | 7 Seater | 7 Seater | 7 Seater | 7 Seater | 7 Seater | 7 Seater | 7 Seater |
| No of Rows | 3 Rows | 3 Rows | 3 Rows | 3 Rows | 3 Rows | 3 Rows | 3 Rows | 3 Rows | 3 Rows | 3 Rows | 3 Rows | 3 Rows |
| Feature | Pack One Above 59.0 kWh No Charger (Base Model) | Pack One Above 59.0 kWh 11.2kW Charger | Pack One Above 79.0 kWh No Charger | Pack One Above 79.0 kWh 11.2kW Charger | Pack Two Above 70.0 kWh No Charger | Pack Two Above 70.0 kWh 11.2kW Charger | Pack Two Above 79.0 kWh No Charger | Pack Two Above 79.0 kWh 11.2kW Charger | Pack Three 79.0 kWh No Charger | Pack Three 79.0 kWh 11.2kW Charger | Pack Three Above 79.0 kWh No Charger | Pack Three Above 79.0 kWh 11.2kW Charger |
|---|---|---|---|---|---|---|---|---|---|---|---|---|
| Exterior | ||||||||||||
| Rub-strips | No | No | No | No | No | No | No | No | No | No | No | No |
| Roof Rails | No (Coupé Silhouette Roofline) | No (Coupé Silhouette Roofline) | No (Coupé Silhouette Roofline) | No (Coupé Silhouette Roofline) | No (Coupé Silhouette Roofline) | No (Coupé Silhouette Roofline) | No (Coupé Silhouette Roofline) | No (Coupé Silhouette Roofline) | No (Coupé Silhouette Roofline) | No (Coupé Silhouette Roofline) | No (Coupé Silhouette Roofline) | No (Coupé Silhouette Roofline) |
| Roof-mounted Antenna | Shark Fin | Shark Fin | Shark Fin | Shark Fin | Shark Fin | Shark Fin | Shark Fin | Shark Fin | Shark Fin | Shark Fin | Shark Fin | Shark Fin |
| Chrome Finish Exhaust Pipe | No (EV) | No (EV) | No (EV) | No (EV) | No (EV) | No (EV) | No (EV) | No (EV) | No (EV) | No (EV) | No (EV) | No (EV) |
| Body-coloured Bumpers | Yes | Yes | Yes | Yes | Yes | Yes | Yes | Yes | Yes | Yes | Yes | Yes |
| Body Kit | Yes (Aero-efficient Body Kit) | Yes (Aero-efficient Body Kit) | Yes (Aero-efficient Body Kit) | Yes (Aero-efficient Body Kit) | Yes (Aero-efficient Body Kit) | Yes (Aero-efficient Body Kit) | Yes (Aero-efficient Body Kit) | Yes (Aero-efficient Body Kit) | Yes (Aero-efficient Body Kit) | Yes (Aero-efficient Body Kit) | Yes (Aero-efficient Body Kit) | Yes (Aero-efficient Body Kit) |
| Sunroof / Moonroof | Panoramic Sunroof with Smart Shade | Panoramic Sunroof with Smart Shade | Panoramic Sunroof with Smart Shade | Panoramic Sunroof with Smart Shade | Panoramic Sunroof with Smart Shade | Panoramic Sunroof with Smart Shade | Panoramic Sunroof with Smart Shade | Panoramic Sunroof with Smart Shade | Panoramic Sunroof with Smart Shade | Panoramic Sunroof with Smart Shade | Panoramic Sunroof with Smart Shade | Panoramic Sunroof with Smart Shade |
| Locks & Security | ||||||||||||
| Central Locking | Smart Keyless Entry with Walk-away Lock | Smart Keyless Entry with Walk-away Lock | Smart Keyless Entry with Walk-away Lock | Smart Keyless Entry with Walk-away Lock | Smart Keyless Entry with Walk-away Lock | Smart Keyless Entry with Walk-away Lock | Smart Keyless Entry with Walk-away Lock | Smart Keyless Entry with Walk-away Lock | Smart Keyless Entry with Walk-away Lock | Smart Keyless Entry with Walk-away Lock | Smart Keyless Entry with Walk-away Lock | Smart Keyless Entry with Walk-away Lock |
| Speed Sensing Door Lock | Yes | Yes | Yes | Yes | Yes | Yes | Yes | Yes | Yes | Yes | Yes | Yes |
| Engine Immobiliser | Yes | Yes | Yes | Yes | Yes | Yes | Yes | Yes | Yes | Yes | Yes | Yes |
| Child Safety Lock | Yes | Yes | Yes | Yes | Yes | Yes | Yes | Yes | Yes | Yes | Yes | Yes |
| Seats & Upholstery | ||||||||||||
| Front Passenger Seat Adjustment | 6-Way Power Adjustable passenger seat | 6-Way Power Adjustable passenger seat | 6-Way Power Adjustable passenger seat | 6-Way Power Adjustable passenger seat | 6-Way Power Adjustable passenger seat | 6-Way Power Adjustable passenger seat | 6-Way Power Adjustable passenger seat | 6-Way Power Adjustable passenger seat | 6-Way Power Adjustable passenger seat | 6-Way Power Adjustable passenger seat | 6-Way Power Adjustable passenger seat | 6-Way Power Adjustable passenger seat |
| Rear Armrest | Yes (With Cup Holders and Device Holder) | Yes (With Cup Holders and Device Holder) | Yes (With Cup Holders and Device Holder) | Yes (With Cup Holders and Device Holder) | Yes (With Cup Holders and Device Holder) | Yes (With Cup Holders and Device Holder) | Yes (With Cup Holders and Device Holder) | Yes (With Cup Holders and Device Holder) | Yes (With Cup Holders and Device Holder) | Yes (With Cup Holders and Device Holder) | Yes (With Cup Holders and Device Holder) | Yes (With Cup Holders and Device Holder) |
| Driver Seat Adjustment | 8-Way Power Adjustable with Memory Functions | 8-Way Power Adjustable with Memory Functions | 8-Way Power Adjustable with Memory Functions | 8-Way Power Adjustable with Memory Functions | 8-Way Power Adjustable with Memory Functions | 8-Way Power Adjustable with Memory Functions | 8-Way Power Adjustable with Memory Functions | 8-Way Power Adjustable with Memory Functions | 8-Way Power Adjustable with Memory Functions | 8-Way Power Adjustable with Memory Functions | 8-Way Power Adjustable with Memory Functions | 8-Way Power Adjustable with Memory Functions |
| Folding Rear Seat | 60:40 Split Fold Flat | 60:40 Split Fold Flat | 60:40 Split Fold Flat | 60:40 Split Fold Flat | 60:40 Split Fold Flat | 60:40 Split Fold Flat | 60:40 Split Fold Flat | 60:40 Split Fold Flat | 60:40 Split Fold Flat | 60:40 Split Fold Flat | 60:40 Split Fold Flat | 60:40 Split Fold Flat |
| Seat Upholstery | Premium Leatherette Performance Seats | Premium Leatherette Seats | Premium Leatherette Performance Seats | Premium Leatherette Performance Seats | Premium Leatherette Performance Seats | Premium Leatherette Performance Seats | Premium Leatherette Performance Seats | Premium Leatherette Performance Seats | Premium Leatherette Performance Seats | Premium Leatherette Performance Seats | Premium Leatherette Performance Seats | Premium Leatherette Performance Seats |
| Second Row Seat Adjustment | Yes (Recline Adjustment) | Yes (Recline Adjustment) | Yes (Recline Adjustment) | Yes (Recline Adjustment) | Yes (Recline Adjustment) | Yes (Recline Adjustment) | Yes (Recline Adjustment) | Yes (Recline Adjustment) | Yes (Recline Adjustment) | Yes (Recline Adjustment) | Yes (Recline Adjustment) | Yes (Recline Adjustment) |
| Interior Colours | Luxury Dual-Tone Dark Theme | Luxury Dual-Tone Dark Theme | Luxury Dual-Tone Dark Theme | Luxury Dual-Tone Dark Theme | Luxury Dual-Tone Dark Theme | Luxury Dual-Tone Dark Theme | Luxury Dual-Tone Dark Theme | Luxury Dual-Tone Dark Theme | Luxury Dual-Tone Dark Theme | Luxury Dual-Tone Dark Theme | Luxury Dual-Tone Dark Theme | Luxury Dual-Tone Dark Theme |
| Ventilated Seat Type | Cushion Flow Ventilation Type | Cushion Flow Ventilation Type | Cushion Flow Ventilation Type | Cushion Flow Ventilation Type | Cushion Flow Ventilation Type | Cushion Flow Ventilation Type | Cushion Flow Ventilation Type | Cushion Flow Ventilation Type | Cushion Flow Ventilation Type | Cushion Flow Ventilation Type | Cushion Flow Ventilation Type | Cushion Flow Ventilation Type |
| Interiors | Triple-Screen Premium Dashboard Setup | Triple-Screen Premium Dashboard Setup | Triple-Screen Premium Dashboard Setup | Triple-Screen Premium Dashboard Setup | Triple-Screen Premium Dashboard Setup | Triple-Screen Premium Dashboard Setup | Triple-Screen Premium Dashboard Setup | Triple-Screen Premium Dashboard Setup | Triple-Screen Premium Dashboard Setup | Triple-Screen Premium Dashboard Setup | Triple-Screen Premium Dashboard Setup | Triple-Screen Premium Dashboard Setup |
| Rear Passenger Seat Type | 60:40 Split Bench Type | 60:40 Split Bench Type | 60:40 Split Bench Type | 60:40 Split Bench Type | 60:40 Split Bench Type | 60:40 Split Bench Type | 60:40 Split Bench Type | 60:40 Split Bench Type | 60:40 Split Bench Type | 60:40 Split Bench Type | 60:40 Split Bench Type | 60:40 Split Bench Type |
| Ventilated Seats | Yes (Front Seats) | Yes (Front Seats) | Yes (Front Seats) | Yes (Front Seats) | Yes (Front Seats) | Yes (Front Seats) | Yes (Front Seats) | Yes (Front Seats) | Yes (Front Seats) | Yes (Front Seats) | Yes (Front Seats) | Yes (Front Seats) |
| Front Seatback Pockets | Yes | Yes | Yes | Yes | Yes | Yes | Yes | Yes | Yes | Yes | Yes | Yes |
| Leather-wrapped Steering Wheel | Yes (Flat Bottom Sport Steering) | Yes (Flat Bottom Sport Steering) | Yes (Flat Bottom Sport Steering) | Yes (Flat Bottom Sport Steering) | Yes (Flat Bottom Sport Steering) | Yes (Flat Bottom Sport Steering) | Yes (Flat Bottom Sport Steering) | Yes (Flat Bottom Sport Steering) | Yes (Flat Bottom Sport Steering) | Yes (Flat Bottom Sport Steering) | Yes (Flat Bottom Sport Steering) | Yes (Flat Bottom Sport Steering) |
| Rear Row Seat Adjustment | No | No | No | No | No | No | No | No | No | No | No | No |
| Driver Armrest | Yes (Front Center Console with Storage) | Yes (Front Center Console with Storage) | Yes (Front Center Console with Storage) | Yes (Front Center Console with Storage) | Yes (Front Center Console with Storage) | Yes (Front Center Console with Storage) | Yes (Front Center Console with Storage) | Yes (Front Center Console with Storage) | Yes (Front Center Console with Storage) | Yes (Front Center Console with Storage) | Yes (Front Center Console with Storage) | Yes (Front Center Console with Storage) |
| Leather-wrapped Gear Knob | No (EV Shift-by-Wire Joystick/Dial) | No (EV Shift-by-Wire Joystick/Dial) | No (EV Shift-by-Wire Joystick/Dial) | No (EV Shift-by-Wire Joystick/Dial) | No (EV Shift-by-Wire Joystick/Dial) | No (EV Shift-by-Wire Joystick/Dial) | No (EV Shift-by-Wire Joystick/Dial) | No (EV Shift-by-Wire Joystick/Dial) | No (EV Shift-by-Wire Joystick/Dial) | No (EV Shift-by-Wire Joystick/Dial) | No (EV Shift-by-Wire Joystick/Dial) | No (EV Shift-by-Wire Joystick/Dial) |
| Split Rear Seat | Yes (60:40) | Yes (60:40) | Yes (60:40) | Yes (60:40) | Yes (60:40) | Yes (60:40) | Yes (60:40) | Yes (60:40) | Yes (60:40) | Yes (60:40) | Yes (60:40) | Yes (60:40) |
| Headrests | Front & Rear Adjustable Headrests | Front & Rear Adjustable Headrests | Front & Rear Adjustable Headrests | Front & Rear Adjustable Headrests | Front & Rear Adjustable Headrests | Front & Rear Adjustable Headrests | Front & Rear Adjustable Headrests | Front & Rear Adjustable Headrests | Front & Rear Adjustable Headrests | Front & Rear Adjustable Headrests | Front & Rear Adjustable Headrests | Front & Rear Adjustable Headrests |
| Safety | ||||||||||||
| Lane Departure Prevention | Yes (Level 2+ ADAS Setup) | Yes (Level 2+ ADAS Setup) | Yes (Level 2+ ADAS Setup) | Yes (Level 2+ ADAS Setup) | Yes (Level 2+ ADAS Setup) | Yes (Level 2+ ADAS Setup) | Yes (Level 2+ ADAS Setup) | Yes (Level 2+ ADAS Setup) | Yes (Level 2+ ADAS Setup) | Yes (Level 2+ ADAS Setup) | Yes (Level 2+ ADAS Setup) | Yes (Level 2+ ADAS Setup) |
| Child Seat Anchor Points | ISOFIX Anchors Standard | ISOFIX Anchors Standard | ISOFIX Anchors Standard | ISOFIX Anchors Standard | ISOFIX Anchors Standard | ISOFIX Anchors Standard | ISOFIX Anchors Standard | ISOFIX Anchors Standard | ISOFIX Anchors Standard | ISOFIX Anchors Standard | ISOFIX Anchors Standard | ISOFIX Anchors Standard |
| Tyre Pressure Monitoring System (TPMS) | Yes (With Temperature Readout) | Yes (With Temperature Readout) | Yes (With Temperature Readout) | Yes (With Temperature Readout) | Yes (With Temperature Readout) | Yes (With Temperature Readout) | Yes (With Temperature Readout) | Yes (With Temperature Readout) | Yes (With Temperature Readout) | Yes (With Temperature Readout) | Yes (With Temperature Readout) | Yes (With Temperature Readout) |
| Rear Middle Three Point Seatbelt | Yes | Yes | Yes | Yes | Yes | Yes | Yes | Yes | Yes | Yes | Yes | Yes |
| Lane Departure Warning | Yes (Level 2+ ADAS Setup) | Yes (Level 2+ ADAS Setup) | Yes (Level 2+ ADAS Setup) | Yes (Level 2+ ADAS Setup) | Yes (Level 2+ ADAS Setup) | Yes (Level 2+ ADAS Setup) | Yes (Level 2+ ADAS Setup) | Yes (Level 2+ ADAS Setup) | Yes (Level 2+ ADAS Setup) | Yes (Level 2+ ADAS Setup) | Yes (Level 2+ ADAS Setup) | Yes (Level 2+ ADAS Setup) |
| Automatic Emergency Braking (AEB) | Yes (Level 2+ ADAS Setup) | Yes (Level 2+ ADAS Setup) | Yes (Level 2+ ADAS Setup) | Yes (Level 2+ ADAS Setup) | Yes (Level 2+ ADAS Setup) | Yes (Level 2+ ADAS Setup) | Yes (Level 2+ ADAS Setup) | Yes (Level 2+ ADAS Setup) | Yes (Level 2+ ADAS Setup) | Yes (Level 2+ ADAS Setup) | Yes (Level 2+ ADAS Setup) | Yes (Level 2+ ADAS Setup) |
| Blind Spot Detection | Yes (Level 2+ ADAS Setup) | Yes (Level 2+ ADAS Setup) | Yes (Level 2+ ADAS Setup) | Yes (Level 2+ ADAS Setup) | Yes (Level 2+ ADAS Setup) | Yes (Level 2+ ADAS Setup) | Yes (Level 2+ ADAS Setup) | Yes (Level 2+ ADAS Setup) | Yes (Level 2+ ADAS Setup) | Yes (Level 2+ ADAS Setup) | Yes (Level 2+ ADAS Setup) | Yes (Level 2+ ADAS Setup) |
| Emergency Brake Light Flashing | Yes | Yes | Yes | Yes | Yes | Yes | Yes | Yes | Yes | Yes | Yes | Yes |
| Forward Collision Warning (FCW) | Yes (Level 2+ ADAS Setup) | Yes (Level 2+ ADAS Setup) | Yes (Level 2+ ADAS Setup) | Yes (Level 2+ ADAS Setup) | Yes (Level 2+ ADAS Setup) | Yes (Level 2+ ADAS Setup) | Yes (Level 2+ ADAS Setup) | Yes (Level 2+ ADAS Setup) | Yes (Level 2+ ADAS Setup) | Yes (Level 2+ ADAS Setup) | Yes (Level 2+ ADAS Setup) | Yes (Level 2+ ADAS Setup) |
| Dashcam | Yes (Built-in DVR System) | Yes (Built-in DVR System) | Yes (Built-in DVR System) | Yes (Built-in DVR System) | Yes (Built-in DVR System) | Yes (Built-in DVR System) | Yes (Built-in DVR System) | Yes (Built-in DVR System) | Yes (Built-in DVR System) | Yes (Built-in DVR System) | Yes (Built-in DVR System) | Yes (Built-in DVR System) |
| Seat Belt Warning | Yes (All 5 Occupants) | Yes (All 5 Occupants) | Yes (All 5 Occupants) | Yes (All 5 Occupants) | Yes (All 5 Occupants) | Yes (All 5 Occupants) | Yes (All 5 Occupants) | Yes (All 5 Occupants) | Yes (All 5 Occupants) | Yes (All 5 Occupants) | Yes (All 5 Occupants) | Yes (All 5 Occupants) |
| Puncture Repair Kit | Yes | Yes | Yes | Yes | Yes | Yes | Yes | Yes | Yes | Yes | Yes | Yes |
| High-beam Assist | Yes (Level 2+ ADAS Setup) | Yes (Level 2+ ADAS Setup) | Yes (Level 2+ ADAS Setup) | Yes (Level 2+ ADAS Setup) | Yes (Level 2+ ADAS Setup) | Yes (Level 2+ ADAS Setup) | Yes (Level 2+ ADAS Setup) | Yes (Level 2+ ADAS Setup) | Yes (Level 2+ ADAS Setup) | Yes (Level 2+ ADAS Setup) | Yes (Level 2+ ADAS Setup) | Yes (Level 2+ ADAS Setup) |
| Airbags | 7 Airbags (Including Driver Knee Airbag) | 7 Airbags (Standard Layout) | 7 Airbags (Including Driver Knee Airbag) | 7 Airbags (Including Driver Knee Airbag) | 7 Airbags (Including Driver Knee Airbag) | 7 Airbags (Including Driver Knee Airbag) | 7 Airbags (Including Driver Knee Airbag) | 7 Airbags (Including Driver Knee Airbag) | 7 Airbags (Including Driver Knee Airbag) | 7 Airbags (Including Driver Knee Airbag) | 7 Airbags (Including Driver Knee Airbag) | 7 Airbags (Including Driver Knee Airbag) |
| NCAP Rating | Designed for 5-Star Bharat NCAP standard | Designed for 5-Star Bharat NCAP standard | Designed for 5-Star Bharat NCAP standard | Designed for 5-Star Bharat NCAP standard | Designed for 5-Star Bharat NCAP standard | Designed for 5-Star Bharat NCAP standard | Designed for 5-Star Bharat NCAP standard | Designed for 5-Star Bharat NCAP standard | Designed for 5-Star Bharat NCAP standard | Designed for 5-Star Bharat NCAP standard | Designed for 5-Star Bharat NCAP standard | Designed for 5-Star Bharat NCAP standard |
| Rear Cross-traffic Assist | Yes (Level 2+ ADAS Setup) | Yes (Level 2+ ADAS Setup) | Yes (Level 2+ ADAS Setup) | Yes (Level 2+ ADAS Setup) | Yes (Level 2+ ADAS Setup) | Yes (Level 2+ ADAS Setup) | Yes (Level 2+ ADAS Setup) | Yes (Level 2+ ADAS Setup) | Yes (Level 2+ ADAS Setup) | Yes (Level 2+ ADAS Setup) | Yes (Level 2+ ADAS Setup) | Yes (Level 2+ ADAS Setup) |
| Rear Middle Head Rest | Yes | Yes | Yes | Yes | Yes | Yes | Yes | Yes | Yes | Yes | Yes | Yes |
| Overspeed Warning | Yes | Yes | Yes | Yes | Yes | Yes | Yes | Yes | Yes | Yes | Yes | Yes |
| Doors, Windows, Mirrors & Wipers | ||||||||||||
| Turn Indicators on ORVMs | Yes (Sequential LED Turn Indicators) | Yes (Sequential LED Turn Indicators) | Yes (Sequential LED Turn Indicators) | Yes (Sequential LED Turn Indicators) | Yes (Sequential LED Turn Indicators) | Yes (Sequential LED Turn Indicators) | Yes (Sequential LED Turn Indicators) | Yes (Sequential LED Turn Indicators) | Yes (Sequential LED Turn Indicators) | Yes (Sequential LED Turn Indicators) | Yes (Sequential LED Turn Indicators) | Yes (Sequential LED Turn Indicators) |
| Rain-sensing Wipers | Smart Rain-Sensing Wipers | Smart Rain-Sensing Wipers | Smart Rain-Sensing Wipers | Smart Rain-Sensing Wipers | Smart Rain-Sensing Wipers | Smart Rain-Sensing Wipers | Smart Rain-Sensing Wipers | Smart Rain-Sensing Wipers | Smart Rain-Sensing Wipers | Smart Rain-Sensing Wipers | Smart Rain-Sensing Wipers | Smart Rain-Sensing Wipers |
| One Touch Up | Yes (All 4 Doors with Anti-Pinch) | Yes (All 4 Doors with Anti-Pinch) | Yes (All 4 Doors with Anti-Pinch) | Yes (All 4 Doors with Anti-Pinch) | Yes (All 4 Doors with Anti-Pinch) | Yes (All 4 Doors with Anti-Pinch) | Yes (All 4 Doors with Anti-Pinch) | Yes (All 4 Doors with Anti-Pinch) | Yes (All 4 Doors with Anti-Pinch) | Yes (All 4 Doors with Anti-Pinch) | Yes (All 4 Doors with Anti-Pinch) | Yes (All 4 Doors with Anti-Pinch) |
| One Touch Down | Yes (All 4 Doors) | Yes (All 4 Doors) | Yes (All 4 Doors) | Yes (All 4 Doors) | Yes (All 4 Doors) | Yes (All 4 Doors) | Yes (All 4 Doors) | Yes (All 4 Doors) | Yes (All 4 Doors) | Yes (All 4 Doors) | Yes (All 4 Doors) | Yes (All 4 Doors) |
| Rear Windshield Blind | No | No | No | No | No | No | No | No | No | No | No | No |
| Exterior Door Handles Finish | Flush Smart Door Handles (Body Coloured) | Flush Smart Door Handles (Body Coloured) | Flush Smart Door Handles (Body Coloured) | Flush Smart Door Handles (Body Coloured) | Flush Smart Door Handles (Body Coloured) | Flush Smart Door Handles (Body Coloured) | Flush Smart Door Handles (Body Coloured) | Flush Smart Door Handles (Body Coloured) | Flush Smart Door Handles (Body Coloured) | Flush Smart Door Handles (Body Coloured) | Flush Smart Door Handles (Body Coloured) | Flush Smart Door Handles (Body Coloured) |
| Interior Door Handles | Yes | Yes | Yes | Yes | Yes | Yes | Yes | Yes | Yes | Yes | Yes | Yes |
| Scuff Plates | Yes (Illuminated Brand Scuff Plates) | Yes (Illuminated Brand Scuff Plates) | Yes (Illuminated Brand Scuff Plates) | Yes (Illuminated Brand Scuff Plates) | Yes (Illuminated Brand Scuff Plates) | Yes (Illuminated Brand Scuff Plates) | Yes (Illuminated Brand Scuff Plates) | Yes (Illuminated Brand Scuff Plates) | Yes (Illuminated Brand Scuff Plates) | Yes (Illuminated Brand Scuff Plates) | Yes (Illuminated Brand Scuff Plates) | Yes (Illuminated Brand Scuff Plates) |
| Adjustable ORVMs | Electrically Adjustable, Auto-Folding & Heated | Electrically Adjustable, Auto-Folding & Heated | Electrically Adjustable, Auto-Folding & Heated | Electrically Adjustable, Auto-Folding & Heated | Electrically Adjustable, Auto-Folding & Heated | Electrically Adjustable, Auto-Folding & Heated | Electrically Adjustable, Auto-Folding & Heated | Electrically Adjustable, Auto-Folding & Heated | Electrically Adjustable, Auto-Folding & Heated | Electrically Adjustable, Auto-Folding & Heated | Electrically Adjustable, Auto-Folding & Heated | Electrically Adjustable, Auto-Folding & Heated |
| Exterior Door Handles | Flush Deployment Type | Flush Deployment Type | Flush Deployment Type | Flush Deployment Type | Flush Deployment Type | Flush Deployment Type | Flush Deployment Type | Flush Deployment Type | Flush Deployment Type | Flush Deployment Type | Flush Deployment Type | Flush Deployment Type |
| Rear Defogger | Yes | Yes | Yes | Yes | Yes | Yes | Yes | Yes | Yes | Yes | Yes | Yes |
| Door Pockets | Front & Rear Door Pockets with Bottle Holders | Front & Rear Door Pockets with Bottle Holders | Front & Rear Door Pockets with Bottle Holders | Front & Rear Door Pockets with Bottle Holders | Front & Rear Door Pockets with Bottle Holders | Front & Rear Door Pockets with Bottle Holders | Front & Rear Door Pockets with Bottle Holders | Front & Rear Door Pockets with Bottle Holders | Front & Rear Door Pockets with Bottle Holders | Front & Rear Door Pockets with Bottle Holders | Front & Rear Door Pockets with Bottle Holders | Front & Rear Door Pockets with Bottle Holders |
| Rear Wiper | No (Coupé Windshield Profile Design) | No (Coupé Windshield Profile Design) | No (Coupé Windshield Profile Design) | No (Coupé Windshield Profile Design) | No (Coupé Windshield Profile Design) | No (Coupé Windshield Profile Design) | No (Coupé Windshield Profile Design) | No (Coupé Windshield Profile Design) | No (Coupé Windshield Profile Design) | No (Coupé Windshield Profile Design) | No (Coupé Windshield Profile Design) | No (Coupé Windshield Profile Design) |
| Side Window Blinds | No | No | No | No | No | No | No | No | No | No | No | No |
| Power Windows | Yes (Front & Rear) | Yes (Front & Rear) | Yes (Front & Rear) | Yes (Front & Rear) | Yes (Front & Rear) | Yes (Front & Rear) | Yes (Front & Rear) | Yes (Front & Rear) | Yes (Front & Rear) | Yes (Front & Rear) | Yes (Front & Rear) | Yes (Front & Rear) |
| ORVM Colour | Gloss Black Dual-Tone Accent | Gloss Black Dual-Tone Accent | Gloss Black Dual-Tone Accent | Gloss Black Dual-Tone Accent | Gloss Black Dual-Tone Accent | Gloss Black Dual-Tone Accent | Gloss Black Dual-Tone Accent | Gloss Black Dual-Tone Accent | Gloss Black Dual-Tone Accent | Gloss Black Dual-Tone Accent | Gloss Black Dual-Tone Accent | Gloss Black Dual-Tone Accent |
| Power Windows Position | Driver Door Master Console | Driver Door Master Console | Driver Door Master Console | Driver Door Master Console | Driver Door Master Console | Driver Door Master Console | Driver Door Master Console | Driver Door Master Console | Driver Door Master Console | Driver Door Master Console | Driver Door Master Console | Driver Door Master Console |
| Interior Door Handles Finish | Satin Metallic Copper / Chrome Finish | Satin Metallic Copper / Chrome Finish | Satin Metallic Copper / Chrome Finish | Satin Metallic Copper / Chrome Finish | Satin Metallic Copper / Chrome Finish | Satin Metallic Copper / Chrome Finish | Satin Metallic Copper / Chrome Finish | Satin Metallic Copper / Chrome Finish | Satin Metallic Copper / Chrome Finish | Satin Metallic Copper / Chrome Finish | Satin Metallic Copper / Chrome Finish | Satin Metallic Copper / Chrome Finish |
| Bootlid Opener | Smart Gesture Control Tailgate / Electric Button | Smart Gesture Control Tailgate / Electric Button | Smart Gesture Control Tailgate / Electric Button | Smart Gesture Control Tailgate / Electric Button | Smart Gesture Control Tailgate / Electric Button | Smart Gesture Control Tailgate / Electric Button | Smart Gesture Control Tailgate / Electric Button | Smart Gesture Control Tailgate / Electric Button | Smart Gesture Control Tailgate / Electric Button | Smart Gesture Control Tailgate / Electric Button | Smart Gesture Control Tailgate / Electric Button | Smart Gesture Control Tailgate / Electric Button |
| Entertainment, Information & Communication | ||||||||||||
| Touchscreen Size | Dual 12.3 inch Infotainment Screen Array | Dual 12.3 inch Infotainment Screen Array | Dual 12.3 inch Infotainment Screen Array | Dual 12.3 inch Infotainment Screen Array | Dual 12.3 inch Infotainment Screen Array | Dual 12.3 inch Infotainment Screen Array | Dual 12.3 inch Infotainment Screen Array | Dual 12.3 inch Infotainment Screen Array | Dual 12.3 inch Infotainment Screen Array | Dual 12.3 inch Infotainment Screen Array | Dual 12.3 inch Infotainment Screen Array | Dual 12.3 inch Infotainment Screen Array |
| Internal Hard Drive | Yes (Embedded Storage for Maps and Apps) | Yes (Embedded High-Speed System Storage) | Yes (Embedded High-Speed System Storage) | Yes (Embedded High-Speed System Storage) | Yes (Embedded High-Speed System Storage) | Yes (Embedded High-Speed System Storage) | Yes (Embedded High-Speed System Storage) | Yes (Embedded High-Speed System Storage) | Yes (Embedded High-Speed System Storage) | Yes (Embedded High-Speed System Storage) | Yes (Embedded High-Speed System Storage) | Yes (Embedded High-Speed System Storage) |
| USB Compatibility | Yes (Type-C High Speed Ports) | Yes (Type-C High Speed Ports) | Yes (Type-C High Speed Ports) | Yes (Type-C High Speed Ports) | Yes (Type-C High Speed Ports) | Yes (Type-C High Speed Ports) | Yes (Type-C High Speed Ports) | Yes (Type-C High Speed Ports) | Yes (Type-C High Speed Ports) | Yes (Type-C High Speed Ports) | Yes (Type-C High Speed Ports) | Yes (Type-C High Speed Ports) |
| Speakers | 16-Speaker High End Acoustic Sound System | 16-Speaker High End Acoustic Sound System | 16-Speaker High End Acoustic Sound System | 16-Speaker High End Acoustic Sound System | 16-Speaker High End Acoustic Sound System | 16-Speaker High End Acoustic Sound System | 16-Speaker High End Acoustic Sound System | 16-Speaker High End Acoustic Sound System | 16-Speaker High End Acoustic Sound System | 16-Speaker High End Acoustic Sound System | 16-Speaker High End Acoustic Sound System | 16-Speaker High End Acoustic Sound System |
| AM/FM Radio | Yes | Yes | Yes | Yes | Yes | Yes | Yes | Yes | Yes | Yes | Yes | Yes |
| Apple CarPlay | Yes (Wireless CarPlay Integration) | Yes (Wireless CarPlay Integration) | Yes (Wireless CarPlay Integration) | Yes (Wireless CarPlay Integration) | Yes (Wireless CarPlay Integration) | Yes (Wireless CarPlay Integration) | Yes (Wireless CarPlay Integration) | Yes (Wireless CarPlay Integration) | Yes (Wireless CarPlay Integration) | Yes (Wireless CarPlay Integration) | Yes (Wireless CarPlay Integration) | Yes (Wireless CarPlay Integration) |
| Voice Command | Yes (Advanced Multilingual Voice System) | Yes (Advanced Multilingual Voice System) | Yes (Advanced Multilingual Voice System) | Yes (Advanced Multilingual Voice System) | Yes (Advanced Multilingual Voice System) | Yes (Advanced Multilingual Voice System) | Yes (Advanced Multilingual Voice System) | Yes (Advanced Multilingual Voice System) | Yes (Advanced Multilingual Voice System) | Yes (Advanced Multilingual Voice System) | Yes (Advanced Multilingual Voice System) | Yes (Advanced Multilingual Voice System) |
| Steering-mounted controls | Audio, Call, Cluster, Adaptive Cruise & ADAS Toggles | Audio, Call, Cluster, Adaptive Cruise & ADAS Toggles | Audio, Call, Cluster, Adaptive Cruise & ADAS Toggles | Audio, Call, Cluster, Adaptive Cruise & ADAS Toggles | Audio, Call, Cluster, Adaptive Cruise & ADAS Toggles | Audio, Call, Cluster, Adaptive Cruise & ADAS Toggles | Audio, Call, Cluster, Adaptive Cruise & ADAS Toggles | Audio, Call, Cluster, Adaptive Cruise & ADAS Toggles | Audio, Call, Cluster, Adaptive Cruise & ADAS Toggles | Audio, Call, Cluster, Adaptive Cruise & ADAS Toggles | Audio, Call, Cluster, Adaptive Cruise & ADAS Toggles | Audio, Call, Cluster, Adaptive Cruise & ADAS Toggles |
| Wireless Charger | Yes (High Wattage Active Cooling Wireless Charger) | Yes (High Wattage Active Cooling Wireless Charger) | Yes (High Wattage Active Cooling Wireless Charger) | Yes (High Wattage Active Cooling Wireless Charger) | Yes (High Wattage Active Cooling Wireless Charger) | Yes (High Wattage Active Cooling Wireless Charger) | Yes (High Wattage Active Cooling Wireless Charger) | Yes (High Wattage Active Cooling Wireless Charger) | Yes (High Wattage Active Cooling Wireless Charger) | Yes (High Wattage Active Cooling Wireless Charger) | Yes (High Wattage Active Cooling Wireless Charger) | Yes (High Wattage Active Cooling Wireless Charger) |
| AUX Compatibility | No | No | No | No | No | No | No | No | No | No | No | No |
| Bluetooth Compatibility | Yes (Multi-device Fast Tethering) | Yes (Multi-device Fast Tethering) | Yes (Multi-device Fast Tethering) | Yes (Multi-device Fast Tethering) | Yes (Multi-device Fast Tethering) | Yes (Multi-device Fast Tethering) | Yes (Multi-device Fast Tethering) | Yes (Multi-device Fast Tethering) | Yes (Multi-device Fast Tethering) | Yes (Multi-device Fast Tethering) | Yes (Multi-device Fast Tethering) | Yes (Multi-device Fast Tethering) |
| Display | 12.3 inch Customisable Digital Cockpit Cluster Display | 12.3 inch Customisable Digital Cockpit Cluster Display | 12.3 inch Customisable Digital Cockpit Cluster Display | 12.3 inch Customisable Digital Cockpit Cluster Display | 12.3 inch Customisable Digital Cockpit Cluster Display | 12.3 inch Customisable Digital Cockpit Cluster Display | 12.3 inch Customisable Digital Cockpit Cluster Display | 12.3 inch Customisable Digital Cockpit Cluster Display | 12.3 inch Customisable Digital Cockpit Cluster Display | 12.3 inch Customisable Digital Cockpit Cluster Display | 12.3 inch Customisable Digital Cockpit Cluster Display | 12.3 inch Customisable Digital Cockpit Cluster Display |
| Integrated (in-dash) Music System | Yes (Integrated Multi-Display setup) | Yes (Integrated Multi-Display setup) | Yes (Integrated Multi-Display setup) | Yes (Integrated Multi-Display setup) | Yes (Integrated Multi-Display setup) | Yes (Integrated Multi-Display setup) | Yes (Integrated Multi-Display setup) | Yes (Integrated Multi-Display setup) | Yes (Integrated Multi-Display setup) | Yes (Integrated Multi-Display setup) | Yes (Integrated Multi-Display setup) | Yes (Integrated Multi-Display setup) |
| Smart Connectivity | Next-Gen Adrenox OS Ecosystem with 80+ Connected Tech features | Next-Gen Adrenox OS Ecosystem with 80+ Connected Tech features | Next-Gen Adrenox OS Ecosystem with 80+ Connected Tech features | Next-Gen Adrenox OS Ecosystem with 80+ Connected Tech features | Next-Gen Adrenox OS Ecosystem with 80+ Connected Tech features | Next-Gen Adrenox OS Ecosystem with 80+ Connected Tech features | Next-Gen Adrenox OS Ecosystem with 80+ Connected Tech features | Next-Gen Adrenox OS Ecosystem with 80+ Connected Tech features | Next-Gen Adrenox OS Ecosystem with 80+ Connected Tech features | Next-Gen Adrenox OS Ecosystem with 80+ Connected Tech features | Next-Gen Adrenox OS Ecosystem with 80+ Connected Tech features | Next-Gen Adrenox OS Ecosystem with 80+ Connected Tech features |
| Android Auto | Yes (Wireless Connectivity) | Yes (Wireless Connectivity) | Yes (Wireless Connectivity) | Yes (Wireless Connectivity) | Yes (Wireless Connectivity) | Yes (Wireless Connectivity) | Yes (Wireless Connectivity) | Yes (Wireless Connectivity) | Yes (Wireless Connectivity) | Yes (Wireless Connectivity) | Yes (Wireless Connectivity) | Yes (Wireless Connectivity) |
| Head Unit Size | Dual 12.3 inch Screens | Dual 12.3 inch Screens | Dual 12.3 inch Screens | Dual 12.3 inch Screens | Dual 12.3 inch Screens | Dual 12.3 inch Screens | Dual 12.3 inch Screens | Dual 12.3 inch Screens | Dual 12.3 inch Screens | Dual 12.3 inch Screens | Dual 12.3 inch Screens | Dual 12.3 inch Screens |
| iPod Compatibility | Yes | Yes | Yes | Yes | Yes | Yes | Yes | Yes | Yes | Yes | Yes | Yes |
| GPS Navigation System | Yes (Built-in Augmented Reality Navigation) | Yes (Built-in Augmented Reality Navigation) | Yes (Built-in Augmented Reality Navigation) | Yes (Built-in Augmented Reality Navigation) | Yes (Built-in Augmented Reality Navigation) | Yes (Built-in Augmented Reality Navigation) | Yes (Built-in Augmented Reality Navigation) | Yes (Built-in Augmented Reality Navigation) | Yes (Built-in Augmented Reality Navigation) | Yes (Built-in Augmented Reality Navigation) | Yes (Built-in Augmented Reality Navigation) | Yes (Built-in Augmented Reality Navigation) |
| Emergency Call | Yes (E-Call Automated System) | Yes (E-Call Automated System) | Yes (E-Call Automated System) | Yes (E-Call Automated System) | Yes (E-Call Automated System) | Yes (E-Call Automated System) | Yes (E-Call Automated System) | Yes (E-Call Automated System) | Yes (E-Call Automated System) | Yes (E-Call Automated System) | Yes (E-Call Automated System) | Yes (E-Call Automated System) |
| Mobile App Features | ||||||||||||
| Find My Car | Yes (via Adrenox Connect App) | Yes (via Adrenox Connect App) | Yes (via Adrenox Connect App) | Yes (via Adrenox Connect App) | Yes (via Adrenox Connect App) | Yes (via Adrenox Connect App) | Yes (via Adrenox Connect App) | Yes (via Adrenox Connect App) | Yes (via Adrenox Connect App) | Yes (via Adrenox Connect App) | Yes (via Adrenox Connect App) | Yes (via Adrenox Connect App) |
| Remote AC: On / Off via App | Yes (With Multi-zone Pre-cooling) | Yes (With Multi-zone Pre-cooling) | Yes (With Multi-zone Pre-cooling) | Yes (With Multi-zone Pre-cooling) | Yes (With Multi-zone Pre-cooling) | Yes (With Multi-zone Pre-cooling) | Yes (With Multi-zone Pre-cooling) | Yes (With Multi-zone Pre-cooling) | Yes (With Multi-zone Pre-cooling) | Yes (With Multi-zone Pre-cooling) | Yes (With Multi-zone Pre-cooling) | Yes (With Multi-zone Pre-cooling) |
| Emergency Call Button | Yes (SOS Button on Roof Console) | Yes (SOS Button on Roof Console) | Yes (SOS Button on Roof Console) | Yes (SOS Button on Roof Console) | Yes (SOS Button on Roof Console) | Yes (SOS Button on Roof Console) | Yes (SOS Button on Roof Console) | Yes (SOS Button on Roof Console) | Yes (SOS Button on Roof Console) | Yes (SOS Button on Roof Console) | Yes (SOS Button on Roof Console) | Yes (SOS Button on Roof Console) |
| Alexa Compatibility | Yes (Alexa Built-in with Voice Controls) | Yes (Alexa Built-in with Voice Controls) | Yes (Alexa Built-in with Voice Controls) | Yes (Alexa Built-in with Voice Controls) | Yes (Alexa Built-in with Voice Controls) | Yes (Alexa Built-in with Voice Controls) | Yes (Alexa Built-in with Voice Controls) | Yes (Alexa Built-in with Voice Controls) | Yes (Alexa Built-in with Voice Controls) | Yes (Alexa Built-in with Voice Controls) | Yes (Alexa Built-in with Voice Controls) | Yes (Alexa Built-in with Voice Controls) |
| Remote Sunroof: Open / Close via App | Yes | Yes | Yes | Yes | Yes | Yes | Yes | Yes | Yes | Yes | Yes | Yes |
| Over The Air (OTA) Updates | Yes (Cloud Firmware Updates) | Yes (Cloud Firmware Updates) | Yes (Cloud Firmware Updates) | Yes (Cloud Firmware Updates) | Yes (Cloud Firmware Updates) | Yes (Cloud Firmware Updates) | Yes (Cloud Firmware Updates) | Yes (Cloud Firmware Updates) | Yes (Cloud Firmware Updates) | Yes (Cloud Firmware Updates) | Yes (Cloud Firmware Updates) | Yes (Cloud Firmware Updates) |
| Check Vehicle Status via App | Yes | Yes | Yes | Yes | Yes | Yes | Yes | Yes | Yes | Yes | Yes | Yes |
| Geo-fence | Yes (Time and Boundary Fencing) | Yes (Time and Boundary Fencing) | Yes (Time and Boundary Fencing) | Yes (Time and Boundary Fencing) | Yes (Time and Boundary Fencing) | Yes (Time and Boundary Fencing) | Yes (Time and Boundary Fencing) | Yes (Time and Boundary Fencing) | Yes (Time and Boundary Fencing) | Yes (Time and Boundary Fencing) | Yes (Time and Boundary Fencing) | Yes (Time and Boundary Fencing) |
| Remote Car Lock/Unlock via App | Yes | Yes | Yes | Yes | Yes | Yes | Yes | Yes | Yes | Yes | Yes | Yes |
| Car Light Flashing & Honking via App | Yes | Yes | Yes | Yes | Yes | Yes | Yes | Yes | Yes | Yes | Yes | Yes |
| Instrumentation | ||||||||||||
| Door Ajar Warning | Yes | Yes | Yes | Yes | Yes | Yes | Yes | Yes | Yes | Yes | Yes | Yes |
| Gear Indicator | Yes (Digital Cockpit Drive Indicator) | Yes (Digital Cockpit Drive Indicator) | Yes (Digital Cockpit Drive Indicator) | Yes (Digital Cockpit Drive Indicator) | Yes (Digital Cockpit Drive Indicator) | Yes (Digital Cockpit Drive Indicator) | Yes (Digital Cockpit Drive Indicator) | Yes (Digital Cockpit Drive Indicator) | Yes (Digital Cockpit Drive Indicator) | Yes (Digital Cockpit Drive Indicator) | Yes (Digital Cockpit Drive Indicator) | Yes (Digital Cockpit Drive Indicator) |
| Shift Indicator | No (EV Multi-mode Automatic Transmission) | No (EV Multi-mode Automatic Transmission) | No (EV Multi-mode Automatic Transmission) | No (EV Multi-mode Automatic Transmission) | No (EV Multi-mode Automatic Transmission) | No (EV Multi-mode Automatic Transmission) | No (EV Multi-mode Automatic Transmission) | No (EV Multi-mode Automatic Transmission) | No (EV Multi-mode Automatic Transmission) | No (EV Multi-mode Automatic Transmission) | No (EV Multi-mode Automatic Transmission) | No (EV Multi-mode Automatic Transmission) |
| Instantaneous Consumption | Yes (Real-time Wh/km Energy Flow Display) | Yes (Real-time Wh/km Energy Flow Display) | Yes (Real-time Wh/km Energy Flow Display) | Yes (Real-time Wh/km Energy Flow Display) | Yes (Real-time Wh/km Energy Flow Display) | Yes (Real-time Wh/km Energy Flow Display) | Yes (Real-time Wh/km Energy Flow Display) | Yes (Real-time Wh/km Energy Flow Display) | Yes (Real-time Wh/km Energy Flow Display) | Yes (Real-time Wh/km Energy Flow Display) | Yes (Real-time Wh/km Energy Flow Display) | Yes (Real-time Wh/km Energy Flow Display) |
| Average Fuel Consumption | No (Electric Drivetrain Setup) | No (Electric Drivetrain Setup) | No (Electric Drivetrain Setup) | No (Electric Drivetrain Setup) | No (Electric Drivetrain Setup) | No (Electric Drivetrain Setup) | No (Electric Drivetrain Setup) | No (Electric Drivetrain Setup) | No (Electric Drivetrain Setup) | No (Electric Drivetrain Setup) | No (Electric Drivetrain Setup) | No (Electric Drivetrain Setup) |
| Clock | Yes (Digital Sync) | Yes (Digital Sync) | Yes (Digital Sync) | Yes (Digital Sync) | Yes (Digital Sync) | Yes (Digital Sync) | Yes (Digital Sync) | Yes (Digital Sync) | Yes (Digital Sync) | Yes (Digital Sync) | Yes (Digital Sync) | Yes (Digital Sync) |
| Average Speed | Yes | Yes | Yes | Yes | Yes | Yes | Yes | Yes | Yes | Yes | Yes | Yes |
| Heads Up Display (HUD) | Yes (Augmented Reality HUD Screen) | Yes (Augmented Reality HUD Screen) | Yes (Augmented Reality HUD Screen) | Yes (Augmented Reality HUD Screen) | Yes (Augmented Reality HUD Screen) | Yes (Augmented Reality HUD Screen) | Yes (Augmented Reality HUD Screen) | Yes (Augmented Reality HUD Screen) | Yes (Augmented Reality HUD Screen) | Yes (Augmented Reality HUD Screen) | Yes (Augmented Reality HUD Screen) | Yes (Augmented Reality HUD Screen) |
| Tachometer | No (Replaced by Power Delivery/Regen Dial Indicators) | No (Replaced by Power Delivery/Regen Dial Indicators) | No (Replaced by Power Delivery/Regen Dial Indicators) | No (Replaced by Power Delivery/Regen Dial Indicators) | No (Replaced by Power Delivery/Regen Dial Indicators) | No (Replaced by Power Delivery/Regen Dial Indicators) | No (Replaced by Power Delivery/Regen Dial Indicators) | No (Replaced by Power Delivery/Regen Dial Indicators) | No (Replaced by Power Delivery/Regen Dial Indicators) | No (Replaced by Power Delivery/Regen Dial Indicators) | No (Replaced by Power Delivery/Regen Dial Indicators) | No (Replaced by Power Delivery/Regen Dial Indicators) |
| Adjustable Cluster Brightness | Yes (Automatic and Manual Modes) | Yes (Automatic and Manual Modes) | Yes (Automatic and Manual Modes) | Yes (Automatic and Manual Modes) | Yes (Automatic and Manual Modes) | Yes (Automatic and Manual Modes) | Yes (Automatic and Manual Modes) | Yes (Automatic and Manual Modes) | Yes (Automatic and Manual Modes) | Yes (Automatic and Manual Modes) | Yes (Automatic and Manual Modes) | Yes (Automatic and Manual Modes) |
| Instrument Cluster | Digital Customisable Cockpit Layout | Digital Customisable Cockpit Layout | Digital Customisable Cockpit Layout | Digital Customisable Cockpit Layout | Digital Customisable Cockpit Layout | Digital Customisable Cockpit Layout | Digital Customisable Cockpit Layout | Digital Customisable Cockpit Layout | Digital Customisable Cockpit Layout | Digital Customisable Cockpit Layout | Digital Customisable Cockpit Layout | Digital Customisable Cockpit Layout |
| Instrument Cluster Screen Type | 12.3 inch High-Resolution TFT Display | 12.3 inch High-Resolution TFT Display | 12.3 inch High-Resolution TFT Display | 12.3 inch High-Resolution TFT Display | 12.3 inch High-Resolution TFT Display | 12.3 inch High-Resolution TFT Display | 12.3 inch High-Resolution TFT Display | 12.3 inch High-Resolution TFT Display | 12.3 inch High-Resolution TFT Display | 12.3 inch High-Resolution TFT Display | 12.3 inch High-Resolution TFT Display | 12.3 inch High-Resolution TFT Display |
| Low Fuel Level Warning | Yes (Critical Low Battery Warning Alert) | Yes (Critical Low Battery Warning Alert) | Yes (Critical Low Battery Warning Alert) | Yes (Critical Low Battery Warning Alert) | Yes (Critical Low Battery Warning Alert) | Yes (Critical Low Battery Warning Alert) | Yes (Critical Low Battery Warning Alert) | Yes (Critical Low Battery Warning Alert) | Yes (Critical Low Battery Warning Alert) | Yes (Critical Low Battery Warning Alert) | Yes (Critical Low Battery Warning Alert) | Yes (Critical Low Battery Warning Alert) |
| Distance to Empty | Yes (Real-time Intelligent DTE Range Calculator) | Yes (Real-time Intelligent DTE Range Calculator) | Yes (Real-time Intelligent DTE Range Calculator) | Yes (Real-time Intelligent DTE Range Calculator) | Yes (Real-time Intelligent DTE Range Calculator) | Yes (Real-time Intelligent DTE Range Calculator) | Yes (Real-time Intelligent DTE Range Calculator) | Yes (Real-time Intelligent DTE Range Calculator) | Yes (Real-time Intelligent DTE Range Calculator) | Yes (Real-time Intelligent DTE Range Calculator) | Yes (Real-time Intelligent DTE Range Calculator) | Yes (Real-time Intelligent DTE Range Calculator) |
| Trip Meter | 2 Trips with Diagnostic Loggers | 2 Trips with Diagnostic Loggers | 2 Trips with Diagnostic Loggers | 2 Trips with Diagnostic Loggers | 2 Trips with Diagnostic Loggers | 2 Trips with Diagnostic Loggers | 2 Trips with Diagnostic Loggers | 2 Trips with Diagnostic Loggers | 2 Trips with Diagnostic Loggers | 2 Trips with Diagnostic Loggers | 2 Trips with Diagnostic Loggers | 2 Trips with Diagnostic Loggers |
| Manufacturer Warranty | ||||||||||||
| Battery Warranty (In Kilometres) | 1,60,000 km | 1,60,000 km | 1,60,000 km | 1,60,000 km | 1,60,000 km | 1,60,000 km | 1,60,000 km | 1,60,000 km | 1,60,000 km | 1,60,000 km | 1,60,000 km | 1,60,000 km |
| Warranty (In Years) | 3 Years | 3 Years | 3 Years | 3 Years | 3 Years | 3 Years | 3 Years | 3 Years | 3 Years | 3 Years | 3 Years | 3 Years |
| Battery Warranty (In Years) | 8 Years | 8 Years | 8 Years | 8 Years | 8 Years | 8 Years | 8 Years | 8 Years | 8 Years | 8 Years | 8 Years | 8 Years |
| Warranty (In Kilometres) | Unlimited km | Unlimited km | Unlimited km | Unlimited km | Unlimited km | Unlimited km | Unlimited km | Unlimited km | Unlimited km | Unlimited km | Unlimited km | Unlimited km |
| Storage | ||||||||||||
| Cup Holders | Front & Rear Sections | Front & Rear Sections | Front & Rear Sections | Front & Rear Sections | Front & Rear Sections | Front & Rear Sections | Front & Rear Sections | Front & Rear Sections | Front & Rear Sections | Front & Rear Sections | Front & Rear Sections | Front & Rear Sections |
| Cooled Glovebox | Yes (With Chiller Control Lever) | Yes (With Chiller Control Lever) | Yes (With Chiller Control Lever) | Yes (With Chiller Control Lever) | Yes (With Chiller Control Lever) | Yes (With Chiller Control Lever) | Yes (With Chiller Control Lever) | Yes (With Chiller Control Lever) | Yes (With Chiller Control Lever) | Yes (With Chiller Control Lever) | Yes (With Chiller Control Lever) | Yes (With Chiller Control Lever) |
| Sunglass Holder | Yes | Yes | Yes | Yes | Yes | Yes | Yes | Yes | Yes | Yes | Yes | Yes |
| Driver Armrest Storage | Yes (Illuminated Storage Console) | Yes (Illuminated Storage Console) | Yes (Illuminated Storage Console) | Yes (Illuminated Storage Console) | Yes (Illuminated Storage Console) | Yes (Illuminated Storage Console) | Yes (Illuminated Storage Console) | Yes (Illuminated Storage Console) | Yes (Illuminated Storage Console) | Yes (Illuminated Storage Console) | Yes (Illuminated Storage Console) | Yes (Illuminated Storage Console) |
| Cup Holders Position | Front Center Tunnel & Rear Center Armrest | Front Center Tunnel & Rear Center Armrest | Front Center Tunnel & Rear Center Armrest | Front Center Tunnel & Rear Center Armrest | Front Center Tunnel & Rear Center Armrest | Front Center Tunnel & Rear Center Armrest | Front Center Tunnel & Rear Center Armrest | Front Center Tunnel & Rear Center Armrest | Front Center Tunnel & Rear Center Armrest | Front Center Tunnel & Rear Center Armrest | Front Center Tunnel & Rear Center Armrest | Front Center Tunnel & Rear Center Armrest |
| Comfort & Convenience | ||||||||||||
| Cruise Control | Yes (Intelligent Adaptive Cruise Control with Stop & Go) | Yes (Intelligent Adaptive Cruise Control with Stop & Go) | Yes (Intelligent Adaptive Cruise Control with Stop & Go) | Yes (Intelligent Adaptive Cruise Control with Stop & Go) | Yes (Intelligent Adaptive Cruise Control with Stop & Go) | Yes (Intelligent Adaptive Cruise Control with Stop & Go) | Yes (Intelligent Adaptive Cruise Control with Stop & Go) | Yes (Intelligent Adaptive Cruise Control with Stop & Go) | Yes (Intelligent Adaptive Cruise Control with Stop & Go) | Yes (Intelligent Adaptive Cruise Control with Stop & Go) | Yes (Intelligent Adaptive Cruise Control with Stop & Go) | Yes (Intelligent Adaptive Cruise Control with Stop & Go) |
| Rear AC | Yes (Rear Console Independent Vents) | Yes (Rear Console Independent Vents) | Yes (Rear Console Independent Vents) | Yes (Rear Console Independent Vents) | Yes (Rear Console Independent Vents) | Yes (Rear Console Independent Vents) | Yes (Rear Console Independent Vents) | Yes (Rear Console Independent Vents) | Yes (Rear Console Independent Vents) | Yes (Rear Console Independent Vents) | Yes (Rear Console Independent Vents) | Yes (Rear Console Independent Vents) |
| Heater | Yes (Positive Temperature Coefficient Heater System) | Yes (Positive Temperature Coefficient Heater System) | Yes (Positive Temperature Coefficient Heater System) | Yes (Positive Temperature Coefficient Heater System) | Yes (Positive Temperature Coefficient Heater System) | Yes (Positive Temperature Coefficient Heater System) | Yes (Positive Temperature Coefficient Heater System) | Yes (Positive Temperature Coefficient Heater System) | Yes (Positive Temperature Coefficient Heater System) | Yes (Positive Temperature Coefficient Heater System) | Yes (Positive Temperature Coefficient Heater System) | Yes (Positive Temperature Coefficient Heater System) |
| Air Conditioner- Automatic/Zones | Multi-Zone Automatic Climate Control System | Multi-Zone Automatic Climate Control System | Multi-Zone Automatic Climate Control System | Multi-Zone Automatic Climate Control System | Multi-Zone Automatic Climate Control System | Multi-Zone Automatic Climate Control System | Multi-Zone Automatic Climate Control System | Multi-Zone Automatic Climate Control System | Multi-Zone Automatic Climate Control System | Multi-Zone Automatic Climate Control System | Multi-Zone Automatic Climate Control System | Multi-Zone Automatic Climate Control System |
| Electronic Parking Brake | Yes (EPB Console Lever with Dynamic Auto-Hold) | Yes (EPB Console Lever with Dynamic Auto-Hold) | Yes (EPB Console Lever with Dynamic Auto-Hold) | Yes (EPB Console Lever with Dynamic Auto-Hold) | Yes (EPB Console Lever with Dynamic Auto-Hold) | Yes (EPB Console Lever with Dynamic Auto-Hold) | Yes (EPB Console Lever with Dynamic Auto-Hold) | Yes (EPB Console Lever with Dynamic Auto-Hold) | Yes (EPB Console Lever with Dynamic Auto-Hold) | Yes (EPB Console Lever with Dynamic Auto-Hold) | Yes (EPB Console Lever with Dynamic Auto-Hold) | Yes (EPB Console Lever with Dynamic Auto-Hold) |
| Cabin Boot Access | Yes | Yes | Yes | Yes | Yes | Yes | Yes | Yes | Yes | Yes | Yes | Yes |
| Parking Assist | 360-Degree Surround-View Monitor with Adaptive Guidelines | 360-Degree Surround-View Monitor with Adaptive Guidelines | 360-Degree Surround-View Monitor with Adaptive Guidelines | 360-Degree Surround-View Monitor with Adaptive Guidelines | 360-Degree Surround-View Monitor with Adaptive Guidelines | 360-Degree Surround-View Monitor with Adaptive Guidelines | 360-Degree Surround-View Monitor with Adaptive Guidelines | 360-Degree Surround-View Monitor with Adaptive Guidelines | 360-Degree Surround-View Monitor with Adaptive Guidelines | 360-Degree Surround-View Monitor with Adaptive Guidelines | 360-Degree Surround-View Monitor with Adaptive Guidelines | 360-Degree Surround-View Monitor with Adaptive Guidelines |
| Air Purifier | Yes (Advanced PM2.5 Active HEPA Filter System) | Yes (Advanced PM2.5 Active HEPA Filter System) | Yes (Advanced PM2.5 Active HEPA Filter System) | Yes (Advanced PM2.5 Active HEPA Filter System) | Yes (Advanced PM2.5 Active HEPA Filter System) | Yes (Advanced PM2.5 Active HEPA Filter System) | Yes (Advanced PM2.5 Active HEPA Filter System) | Yes (Advanced PM2.5 Active HEPA Filter System) | Yes (Advanced PM2.5 Active HEPA Filter System) | Yes (Advanced PM2.5 Active HEPA Filter System) | Yes (Advanced PM2.5 Active HEPA Filter System) | Yes (Advanced PM2.5 Active HEPA Filter System) |
| Third Row AC Zone | No (Premium 2-Row Luxury SUV Configuration) | No (Premium 2-Row Luxury SUV Configuration) | No (Premium 2-Row Luxury SUV Configuration) | No (Premium 2-Row Luxury SUV Configuration) | No (Premium 2-Row Luxury SUV Configuration) | No (Premium 2-Row Luxury SUV Configuration) | No (Premium 2-Row Luxury SUV Configuration) | No (Premium 2-Row Luxury SUV Configuration) | No (Premium 2-Row Luxury SUV Configuration) | No (Premium 2-Row Luxury SUV Configuration) | No (Premium 2-Row Luxury SUV Configuration) | No (Premium 2-Row Luxury SUV Configuration) |
| Keyless Start/ Button Start | Yes (Engine/Powertrain Push Start Button) | Yes (Engine/Powertrain Push Start Button) | Yes (Engine/Powertrain Push Start Button) | Yes (Engine/Powertrain Push Start Button) | Yes (Engine/Powertrain Push Start Button) | Yes (Engine/Powertrain Push Start Button) | Yes (Engine/Powertrain Push Start Button) | Yes (Engine/Powertrain Push Start Button) | Yes (Engine/Powertrain Push Start Button) | Yes (Engine/Powertrain Push Start Button) | Yes (Engine/Powertrain Push Start Button) | Yes (Engine/Powertrain Push Start Button) |
| Vanity Mirrors on Sun Visors | Driver & Co-Driver Sun Visors | Driver & Co-Driver Sun Visors | Driver & Co-Driver Sun Visors | Driver & Co-Driver Sun Visors | Driver & Co-Driver Sun Visors | Driver & Co-Driver Sun Visors | Driver & Co-Driver Sun Visors | Driver & Co-Driver Sun Visors | Driver & Co-Driver Sun Visors | Driver & Co-Driver Sun Visors | Driver & Co-Driver Sun Visors | Driver & Co-Driver Sun Visors |
| Air Conditioner | Yes (Intelligent Automated Climate Array) | Yes (Intelligent Automated Climate Array) | Yes (Intelligent Automated Climate Array) | Yes (Intelligent Automated Climate Array) | Yes (Intelligent Automated Climate Array) | Yes (Intelligent Automated Climate Array) | Yes (Intelligent Automated Climate Array) | Yes (Intelligent Automated Climate Array) | Yes (Intelligent Automated Climate Array) | Yes (Intelligent Automated Climate Array) | Yes (Intelligent Automated Climate Array) | Yes (Intelligent Automated Climate Array) |
| 12V Power Outlets | 2 Outlets (Front Console & Rear Trunk Space) | 2 Outlets (Front Console & Rear Trunk Space) | 2 Outlets (Front Console & Rear Trunk Space) | 2 Outlets (Front Console & Rear Trunk Space) | 2 Outlets (Front Console & Rear Trunk Space) | 2 Outlets (Front Console & Rear Trunk Space) | 2 Outlets (Front Console & Rear Trunk Space) | 2 Outlets (Front Console & Rear Trunk Space) | 2 Outlets (Front Console & Rear Trunk Space) | 2 Outlets (Front Console & Rear Trunk Space) | 2 Outlets (Front Console & Rear Trunk Space) | 2 Outlets (Front Console & Rear Trunk Space) |
| Anti-glare Mirrors | Auto-Dimming Electrochromic Inside Rear View Mirror | Auto-Dimming Electrochromic Inside Rear View Mirror | Auto-Dimming Electrochromic Inside Rear View Mirror | Auto-Dimming Electrochromic Inside Rear View Mirror | Auto-Dimming Electrochromic Inside Rear View Mirror | Auto-Dimming Electrochromic Inside Rear View Mirror | Auto-Dimming Electrochromic Inside Rear View Mirror | Auto-Dimming Electrochromic Inside Rear View Mirror | Auto-Dimming Electrochromic Inside Rear View Mirror | Auto-Dimming Electrochromic Inside Rear View Mirror | Auto-Dimming Electrochromic Inside Rear View Mirror | Auto-Dimming Electrochromic Inside Rear View Mirror |
| Front AC | Multi-Zone Automatic Climate Control Setup | Multi-Zone Automatic Climate Control Setup | Multi-Zone Automatic Climate Control Setup | Multi-Zone Automatic Climate Control Setup | Multi-Zone Automatic Climate Control Setup | Multi-Zone Automatic Climate Control Setup | Multi-Zone Automatic Climate Control Setup | Multi-Zone Automatic Climate Control Setup | Multi-Zone Automatic Climate Control Setup | Multi-Zone Automatic Climate Control Setup | Multi-Zone Automatic Climate Control Setup | Multi-Zone Automatic Climate Control Setup |
| Headlight and Ignition on Reminder | Yes | Yes | Yes | Yes | Yes | Yes | Yes | Yes | Yes | Yes | Yes | Yes |
| Steering Adjustment | Tilt & Telescopic Power Adjustable with Memory Functions | Tilt & Telescopic Power Adjustable with Memory Functions | Tilt & Telescopic Power Adjustable with Memory Functions | Tilt & Telescopic Power Adjustable with Memory Functions | Tilt & Telescopic Power Adjustable with Memory Functions | Tilt & Telescopic Power Adjustable with Memory Functions | Tilt & Telescopic Power Adjustable with Memory Functions | Tilt & Telescopic Power Adjustable with Memory Functions | Tilt & Telescopic Power Adjustable with Memory Functions | Tilt & Telescopic Power Adjustable with Memory Functions | Tilt & Telescopic Power Adjustable with Memory Functions | Tilt & Telescopic Power Adjustable with Memory Functions |
| Umbrella Storage in Door | Yes (Front Door Internal Drain Compartments) | Yes (Front Door Internal Drain Compartments) | Yes (Front Door Internal Drain Compartments) | Yes (Front Door Internal Drain Compartments) | Yes (Front Door Internal Drain Compartments) | Yes (Front Door Internal Drain Compartments) | Yes (Front Door Internal Drain Compartments) | Yes (Front Door Internal Drain Compartments) | Yes (Front Door Internal Drain Compartments) | Yes (Front Door Internal Drain Compartments) | Yes (Front Door Internal Drain Compartments) | Yes (Front Door Internal Drain Compartments) |
| Parking Sensors | Front & Rear Multi-sensor Arrays | Front & Rear Multi-sensor Arrays | Front & Rear Multi-sensor Arrays | Front & Rear Multi-sensor Arrays | Front & Rear Multi-sensor Arrays | Front & Rear Multi-sensor Arrays | Front & Rear Multi-sensor Arrays | Front & Rear Multi-sensor Arrays | Front & Rear Multi-sensor Arrays | Front & Rear Multi-sensor Arrays | Front & Rear Multi-sensor Arrays | Front & Rear Multi-sensor Arrays |
| Lighting | ||||||||||||
| Automatic Headlamps | Yes (With Twilight Sensors) | Yes (With Twilight Sensors) | Yes (With Twilight Sensors) | Yes (With Twilight Sensors) | Yes (With Twilight Sensors) | Yes (With Twilight Sensors) | Yes (With Twilight Sensors) | Yes (With Twilight Sensors) | Yes (With Twilight Sensors) | Yes (With Twilight Sensors) | Yes (With Twilight Sensors) | Yes (With Twilight Sensors) |
| Taillights | End-to-End Infinity Connected LED Taillight Strip | End-to-End Infinity Connected LED Taillight Strip | End-to-End Infinity Connected LED Taillight Strip | End-to-End Infinity Connected LED Taillight Strip | End-to-End Infinity Connected LED Taillight Strip | End-to-End Infinity Connected LED Taillight Strip | End-to-End Infinity Connected LED Taillight Strip | End-to-End Infinity Connected LED Taillight Strip | End-to-End Infinity Connected LED Taillight Strip | End-to-End Infinity Connected LED Taillight Strip | End-to-End Infinity Connected LED Taillight Strip | End-to-End Infinity Connected LED Taillight Strip |
| Fog Lights | No (Integrated into Main LED Headlamp Pod Pods) | No (Integrated into Main LED Headlamp Pod Pods) | No (Integrated into Main LED Headlamp Pod Pods) | No (Integrated into Main LED Headlamp Pod Pods) | No (Integrated into Main LED Headlamp Pod Pods) | No (Integrated into Main LED Headlamp Pod Pods) | No (Integrated into Main LED Headlamp Pod Pods) | No (Integrated into Main LED Headlamp Pod Pods) | No (Integrated into Main LED Headlamp Pod Pods) | No (Integrated into Main LED Headlamp Pod Pods) | No (Integrated into Main LED Headlamp Pod Pods) | No (Integrated into Main LED Headlamp Pod Pods) |
| Daytime Running Lights | Signature Infinity Loop LED Daytime Running Lights | Signature Infinity Loop LED Daytime Running Lights | Signature Infinity Loop LED Daytime Running Lights | Signature Infinity Loop LED Daytime Running Lights | Signature Infinity Loop LED Daytime Running Lights | Signature Infinity Loop LED Daytime Running Lights | Signature Infinity Loop LED Daytime Running Lights | Signature Infinity Loop LED Daytime Running Lights | Signature Infinity Loop LED Daytime Running Lights | Signature Infinity Loop LED Daytime Running Lights | Signature Infinity Loop LED Daytime Running Lights | Signature Infinity Loop LED Daytime Running Lights |
| Glovebox Lamp | Yes (Soft LED illumination) | Yes (Soft LED illumination) | Yes (Soft LED illumination) | Yes (Soft LED illumination) | Yes (Soft LED illumination) | Yes (Soft LED illumination) | Yes (Soft LED illumination) | Yes (Soft LED illumination) | Yes (Soft LED illumination) | Yes (Soft LED illumination) | Yes (Soft LED illumination) | Yes (Soft LED illumination) |
| Follow Me Home Headlamps | Yes | Yes | Yes | Yes | Yes | Yes | Yes | Yes | Yes | Yes | Yes | Yes |
| Rear Reading Lamp | Yes (Rear Passenger Premium LED Reading Pods) | Yes (Rear Passenger Premium LED Reading Pods) | Yes (Rear Passenger Premium LED Reading Pods) | Yes (Rear Passenger Premium LED Reading Pods) | Yes (Rear Passenger Premium LED Reading Pods) | Yes (Rear Passenger Premium LED Reading Pods) | Yes (Rear Passenger Premium LED Reading Pods) | Yes (Rear Passenger Premium LED Reading Pods) | Yes (Rear Passenger Premium LED Reading Pods) | Yes (Rear Passenger Premium LED Reading Pods) | Yes (Rear Passenger Premium LED Reading Pods) | Yes (Rear Passenger Premium LED Reading Pods) |
| Puddle Lamps | Yes (Integrated Under Door Panels with Brand Projection) | Yes (Integrated Under Door Panels with Brand Projection) | Yes (Integrated Under Door Panels with Brand Projection) | Yes (Integrated Under Door Panels with Brand Projection) | Yes (Integrated Under Door Panels with Brand Projection) | Yes (Integrated Under Door Panels with Brand Projection) | Yes (Integrated Under Door Panels with Brand Projection) | Yes (Integrated Under Door Panels with Brand Projection) | Yes (Integrated Under Door Panels with Brand Projection) | Yes (Integrated Under Door Panels with Brand Projection) | Yes (Integrated Under Door Panels with Brand Projection) | Yes (Integrated Under Door Panels with Brand Projection) |
| Cabin Lamps | Yes (Full LED Lounge Array) | Yes (Full LED Lounge Array) | Yes (Full LED Lounge Array) | Yes (Full LED Lounge Array) | Yes (Full LED Lounge Array) | Yes (Full LED Lounge Array) | Yes (Full LED Lounge Array) | Yes (Full LED Lounge Array) | Yes (Full LED Lounge Array) | Yes (Full LED Lounge Array) | Yes (Full LED Lounge Array) | Yes (Full LED Lounge Array) |
| Cabin Lamps Position | Front & Rear Roof Line Configurations | Front & Rear Roof Line Configurations | Front & Rear Roof Line Configurations | Front & Rear Roof Line Configurations | Front & Rear Roof Line Configurations | Front & Rear Roof Line Configurations | Front & Rear Roof Line Configurations | Front & Rear Roof Line Configurations | Front & Rear Roof Line Configurations | Front & Rear Roof Line Configurations | Front & Rear Roof Line Configurations | Front & Rear Roof Line Configurations |
| Ambient Interior Lighting | Yes (Multi-colour Customizable Active Ambient Light System) | Yes (Multi-colour Customizable Active Ambient Light System) | Yes (Multi-colour Customizable Active Ambient Light System) | Yes (Multi-colour Customizable Active Ambient Light System) | Yes (Multi-colour Customizable Active Ambient Light System) | Yes (Multi-colour Customizable Active Ambient Light System) | Yes (Multi-colour Customizable Active Ambient Light System) | Yes (Multi-colour Customizable Active Ambient Light System) | Yes (Multi-colour Customizable Active Ambient Light System) | Yes (Multi-colour Customizable Active Ambient Light System) | Yes (Multi-colour Customizable Active Ambient Light System) | Yes (Multi-colour Customizable Active Ambient Light System) |
| Headlights | Advanced Premium Stacked Multi-LED Projector Headlamps | Advanced Premium Stacked Multi-LED Projector Headlamps | Advanced Premium Stacked Multi-LED Projector Headlamps | Advanced Premium Stacked Multi-LED Projector Headlamps | Advanced Premium Stacked Multi-LED Projector Headlamps | Advanced Premium Stacked Multi-LED Projector Headlamps | Advanced Premium Stacked Multi-LED Projector Headlamps | Advanced Premium Stacked Multi-LED Projector Headlamps | Advanced Premium Stacked Multi-LED Projector Headlamps | Advanced Premium Stacked Multi-LED Projector Headlamps | Advanced Premium Stacked Multi-LED Projector Headlamps | Advanced Premium Stacked Multi-LED Projector Headlamps |
| Reading Lamp | Front Roof Center Console Map Lights | Front Roof Center Console Map Lights | Front Roof Center Console Map Lights | Front Roof Center Console Map Lights | Front Roof Center Console Map Lights | Front Roof Center Console Map Lights | Front Roof Center Console Map Lights | Front Roof Center Console Map Lights | Front Roof Center Console Map Lights | Front Roof Center Console Map Lights | Front Roof Center Console Map Lights | Front Roof Center Console Map Lights |
| Cornering Headlights | Yes (Dynamic Steering Input Adaptive Cornering Function) | Yes (Dynamic Steering Input Adaptive Cornering Function) | Yes (Dynamic Steering Input Adaptive Cornering Function) | Yes (Dynamic Steering Input Adaptive Cornering Function) | Yes (Dynamic Steering Input Adaptive Cornering Function) | Yes (Dynamic Steering Input Adaptive Cornering Function) | Yes (Dynamic Steering Input Adaptive Cornering Function) | Yes (Dynamic Steering Input Adaptive Cornering Function) | Yes (Dynamic Steering Input Adaptive Cornering Function) | Yes (Dynamic Steering Input Adaptive Cornering Function) | Yes (Dynamic Steering Input Adaptive Cornering Function) | Yes (Dynamic Steering Input Adaptive Cornering Function) |
| Light on Vanity Mirrors | Yes (LED Illuminated Sun Visors) | Yes (LED Illuminated Sun Visors) | Yes (LED Illuminated Sun Visors) | Yes (LED Illuminated Sun Visors) | Yes (LED Illuminated Sun Visors) | Yes (LED Illuminated Sun Visors) | Yes (LED Illuminated Sun Visors) | Yes (LED Illuminated Sun Visors) | Yes (LED Illuminated Sun Visors) | Yes (LED Illuminated Sun Visors) | Yes (LED Illuminated Sun Visors) | Yes (LED Illuminated Sun Visors) |
| Braking & Traction | ||||||||||||
| Hill Descent Control | Yes (Intelligent Terrain-linked Speed Descent Braking) | Yes (Intelligent Terrain-linked Speed Descent Braking) | Yes (Intelligent Terrain-linked Speed Descent Braking) | Yes (Intelligent Terrain-linked Speed Descent Braking) | Yes (Intelligent Terrain-linked Speed Descent Braking) | Yes (Intelligent Terrain-linked Speed Descent Braking) | Yes (Intelligent Terrain-linked Speed Descent Braking) | Yes (Intelligent Terrain-linked Speed Descent Braking) | Yes (Intelligent Terrain-linked Speed Descent Braking) | Yes (Intelligent Terrain-linked Speed Descent Braking) | Yes (Intelligent Terrain-linked Speed Descent Braking) | Yes (Intelligent Terrain-linked Speed Descent Braking) |
| Differential Lock | Yes (Electronic Differential Locking System via Torque Vectoring) | Yes (Electronic Differential Locking System via Torque Vectoring) | Yes (Electronic Differential Locking System via Torque Vectoring) | Yes (Electronic Differential Locking System via Torque Vectoring) | Yes (Electronic Differential Locking System via Torque Vectoring) | Yes (Electronic Differential Locking System via Torque Vectoring) | Yes (Electronic Differential Locking System via Torque Vectoring) | Yes (Electronic Differential Locking System via Torque Vectoring) | Yes (Electronic Differential Locking System via Torque Vectoring) | Yes (Electronic Differential Locking System via Torque Vectoring) | Yes (Electronic Differential Locking System via Torque Vectoring) | Yes (Electronic Differential Locking System via Torque Vectoring) |
| Anti-Lock Braking System (ABS) | Yes (With Intelligent Brake Assist Tuning) | Yes (With Intelligent Brake Assist Tuning) | Yes (With Intelligent Brake Assist Tuning) | Yes (With Intelligent Brake Assist Tuning) | Yes (With Intelligent Brake Assist Tuning) | Yes (With Intelligent Brake Assist Tuning) | Yes (With Intelligent Brake Assist Tuning) | Yes (With Intelligent Brake Assist Tuning) | Yes (With Intelligent Brake Assist Tuning) | Yes (With Intelligent Brake Assist Tuning) | Yes (With Intelligent Brake Assist Tuning) | Yes (With Intelligent Brake Assist Tuning) |
| Brake Assist (BA) | Yes (Advanced Electronic Hydraulic Boost) | Yes (Advanced Electronic Hydraulic Boost) | Yes (Advanced Electronic Hydraulic Boost) | Yes (Advanced Electronic Hydraulic Boost) | Yes (Advanced Electronic Hydraulic Boost) | Yes (Advanced Electronic Hydraulic Boost) | Yes (Advanced Electronic Hydraulic Boost) | Yes (Advanced Electronic Hydraulic Boost) | Yes (Advanced Electronic Hydraulic Boost) | Yes (Advanced Electronic Hydraulic Boost) | Yes (Advanced Electronic Hydraulic Boost) | Yes (Advanced Electronic Hydraulic Boost) |
| Hill Hold Control | Yes | Yes | Yes | Yes | Yes | Yes | Yes | Yes | Yes | Yes | Yes | Yes |
| Ride Height Adjustment | No (Fixed Ground Clearance tuned for EV Platform) | No (Fixed Ground Clearance tuned for EV Platform) | No (Fixed Ground Clearance tuned for EV Platform) | No (Fixed Ground Clearance tuned for EV Platform) | No (Fixed Ground Clearance tuned for EV Platform) | No (Fixed Ground Clearance tuned for EV Platform) | No (Fixed Ground Clearance tuned for EV Platform) | No (Fixed Ground Clearance tuned for EV Platform) | No (Fixed Ground Clearance tuned for EV Platform) | No (Fixed Ground Clearance tuned for EV Platform) | No (Fixed Ground Clearance tuned for EV Platform) | No (Fixed Ground Clearance tuned for EV Platform) |
| Electronic Brake-force Distribution (EBD) | Yes | Yes | Yes | Yes | Yes | Yes | Yes | Yes | Yes | Yes | Yes | Yes |
| Electronic Stability Program (ESP) | Yes (Next-Gen Multi-tier Stability Matrix) | Yes (Next-Gen Multi-tier Stability Matrix) | Yes (Next-Gen Multi-tier Stability Matrix) | Yes (Next-Gen Multi-tier Stability Matrix) | Yes (Next-Gen Multi-tier Stability Matrix) | Yes (Next-Gen Multi-tier Stability Matrix) | Yes (Next-Gen Multi-tier Stability Matrix) | Yes (Next-Gen Multi-tier Stability Matrix) | Yes (Next-Gen Multi-tier Stability Matrix) | Yes (Next-Gen Multi-tier Stability Matrix) | Yes (Next-Gen Multi-tier Stability Matrix) | Yes (Next-Gen Multi-tier Stability Matrix) |
Recently Asked Questions on Mahindra XEV 9S
How much does the Mahindra XEV 9S cost?
The Mahindra XEV 9S starts at ₹22.49 L and goes up to ₹27.99 L, ex-showroom. The exact price depends on the variant you choose. On-road price varies by city — use the Get On Road Price button for an exact quote.
What powertrain does the Mahindra XEV 9S have?
The Mahindra XEV 9S is a fully electric vehicle with no petrol or diesel engine.
What is the range of the Mahindra XEV 9S?
The claimed range of the Mahindra XEV 9S is 521 km, 679 km and 600 km. It changes with the battery pack and variant.
How many seats are there in the Mahindra XEV 9S?
Most Mahindra XEV 9S variants are 7-seater. A few variants come as 6-seater.
Is there 4WD in the Mahindra XEV 9S?
No. The Mahindra XEV 9S is not offered with 4WD. It comes with RWD (Rear Wheel Drive).
Mahindra
XEV 9S
Model price range
₹22.49 L - ₹27.99 L
Choose a variant to open its dedicated detail page.
Select a variant first to calculate EMI using that variant's price.
Mahindra XEV 9S Summary
- Variants 12 options
- Price Range ₹22.49 L - ₹27.99 L
- Variant Pages Available
Starting at
₹22.49 L