
Car
Maruti Suzuki Baleno
Model overview, prices and all available variants
Ex-showroom price range
₹6.66 L - ₹9.88 L
11 variants available
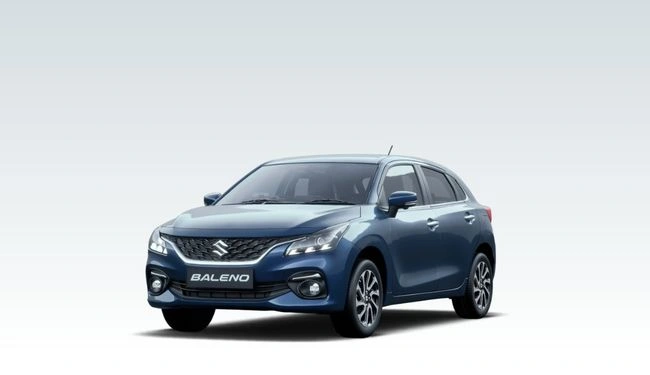
Representative model image from
Delta MT CNG.
The Maruti Suzuki Baleno is one of 11 available Maruti Suzuki Baleno variants. Its ex-showroom price is On request. See the specifications and features below for this exact variant.
Maruti Suzuki Baleno Specifications
- Engine
- It runs on a 998 cc K-Series petrol engine . Small specification differences can show up based on the fuel setup.
- Performance
- In the petrol variant, it can deliver up to 68 bhp and 91.1 Nm of torque.
- Gearbox
- There is a 5-speed manual option. Some variants come with a 5-speed AMT or AGS automatic.
- Fuel Types
- You can choose Petrol or CNG depending on the variant.
- Space and Size
- This is a 5-seat, 5-door hatchback . Length is 3,530 mm, width is 1,490 mm, and height is 1,520 mm.
- Features
- Features depend on the variant. Some versions may include central locking, an engine immobiliser, child safety locks, body-coloured bumpers, steel wheels, and other comfort items.
This is the common model page.
No variant is selected here. Each variant below has its own separate URL and detail page.
All Variants & Price (11)
| Variant | Fuel | Transmission | Price * | |
|---|---|---|---|---|
| Delta MT CNG | CNG | Manual - 5 Gears | ₹8.4 L | View Details |
| Zeta MT CNG | CNG | Manual - 5 Gears | ₹9.33 L | View Details |
| Maruti Baleno Sigma Petrol Manual | Petrol | 5-Speed Manual Transmission (MT) | ₹6.66 L | View Details |
| Maruti Baleno Delta Petrol Manual | Petrol | 5-Speed Manual Transmission (MT) | ₹7.5 L | View Details |
| Maruti Baleno Delta Petrol Automatic (AMT) | Petrol | 5-Speed Automatic (Automated Manual Transmission / AGS) | ₹8 L | View Details |
| Maruti Baleno Delta MT CNG | CNG & Petrol | 5-Speed Manual Transmission (MT) | ₹8.4 L | View Details |
| Maruti Baleno Zeta Petrol Manual | Petrol | 5-Speed Manual Transmission (MT) | ₹8.43 L | View Details |
| Maruti Baleno Zeta Petrol Automatic (AMT) | Petrol | 5-Speed Automatic (Automated Manual Transmission / AGS) | ₹8.93 L | View Details |
| Maruti Baleno Zeta MT CNG | CNG & Petrol | 5-Speed Manual Transmission (MT) | ₹9.33 L | View Details |
| Maruti Baleno Alpha Petrol Manual | Petrol | 5-Speed Manual Transmission (MT) | ₹9.38 L | View Details |
| Maruti Baleno Alpha Petrol Automatic (AMT) | Petrol | 5-Speed Automatic (Automated Manual Transmission / AGS) | ₹9.88 L | View Details |
| Specification | Delta MT CNG | Zeta MT CNG | Maruti Baleno Sigma Petrol Manual | Maruti Baleno Delta Petrol Manual | Maruti Baleno Delta Petrol Automatic (AMT) | Maruti Baleno Delta MT CNG | Maruti Baleno Zeta Petrol Manual | Maruti Baleno Zeta Petrol Automatic (AMT) | Maruti Baleno Zeta MT CNG | Maruti Baleno Alpha Petrol Manual | Maruti Baleno Alpha Petrol Automatic (AMT) |
|---|---|---|---|---|---|---|---|---|---|---|---|
| Engine & Transmission | |||||||||||
| Engine | 1197 cc, 4 Cylinders Inline, 4 Valves/Cylinder, DOHC | 1197 cc, 4 Cylinders Inline, 4 Valves/Cylinder, DOHC | 1.2L DualJet Petrol Engine (Advanced K-Series) | 1.2L DualJet Petrol Engine (Advanced K-Series) | 1.2L DualJet Petrol Engine (Advanced K-Series) | 1.2L K-Series DualJet Dual VVT Bi-Fuel Engine | 1.2L DualJet Petrol Engine (Advanced K-Series) | 1.2L DualJet Petrol Engine (Advanced K-Series) | 1.2L K-Series DualJet Dual VVT Bi-Fuel Engine | 1.2L DualJet Petrol Engine (Advanced K-Series) | 1.2L DualJet Petrol Engine (Advanced K-Series) |
| Engine Type | 1.2L VVT | 1.2L VVT | 1197 cc, 4 Cylinders Inline, 4 Valves/Cylinder, DOHC | 1197 cc, 4 Cylinders Inline, 4 Valves/Cylinder, DOHC | 1197 cc, 4 Cylinders Inline, 4 Valves/Cylinder, DOHC | 1197 cc, 4 Cylinders Inline, 4 Valves/Cylinder, DOHC | 1197 cc, 4 Cylinders Inline, 4 Valves/Cylinder, DOHC | 1197 cc, 4 Cylinders Inline, 4 Valves/Cylinder, DOHC | 1197 cc, 4 Cylinders Inline, 4 Valves/Cylinder, DOHC | 1197 cc, 4 Cylinders Inline, 4 Valves/Cylinder, DOHC | 1197 cc, 4 Cylinders Inline, 4 Valves/Cylinder, DOHC |
| Fuel Type | CNG | CNG | Petrol | Petrol | Petrol | CNG & Petrol | Petrol | Petrol | CNG & Petrol | Petrol | Petrol |
| Alternate Fuel | Petrol | Petrol | None (This is the petrol base variant; CNG is available on separate Delta/Zeta trims) | None (This is the petrol variant; CNG option is available on separate Delta CNG trims) | None | Petrol | None (This is the petrol variant; CNG option is available on separate Zeta CNG trims) | None | Petrol | None | None |
| Mileage (ARAI) | CNG: 30.61 km/Kg | User Reported: 22.5 km/Kg | CNG: 30.61 km/Kg | User Reported: 25.5 km/Kg | 22.35 kmpl | 22.35 kmpl | 22.94 kmpl | 30.61 km/kg (CNG) / 22.35 kmpl (Petrol) | 22.35 kmpl | 22.94 kmpl | 30.61 km/kg (CNG) / 22.35 kmpl (Petrol) | 22.35 kmpl | 22.94 kmpl |
| Max Torque | 98.5 Nm @ 4300 rpm | 98.5 Nm @ 4300 rpm | 113 Nm @ 4400 rpm | 113 Nm @ 4400 rpm | 113 Nm @ 4400 rpm | 98.5 Nm @ 4300 rpm (CNG Mode) / 113 Nm @ 4400 rpm (Petrol Mode) | 113 Nm @ 4400 rpm | 113 Nm @ 4400 rpm | 98.5 Nm @ 4300 rpm (CNG Mode) / 113 Nm @ 4400 rpm (Petrol Mode) | 113 Nm @ 4400 rpm | 113 Nm @ 4400 rpm |
| Emission Standard | BS6 Phase 2 | BS6 Phase 2 | BS6 Phase 2.0 (RDE Compliant) | BS6 Phase 2.0 (RDE Compliant) | BS6 Phase 2.0 (RDE Compliant) | BS6 Phase 2.0 (RDE Compliant) | BS6 Phase 2.0 (RDE Compliant) | BS6 Phase 2.0 (RDE Compliant) | BS6 Phase 2.0 (RDE Compliant) | BS6 Phase 2.0 (RDE Compliant) | BS6 Phase 2.0 (RDE Compliant) |
| Turbocharger / Supercharger | No | No | Naturally Aspirated | Naturally Aspirated | Naturally Aspirated | Naturally Aspirated | Naturally Aspirated | Naturally Aspirated | Naturally Aspirated | Naturally Aspirated | Naturally Aspirated |
| Drivetrain | FWD (Front-Wheel Drive) | FWD (Front-Wheel Drive) | Front Wheel Drive (FWD) | Front Wheel Drive (FWD) | Front Wheel Drive (FWD) | Front Wheel Drive (FWD) | Front Wheel Drive (FWD) | Front Wheel Drive (FWD) | Front Wheel Drive (FWD) | Front Wheel Drive (FWD) | Front Wheel Drive (FWD) |
| Max Power (bhp@rpm) | 76 bhp @ 6000 rpm | 76 bhp @ 6000 rpm | 88.50 bhp @ 6000 rpm | 88.50 bhp @ 6000 rpm | 88.50 bhp @ 6000 rpm | 76.43 bhp @ 6000 rpm (CNG Mode) / 88.50 bhp @ 6000 rpm (Petrol Mode) | 88.50 bhp @ 6000 rpm | 88.50 bhp @ 6000 rpm | 76.43 bhp @ 6000 rpm (CNG Mode) / 88.50 bhp @ 6000 rpm (Petrol Mode) | 88.50 bhp @ 6000 rpm | 88.50 bhp @ 6000 rpm |
| Pure Electric Driving Mode | No | No | No | No | No | No | No | No | No | No | No |
| Transmission | Manual - 5 Gears | Manual - 5 Gears | 5-Speed Manual Transmission (MT) | 5-Speed Manual Transmission (MT) | 5-Speed Automatic (Automated Manual Transmission / AGS) | 5-Speed Manual Transmission (MT) | 5-Speed Manual Transmission (MT) | 5-Speed Automatic (Automated Manual Transmission / AGS) | 5-Speed Manual Transmission (MT) | 5-Speed Manual Transmission (MT) | 5-Speed Automatic (Automated Manual Transmission / AGS) |
| Acceleration (0-100 kmph) | — | — | ~11.8 seconds | ~11.8 seconds | ~12.5 seconds | ~13.5 seconds | ~11.8 seconds | ~12.5 seconds | ~13.5 seconds | ~11.8 seconds | ~12.5 seconds |
| City Mileage | — | — | ~15-17 kmpl | ~15-17 kmpl | ~14-16 kmpl | ~20-22 km/kg (CNG) | ~15-17 kmpl | ~14-16 kmpl | ~20-22 km/kg (CNG) | ~15-17 kmpl | ~14-16 kmpl |
| Max Motor Performance | — | — | Not Applicable | Not Applicable | Not Applicable | Not Applicable | Not Applicable | Not Applicable | Not Applicable | Not Applicable | Not Applicable |
| Battery | — | — | Standard 12V Engine Lead-Acid Battery with Idle Start-Stop functionality | Standard 12V Engine Lead-Acid Battery with Idle Start-Stop functionality | Standard 12V Engine Lead-Acid Battery with Idle Start-Stop functionality | Standard 12V Engine Lead-Acid Battery with Integrated CNG Safety Components | Standard 12V Engine Lead-Acid Battery with Idle Start-Stop functionality | Standard 12V Engine Lead-Acid Battery with Idle Start-Stop functionality | Standard 12V Engine Lead-Acid Battery with Integrated CNG Safety Components | Standard 12V Engine Lead-Acid Battery with Idle Start-Stop functionality | Standard 12V Engine Lead-Acid Battery with Idle Start-Stop functionality |
| Top Speed | — | — | ~170 kmph | ~170 kmph | ~165 kmph | ~160 kmph | ~170 kmph | ~165 kmph | ~160 kmph | ~170 kmph | ~165 kmph |
| Highway Mileage | — | — | ~19-22 kmpl | ~19-22 kmpl | ~19-23 kmpl | ~25-28 km/kg (CNG) | ~19-22 kmpl | ~19-23 kmpl | ~25-28 km/kg (CNG) | ~19-22 kmpl | ~19-23 kmpl |
| Battery Charging | — | — | Not Applicable | Not Applicable | Not Applicable | Not Applicable | Not Applicable | Not Applicable | Not Applicable | Not Applicable | Not Applicable |
| Performance on Alternate Fuel | — | — | Not Applicable | Not Applicable | Not Applicable | Power: 88.50 bhp @ 6000 rpm, Torque: 113 Nm @ 4400 rpm (Petrol Mode) | Not Applicable | Not Applicable | Power: 88.50 bhp @ 6000 rpm, Torque: 113 Nm @ 4400 rpm (Petrol Mode) | Not Applicable | Not Applicable |
| Electric Motor Assist | — | — | None | None | None | None | None | None | None | None | None |
| Range | — | — | ~826.9 km | ~826.9 km | ~848.7 km | ~367 km on Full CNG Tank | ~826.9 km | ~848.7 km | ~367 km on Full CNG Tank | ~826.9 km | ~848.7 km |
| Driving Range | — | — | ~600-700 km in mixed real-world driving | ~600-700 km in mixed real-world driving loops | ~620-720 km in mixed real-world driving loops | ~240-280 km real-world range on CNG (plus ~600-700 km on Petrol) | ~600-700 km in mixed real-world driving loops | ~620-720 km in mixed real-world driving loops | ~240-280 km real-world range on CNG (plus ~600-700 km on Petrol) | ~600-700 km in mixed real-world driving loops | ~620-720 km in mixed real-world driving loops |
| Others | — | — | Idle Start-Stop system, dual front airbags, reverse parking sensors, gear shift indicator | 17.78 cm SmartPlay Studio touchscreen infotainment system, steering-mounted controls, electrically folding mirrors | 17.78 cm SmartPlay Studio touchscreen infotainment system, steering-mounted controls, ESP with Hill Hold Assist | Factory-fitted leakproof CNG kit, integrated fuel gauges, auto-switchover mechanism | 17.78 cm SmartPlay Pro infotainment system, LED projector headlamps, 6 airbags, rear wiper and washer | 17.78 cm SmartPlay Pro infotainment system, LED projector headlamps, 6 airbags, ESP with Hill Hold Assist | Factory-fitted leakproof CNG kit, 17.78 cm SmartPlay Pro screen, 6 airbags, rear wiper and washer | Head-Up Display (HUD), 360 View Camera, 22.86 cm SmartPlay Pro+ touchscreen, Arkamys Surround Sense | Head-Up Display (HUD), 360 View Camera, 22.86 cm SmartPlay Pro+ touchscreen, ESP with Hill Hold Assist |
| Electric Motor | — | — | None | None | None | None | None | None | None | None | None |
| Max Engine Torque (Nm@rpm) | — | — | 113 Nm @ 4400 rpm | 113 Nm @ 4400 rpm | 113 Nm @ 4400 rpm | 98.5 Nm @ 4300 rpm | 113 Nm @ 4400 rpm | 113 Nm @ 4400 rpm | 98.5 Nm @ 4300 rpm | 113 Nm @ 4400 rpm | 113 Nm @ 4400 rpm |
| E20 Compatibility | — | — | Yes (E20 Compliant) | Yes (E20 Compliant) | Yes (E20 Compliant) | Yes (Petrol tank is E20 Compliant) | Yes (E20 Compliant) | Yes (E20 Compliant) | Yes (Petrol tank is E20 Compliant) | Yes (E20 Compliant) | Yes (E20 Compliant) |
| Direct Start in CNG | — | — | No | No | No | Yes (Advanced ECU allows direct ignition and start on CNG mode) | No | No | Yes (Advanced ECU allows direct ignition and start on CNG mode) | No | No |
| Fuel Change Over Switch | — | — | Not Applicable | Not Applicable | Not Applicable | Yes (Dedicated dashboard-mounted console switch to flip between Petrol and CNG) | Not Applicable | Not Applicable | Yes (Dedicated dashboard-mounted console switch to flip between Petrol and CNG) | Not Applicable | Not Applicable |
| Suspensions, Brakes, Steering & Tyres | |||||||||||
| Spare Wheel | Steel | Steel | 15-inch Steel Spare Wheel (In-boot storage) | 15-inch Steel Spare Wheel (In-boot storage) | 15-inch Steel Spare Wheel (In-boot storage) | 15-inch Steel Spare Wheel (Repositioned/altered access due to floor-mounted cylinder) | 15-inch Steel Spare Wheel (In-boot storage) | 15-inch Steel Spare Wheel (In-boot storage) | 15-inch Steel Spare Wheel (Repositioned/altered access due to floor-mounted cylinder) | 15-inch Steel Spare Wheel (In-boot storage) | 15-inch Steel Spare Wheel (In-boot storage) |
| Wheels | Steel Rims | Alloy Wheels | 15-inch Steel Wheels with Center Cap | 15-inch Steel Wheels with Full Wheel Covers | 15-inch Steel Wheels with Full Wheel Covers | 15-inch Steel Wheels with Full Wheel Covers | 16-inch Painted Alloy Wheels | 16-inch Painted Alloy Wheels | 16-inch Painted Alloy Wheels | 16-inch Precision Cut Alloy Wheels | 16-inch Precision Cut Alloy Wheels |
| Front Suspension | McPherson Strut | McPherson Strut | MacPherson Strut with Coil Spring | MacPherson Strut with Coil Spring | MacPherson Strut with Coil Spring | MacPherson Strut with Coil Spring | MacPherson Strut with Coil Spring | MacPherson Strut with Coil Spring | MacPherson Strut with Coil Spring | MacPherson Strut with Coil Spring | MacPherson Strut with Coil Spring |
| Front Tyres | 185 / 65 R15 | 195 / 55 R16 | 185/65 R15 | 185/65 R15 | 185/65 R15 | 185/65 R15 | 195/55 R16 | 195/55 R16 | 195/55 R16 | 195/55 R16 | 195/55 R16 |
| Rear Suspension | Torsion Beam | Torsion Beam | Torsion Beam with Coil Spring | Torsion Beam with Coil Spring | Torsion Beam with Coil Spring | Torsion Beam with Coil Spring (Stiffened to handle heavy CNG tank payload) | Torsion Beam with Coil Spring | Torsion Beam with Coil Spring | Torsion Beam with Coil Spring (Stiffened to handle heavy CNG tank payload) | Torsion Beam with Coil Spring | Torsion Beam with Coil Spring |
| Rear Tyres | 185 / 65 R15 | 195 / 55 R16 | 185/65 R15 | 185/65 R15 | 185/65 R15 | 185/65 R15 | 195/55 R16 | 195/55 R16 | 195/55 R16 | 195/55 R16 | 195/55 R16 |
| Steering Type | — | — | Electric Power Steering | Electric Power Steering | Electric Power Steering | Electric Power Steering | Electric Power Steering | Electric Power Steering | Electric Power Steering | Electric Power Steering | Electric Power Steering |
| Rear Brake Type | — | — | Drum Brakes | Drum Brakes | Drum Brakes | Drum Brakes | Drum Brakes | Drum Brakes | Drum Brakes | Drum Brakes | Drum Brakes |
| Tyre Construction | — | — | Radial, Tubeless | Radial, Tubeless | Radial, Tubeless | Radial, Tubeless | Radial, Tubeless | Radial, Tubeless | Radial, Tubeless | Radial, Tubeless | Radial, Tubeless |
| Minimum Turning Radius(m) | — | — | 4.85 metres | 4.85 metres | 4.85 metres | 4.85 metres | 4.85 metres | 4.85 metres | 4.85 metres | 4.85 metres | 4.85 metres |
| Front Brake Type | — | — | Disc Brakes | Disc Brakes | Disc Brakes | Disc Brakes | Disc Brakes | Disc Brakes | Disc Brakes | Disc Brakes | Disc Brakes |
| Four Wheel Steering | — | — | No | No | No | No | No | No | No | No | No |
| Dimensions & Weight | |||||||||||
| Kerb Weight(kg) | 1020 Kg | — | 920 kg | 925 kg | 935 kg | 1035 kg (Heavier than standard petrol version due to tank weight) | 935 kg | 945 kg | 1045 kg (Heavier than standard petrol version due to tank and variant features) | 935 kg | 945 kg |
| Height(mm) | 1500 mm | 1500 mm | 1500 mm | 1500 mm | 1500 mm | 1500 mm | 1500 mm | 1500 mm | 1500 mm | 1500 mm | 1500 mm |
| Width(mm) | 1745 mm | 1745 mm | 1745 mm | 1745 mm | 1745 mm | 1745 mm | 1745 mm | 1745 mm | 1745 mm | 1745 mm | 1745 mm |
| Length(mm) | 3990 mm | 3990 mm | 3990 mm | 3990 mm | 3990 mm | 3990 mm | 3990 mm | 3990 mm | 3990 mm | 3990 mm | 3990 mm |
| Ground Clearance | — | — | 165 mm | 165 mm | 165 mm | 165 mm | 165 mm | 165 mm | 165 mm | 165 mm | 165 mm |
| Wheelbase(mm) | — | — | 2520 mm | 2520 mm | 2520 mm | 2520 mm | 2520 mm | 2520 mm | 2520 mm | 2520 mm | 2520 mm |
| Capacity | |||||||||||
| Fuel Tank Capacity(L) | 37 L | 37 L | 37 Litres | 37 Litres | 37 Litres | 55 Litres Water Capacity (Equivalent to ~9-10 kg CNG capacity) / 37 Litres Petrol Tank | 37 Litres | 37 Litres | 55 Litres Water Capacity (Equivalent to ~9-10 kg CNG capacity) / 37 Litres Petrol Tank | 37 Litres | 37 Litres |
| Doors | 5 Doors | 5 Doors | 5 Doors | 5 Doors | 5 Doors | 5 Doors | 5 Doors | 5 Doors | 5 Doors | 5 Doors | 5 Doors |
| Seating Capacity | 5 Seats and 2 Row | 5 Seats and 2 Row | 5-Seater | 5-Seater | 5-Seater | 5-Seater | 5-Seater | 5-Seater | 5-Seater | 5-Seater | 5-Seater |
| Bootspace(L) | — | — | 318 Litres | 318 Litres | 318 Litres | Highly reduced boot space (~50-80 Litres remaining due to massive floor cylinder cylinder) | 318 Litres | 318 Litres | Highly reduced boot space (~50-80 Litres remaining due to massive floor cylinder) | 318 Litres | 318 Litres |
| No of Rows | — | — | 2 Rows | 2 Rows | 2 Rows | 2 Rows | 2 Rows | 2 Rows | 2 Rows | 2 Rows | 2 Rows |
| Feature | Delta MT CNG | Zeta MT CNG | Maruti Baleno Sigma Petrol Manual | Maruti Baleno Delta Petrol Manual | Maruti Baleno Delta Petrol Automatic (AMT) | Maruti Baleno Delta MT CNG | Maruti Baleno Zeta Petrol Manual | Maruti Baleno Zeta Petrol Automatic (AMT) | Maruti Baleno Zeta MT CNG | Maruti Baleno Alpha Petrol Manual | Maruti Baleno Alpha Petrol Automatic (AMT) |
|---|---|---|---|---|---|---|---|---|---|---|---|
| Exterior | |||||||||||
| Rub-strips | No | No | No | No | No | No | No | No | No | No | No |
| Roof Rails | No | No | No | No | No | No | No | No | No | No | No |
| Roof-mounted Antenna | Yes | Yes | Yes (Shark-Fin Antenna) | Yes (Shark-Fin Antenna) | Yes (Shark-Fin Antenna) | Yes (Shark-Fin Antenna) | Yes (Shark-Fin Antenna) | Yes (Shark-Fin Antenna) | Yes (Shark-Fin Antenna) | Yes (Shark-Fin Antenna) | Yes (Shark-Fin Antenna) |
| Body-coloured Bumpers | Yes | Yes | Yes (Body-Coloured Bumpers) | Yes (Body-Coloured Bumpers) | Yes (Body-Coloured Bumpers) | Yes (Body-Coloured Bumpers) | Yes (Body-Coloured Bumpers) | Yes (Body-Coloured Bumpers) | Yes (Body-Coloured Bumpers) | Yes (Body-Coloured Bumpers) | Yes (Body-Coloured Bumpers) |
| Body Kit | No | No | No | No | No | No | No | No | No | No | No |
| Chrome Finish Exhaust Pipe | — | — | No | No | No | No | No | No | No | No | No |
| Sunroof / Moonroof | — | — | No | No | No | No | No | No | No | No | No |
| Locks & Security | |||||||||||
| Central Locking | Keyless Central Locking | Keyless Central Locking | Yes (With Keyless Entry) | Yes (With Keyless Entry) | Yes (With Keyless Entry) | Yes (With Keyless Entry) | Yes (With Smart Keyless Entry) | Yes (With Smart Keyless Entry) | Yes (With Smart Keyless Entry) | Yes (With Smart Keyless Entry) | Yes (With Smart Keyless Entry) |
| Speed Sensing Door Lock | Yes | Yes | Yes | Yes | Yes | Yes | Yes | Yes | Yes | Yes | Yes |
| Engine Immobiliser | Yes | Yes | Yes | Yes | Yes | Yes | Yes | Yes | Yes | Yes | Yes |
| Child Safety Lock | Yes | Yes | Yes | Yes | Yes | Yes | Yes | Yes | Yes | Yes | Yes |
| Seats & Upholstery | |||||||||||
| Front Passenger Seat Adjustment | 6-way manually adjustable | 6-way manually adjustable | 4-Way Manual Adjustable (Backrest Recline + Longitudinal Slide) | 4-Way Manual Adjustable (Backrest Recline + Longitudinal Slide) | 4-Way Manual Adjustable (Backrest Recline + Longitudinal Slide) | 4-Way Manual Adjustable (Backrest Recline + Longitudinal Slide) | 4-Way Manual Adjustable (Backrest Recline + Longitudinal Slide) | 4-Way Manual Adjustable (Backrest Recline + Longitudinal Slide) | 4-Way Manual Adjustable (Backrest Recline + Longitudinal Slide) | 4-Way Manual Adjustable (Backrest Recline + Longitudinal Slide) | 4-Way Manual Adjustable (Backrest Recline + Longitudinal Slide) |
| Rear Armrest | No | No | No | No | No | No | No | No | No | No | No |
| Driver Seat Adjustment | 6-way manually adjustable | 8 way manually adjustable | 4-Way Manual Adjustable (No Driver Seat Height Adjust) | 4-Way Manual Adjustable (No Driver Seat Height Adjust) | 4-Way Manual Adjustable (No Driver Seat Height Adjust) | 4-Way Manual Adjustable (No Driver Seat Height Adjust) | 6-Way Manual Adjustable (Includes Driver Seat Height Adjust) | 6-Way Manual Adjustable (Includes Driver Seat Height Adjust) | 6-Way Manual Adjustable (Includes Driver Seat Height Adjust) | 6-Way Manual Adjustable (Includes Driver Seat Height Adjust) | 6-Way Manual Adjustable (Includes Driver Seat Height Adjust) |
| Folding Rear Seat | Flat | Flat | Yes (60:40 Split Folding Rear Seat Layout) | Yes (60:40 Split Folding Rear Seat Layout) | Yes (60:40 Split Folding Rear Seat Layout) | No (CNG cylinder installation limits full folding flexibility) | Yes (60:40 Split Folding Rear Seat Layout) | Yes (60:40 Split Folding Rear Seat Layout) | No (CNG cylinder installation limits full folding flexibility) | Yes (60:40 Split Folding Rear Seat Layout) | Yes (60:40 Split Folding Rear Seat Layout) |
| Seat Upholstery | Fabric | Fabric | Premium Fabric Upholstery Layout | Premium Fabric Upholstery Layout | Premium Fabric Upholstery Layout | Premium Fabric Upholstery Layout | Premium Fabric Upholstery Layout | Premium Fabric Upholstery Layout | Premium Fabric Upholstery Layout | Premium Fabric Upholstery Layout | Premium Fabric Upholstery Layout |
| Rear Passenger Seat Type | Bench Seat | Bench Seat | Bench Type (3-Passenger Configured Layout) | Bench Type (3-Passenger Configured Layout) | Bench Type (3-Passenger Configured Layout) | Bench Type (3-Passenger Configured Layout) | Bench Type (3-Passenger Configured Layout) | Bench Type (3-Passenger Configured Layout) | Bench Type (3-Passenger Configured Layout) | Bench Type (3-Passenger Configured Layout) | Bench Type (3-Passenger Configured Layout) |
| Ventilated Seats | No | No | No | No | No | No | No | No | No | No | No |
| Front Seatback Pockets | Yes | Yes | No | No | No | No | Yes (Co-Driver Side Only) | Yes (Co-Driver Side Only) | Yes (Co-Driver Side Only) | Yes (Both Driver & Co-Driver Side) | Yes (Both Driver & Co-Driver Side) |
| Driver Armrest | No | Yes | No | No | No | No | Yes (Front Center Sliding Armrest with Storage) | Yes (Front Center Sliding Armrest with Storage) | Yes (Front Center Sliding Armrest with Storage) | Yes (Front Center Sliding Armrest with Storage) | Yes (Front Center Sliding Armrest with Storage) |
| Split Rear Seat | 60:40 Split Rear Seat | 60:40 Split Rear Seat | Yes (60:40 Split Rear Seat Configuration) | Yes (60:40 Split Rear Seat Configuration) | Yes (60:40 Split Rear Seat Configuration) | Yes (60:40 Split configuration exists but backrest fold is blocked by CNG tank) | Yes (60:40 Split Rear Seat Configuration) | Yes (60:40 Split Rear Seat Configuration) | Yes (60:40 Split configuration exists but backrest fold is blocked by CNG tank) | Yes (60:40 Split Rear Seat Configuration) | Yes (60:40 Split Rear Seat Configuration) |
| Headrests | Front & Rear | Front & Rear | Front & Rear Height Adjustable Cushion Headrests | Front & Rear Height Adjustable Cushion Headrests | Front & Rear Height Adjustable Cushion Headrests | Front & Rear Height Adjustable Cushion Headrests | Front & Rear Height Adjustable Cushion Headrests | Front & Rear Height Adjustable Cushion Headrests | Front & Rear Height Adjustable Cushion Headrests | Front & Rear Height Adjustable Cushion Headrests | Front & Rear Height Adjustable Cushion Headrests |
| Second Row Seat Adjustment | — | 2 way manually adjustable | Fixed Bench Base with Split Fold Backrest | Fixed Bench Base with Split Fold Backrest | Fixed Bench Base with Split Fold Backrest | Fixed Bench Base with Split Fold Backrest functionality restricted by tank | Fixed Bench Base with Split Fold Backrest | Fixed Bench Base with Split Fold Backrest | Fixed Bench Base with Split Fold Backrest functionality restricted by tank | Fixed Bench Base with Split Fold Backrest | Fixed Bench Base with Split Fold Backrest |
| Interior Colours | — | — | Dual Tone - Black & Deep Blue | Dual Tone - Black & Deep Blue | Dual Tone - Black & Deep Blue | Dual Tone - Black & Deep Blue | Dual Tone - Black & Deep Blue | Dual Tone - Black & Deep Blue | Dual Tone - Black & Deep Blue | Dual Tone - Black & Deep Blue | Dual Tone - Black & Deep Blue |
| Ventilated Seat Type | — | — | Not Applicable | Not Applicable | Not Applicable | Not Applicable | Not Applicable | Not Applicable | Not Applicable | Not Applicable | Not Applicable |
| Interiors | — | — | Dual-Tone Premium Dashboard Layout with Silver Accents | Dual-Tone Premium Dashboard Layout with Silver Accents | Dual-Tone Premium Dashboard Layout with Silver Accents | Dual-Tone Premium Dashboard Layout with Silver Accents | Dual-Tone Premium Dashboard Layout with Silver Accents | Dual-Tone Premium Dashboard Layout with Silver Accents | Dual-Tone Premium Dashboard Layout with Silver Accents | Dual-Tone Premium Dashboard Layout with Silver Accents | Dual-Tone Premium Dashboard Layout with Silver Accents |
| Leather-wrapped Steering Wheel | — | — | No (Standard Three-Spoke Polyurethane Steering Wheel) | No (Standard Three-Spoke Polyurethane Steering Wheel) | No (Standard Three-Spoke Polyurethane Steering Wheel) | No (Standard Three-Spoke Polyurethane Steering Wheel) | No (Reserved for Alpha variant) | No (Reserved for Alpha variant) | No (Reserved for Alpha variant) | Yes (Leather-wrapped Steering Wheel) | Yes (Leather-wrapped Steering Wheel) |
| Rear Row Seat Adjustment | — | — | No | No | No | No | No | No | No | No | No |
| Leather-wrapped Gear Knob | — | — | No | No | No | No | No | No | No | No | No |
| Safety | |||||||||||
| Child Seat Anchor Points | Yes | Yes | Yes (ISOFIX Child Seat Anchor Mount Points) | Yes (ISOFIX Child Seat Anchor Mount Points) | Yes (ISOFIX Child Seat Anchor Mount Points) | Yes (ISOFIX Child Seat Anchor Mount Points) | Yes (ISOFIX Child Seat Anchor Mount Points) | Yes (ISOFIX Child Seat Anchor Mount Points) | Yes (ISOFIX Child Seat Anchor Mount Points) | Yes (ISOFIX Child Seat Anchor Mount Points) | Yes (ISOFIX Child Seat Anchor Mount Points) |
| Tyre Pressure Monitoring System (TPMS) | No | No | No | No | No | No | No | No | No | No | No |
| Rear Middle Three Point Seatbelt | Yes | Yes | Yes (3-Point seatbelts for all 5 occupants) | Yes (3-Point seatbelts for all 5 occupants) | Yes (3-Point seatbelts for all 5 occupants) | Yes (3-Point seatbelts for all 5 occupants) | Yes (3-Point seatbelts for all 5 occupants) | Yes (3-Point seatbelts for all 5 occupants) | Yes (3-Point seatbelts for all 5 occupants) | Yes (3-Point seatbelts for all 5 occupants) | Yes (3-Point seatbelts for all 5 occupants) |
| Blind Spot Detection | No | No | No | No | No | No | No | No | No | No | No |
| Emergency Brake Light Flashing | No | No | Yes | Yes | Yes | Yes | Yes | Yes | Yes | Yes | Yes |
| Forward Collision Warning (FCW) | No | — | No | No | No | No | No | No | No | No | No |
| Dashcam | No | No | No | No | No | No | No | No | No | No | No |
| Seat Belt Warning | Yes | Yes | Yes (Audio-Visual Reminders for All Occupants) | Yes (Audio-Visual Reminders for All Occupants) | Yes (Audio-Visual Reminders for All Occupants) | Yes (Audio-Visual Reminders for All Occupants) | Yes (Audio-Visual Reminders for All Occupants) | Yes (Audio-Visual Reminders for All Occupants) | Yes (Audio-Visual Reminders for All Occupants) | Yes (Audio-Visual Reminders for All Occupants) | Yes (Audio-Visual Reminders for All Occupants) |
| Puncture Repair Kit | No | No | No (Standard 15-inch Steel Spare Wheel provided) | No (Standard 15-inch Steel Spare Wheel provided) | No (Standard 15-inch Steel Spare Wheel provided) | No (Standard 15-inch Steel Spare Wheel provided under boot floor layout) | No (Standard 15-inch Steel Spare Wheel provided) | No (Standard 15-inch Steel Spare Wheel provided) | No (Standard 15-inch Steel Spare Wheel provided under boot floor layout) | No (Standard 15-inch Steel Spare Wheel provided) | No (Standard 15-inch Steel Spare Wheel provided) |
| Airbags | 6 Airbags (Driver & Front Passenger) | 6 Airbags (Driver & Front Passenger) | 6 Airbags (Standard Dual Front, Side, and Curtain Airbags) | 6 Airbags (Standard Dual Front, Side, and Curtain Airbags) | 6 Airbags (Standard Dual Front, Side, and Curtain Airbags) | 6 Airbags (Standard Dual Front, Side, and Curtain Airbags) | 6 Airbags (Standard Dual Front, Side, and Curtain Airbags) | 6 Airbags (Standard Dual Front, Side, and Curtain Airbags) | 6 Airbags (Standard Dual Front, Side, and Curtain Airbags) | 6 Airbags (Standard Dual Front, Side, and Curtain Airbags) | 6 Airbags (Standard Dual Front, Side, and Curtain Airbags) |
| NCAP Rating | 4 Star | 4 Star | Not Formally Rated | Not Formally Rated | Not Formally Rated | Not Formally Rated | Not Formally Rated | Not Formally Rated | Not Formally Rated | Not Formally Rated | Not Formally Rated |
| Rear Middle Head Rest | Yes | Yes | Yes (Adjustable Rear Middle Headrest) | Yes (Adjustable Rear Middle Headrest) | Yes (Adjustable Rear Middle Headrest) | Yes (Adjustable Rear Middle Headrest) | Yes (Adjustable Rear Middle Headrest) | Yes (Adjustable Rear Middle Headrest) | Yes (Adjustable Rear Middle Headrest) | Yes (Adjustable Rear Middle Headrest) | Yes (Adjustable Rear Middle Headrest) |
| Overspeed Warning | 1 beep over 80kmph, Continuous beeps over 120kmph | 1 beep over 80kmph, Continuous beeps over 120kmph | Yes (80 kmph Acoustic Alert Warning, 120 kmph Continuous Buzzing) | Yes (80 kmph Acoustic Alert Warning, 120 kmph Continuous Buzzing) | Yes (80 kmph Acoustic Alert Warning, 120 kmph Continuous Buzzing) | Yes (80 kmph Acoustic Alert Warning, 120 kmph Continuous Buzzing) | Yes (80 kmph Acoustic Alert Warning, 120 kmph Continuous Buzzing) | Yes (80 kmph Acoustic Alert Warning, 120 kmph Continuous Buzzing) | Yes (80 kmph Acoustic Alert Warning, 120 kmph Continuous Buzzing) | Yes (80 kmph Acoustic Alert Warning, 120 kmph Continuous Buzzing) | Yes (80 kmph Acoustic Alert Warning, 120 kmph Continuous Buzzing) |
| Lane Departure Prevention | — | — | No | No | No | No | No | No | No | No | No |
| Lane Departure Warning | — | — | No | No | No | No | No | No | No | No | No |
| Automatic Emergency Braking (AEB) | — | — | No | No | No | No | No | No | No | No | No |
| High-beam Assist | — | — | No | No | No | No | No | No | No | No | No |
| Rear Cross-traffic Assist | — | — | No | No | No | No | No | No | No | No | No |
| Doors, Windows, Mirrors & Wipers | |||||||||||
| Rain-sensing Wipers | No | No | No | No | No | No | No | No | No | No | No |
| Adjustable ORVMs | Electric Adjustable ORVMs | Electric Adjustable ORVMs | No (Manually Externally Foldable & Adjustable ORVMs) | Yes (Electrically Adjustable & Foldable ORVMs) | Yes (Electrically Adjustable & Foldable ORVMs) | Yes (Electrically Adjustable & Foldable ORVMs) | Yes (Electrically Adjustable & Auto-Folding ORVMs) | Yes (Electrically Adjustable & Auto-Folding ORVMs) | Yes (Electrically Adjustable & Auto-Folding ORVMs) | Yes (Electrically Adjustable & Auto-Folding ORVMs) | Yes (Electrically Adjustable & Auto-Folding ORVMs) |
| Rear Defogger | Yes | Yes | Yes (Rear Defogger with Timer standard from base) | Yes (Rear Defogger with Timer) | Yes (Rear Defogger with Timer) | Yes (Rear Defogger with Timer) | Yes (Rear Defogger with Timer) | Yes (Rear Defogger with Timer) | Yes (Rear Defogger with Timer) | Yes (Rear Defogger with Timer) | Yes (Rear Defogger with Timer) |
| Door Pockets | Front & Rear | Front & Rear | Yes (Front & Rear Door Pads with Bottle Slots) | Yes (Front & Rear Door Pads with Bottle Slots) | Yes (Front & Rear Door Pads with Bottle Slots) | Yes (Front & Rear Door Pads with Bottle Slots) | Yes (Front & Rear Door Pads with Bottle Slots) | Yes (Front & Rear Door Pads with Bottle Slots) | Yes (Front & Rear Door Pads with Bottle Slots) | Yes (Front & Rear Door Pads with Bottle Slots) | Yes (Front & Rear Door Pads with Bottle Slots) |
| Rear Wiper | No | Yes | No | Yes (Rear Wiper & Washer included from Delta variant) | Yes (Rear Wiper & Washer included from Delta variant) | Yes (Rear Wiper & Washer included from Delta variant) | Yes (Rear Wiper & Washer included) | Yes (Rear Wiper & Washer included) | Yes (Rear Wiper & Washer included) | Yes (Rear Wiper & Washer included) | Yes (Rear Wiper & Washer included) |
| Power Windows | Front & Rear | Front & Rear | Yes (All 4 Power Windows with Driver Side Auto-Down Option) | Yes (All 4 Power Windows with Driver Side Auto-Down Option) | Yes (All 4 Power Windows with Driver Side Auto-Down Option) | Yes (All 4 Power Windows with Driver Side Auto-Down Option) | Yes (All 4 Power Windows with Driver Side Auto Up/Down) | Yes (All 4 Power Windows with Driver Side Auto Up/Down) | Yes (All 4 Power Windows with Driver Side Auto Up/Down) | Yes (All 4 Power Windows) | Yes (All 4 Power Windows) |
| Interior Door Handles Finish | Black | Chrome | Chrome | Chrome | Chrome | Chrome | Chrome | Chrome | Chrome | Chrome | Chrome |
| Turn Indicators on ORVMs | — | — | No (Fender-Mounted Indicators on Base Variant) | Yes (Turn Indicators integrated on ORVMs) | Yes (Turn Indicators integrated on ORVMs) | Yes (Turn Indicators integrated on ORVMs) | Yes (Turn Indicators integrated on ORVMs) | Yes (Turn Indicators integrated on ORVMs) | Yes (Turn Indicators integrated on ORVMs) | Yes (Turn Indicators integrated on ORVMs) | Yes (Turn Indicators integrated on ORVMs) |
| One Touch Up | — | — | No | No | No | No | Yes (Driver Side Only with Anti-Pinch) | Yes (Driver Side Only with Anti-Pinch) | Yes (Driver Side Only with Anti-Pinch) | Yes (Driver Side Only with Anti-Pinch) | Yes (Driver Side Only with Anti-Pinch) |
| One Touch Down | — | — | No | No | No | No | Yes (All Doors) | Yes (All Doors) | Yes (All Doors) | Yes (All Doors) | Yes (All Doors) |
| Rear Windshield Blind | — | — | No | No | No | No | No | No | No | No | No |
| Exterior Door Handles Finish | — | — | Matte Black Finish | Body-Coloured Finish | Body-Coloured Finish | Body-Coloured Finish | Chrome Finished Handles | Chrome Finished Handles | Chrome Finished Handles | Chrome Finished Handles | Chrome Finished Handles |
| Interior Door Handles | — | — | Chrome Finished | Chrome Finished | Chrome Finished | Chrome Finished | Chrome Finished | Chrome Finished | Chrome Finished | Chrome Finished | Chrome Finished |
| Scuff Plates | — | — | No | No | No | No | No | No | No | No | No |
| Exterior Door Handles | — | — | Pull Type Layout | Pull Type Layout | Pull Type Layout | Pull Type Layout | Pull Type Layout | Pull Type Layout | Pull Type Layout | Pull Type Layout | Pull Type Layout |
| Side Window Blinds | — | — | No | No | No | No | No | No | No | No | No |
| ORVM Colour | — | — | Matte Black Finish | Body-Coloured Finish | Body-Coloured Finish | Body-Coloured Finish | Body-Coloured Finish | Body-Coloured Finish | Body-Coloured Finish | Body-Coloured Finish | Body-Coloured Finish |
| Power Windows Position | — | — | Door Trim Pads (All Rows) | Door Trim Pads (All Rows) | Door Trim Pads (All Rows) | Door Trim Pads (All Rows) | Door Trim Pads (All Rows) | Door Trim Pads (All Rows) | Door Trim Pads (All Rows) | Door Trim Pads (All Rows) | Door Trim Pads (All Rows) |
| Bootlid Opener | — | — | Internal / Keyless Release | Internal / Keyless Release | Internal / Keyless Release | Internal / Keyless Release | Internal / Keyless Release | Internal / Keyless Release | Internal / Keyless Release | Internal / Keyless Release | Internal / Keyless Release |
| Entertainment, Information & Communication | |||||||||||
| Speakers | 4 | 6 | No Speakers | 4 Speakers | 4 Speakers | 4 Speakers | 4 Speakers + 2 Tweeters | 4 Speakers + 2 Tweeters | 4 Speakers + 2 Tweeters | 4 Speakers + 2 Tweeters (Arkamys Surround Sound Setup) | 4 Speakers + 2 Tweeters (Arkamys Surround Sound Setup) |
| Apple CarPlay | Yes | Yes | No | Yes (Wireless) | Yes (Wireless) | Yes (Wireless) | Yes (Wireless) | Yes (Wireless) | Yes (Wireless) | Yes (Wireless) | Yes (Wireless) |
| Voice Command | No | Yes | No | Yes | Yes | Yes | Yes | Yes | Yes | Yes | Yes |
| Steering-mounted controls | Yes | Yes | No | Yes (Steering Mounted Audio & Phone Controls) | Yes (Steering Mounted Audio & Phone Controls) | Yes (Steering Mounted Audio & Phone Controls) | Yes (Steering Mounted Audio & Phone Controls) | Yes (Steering Mounted Audio & Phone Controls) | Yes (Steering Mounted Audio & Phone Controls) | Yes (Steering Mounted Audio, Phone & Cruise Controls) | Yes (Steering Mounted Audio, Phone & Cruise Controls) |
| Wireless Charger | No | No | No | No | No | No | No | No | No | No | No |
| AUX Compatibility | Yes | Yes | No | No | No | No | No | No | No | No | No |
| Bluetooth Compatibility | Yes | Yes | No | Yes (With Audio Streaming & Calling Support) | Yes (With Audio Streaming & Calling Support) | Yes (With Audio Streaming & Calling Support) | Yes (With Audio Streaming & Calling Support) | Yes (With Audio Streaming & Calling Support) | Yes (With Audio Streaming & Calling Support) | Yes (With Audio Streaming & Calling Support) | Yes (With Audio Streaming & Calling Support) |
| Display | 7" Touch-screen | 7" Touch-screen | Analogue Twin Pod Layout with Digital MID screen | Twin Pod Analogue Display with Digital MID screen | Twin Pod Analogue Display with Digital MID screen | Twin Pod Analogue Display with Digital MID screen | Twin Pod Analogue Display with TFT Color MID screen | Twin Pod Analogue Display with TFT Color MID screen | Twin Pod Analogue Display with TFT Color MID screen | Twin Pod Analogue Display with TFT Color MID screen | Twin Pod Analogue Display with TFT Color MID screen |
| Integrated (in-dash) Music System | Yes | Yes | No (2-DIN Audio Provision Only) | Yes (SmartPlay Pro Infotainment System) | Yes (SmartPlay Pro Infotainment System) | Yes (SmartPlay Pro Infotainment System) | Yes (SmartPlay Pro Infotainment System) | Yes (SmartPlay Pro Infotainment System) | Yes (SmartPlay Pro Infotainment System) | Yes (SmartPlay Pro+ Infotainment System) | Yes (SmartPlay Pro+ Infotainment System) |
| Android Auto | Yes | Yes | No | Yes (Wireless) | Yes (Wireless) | Yes (Wireless) | Yes (Wireless) | Yes (Wireless) | Yes (Wireless) | Yes (Wireless) | Yes (Wireless) |
| GPS Navigation System | Yes | Yes | No | Yes (Navigation supported via phone link integration) | Yes (Navigation supported via phone link integration) | Yes (Navigation supported via phone link integration) | Yes (Navigation supported via phone link integration) | Yes (Navigation supported via phone link integration) | Yes (Navigation supported via phone link integration) | Yes (Navigation supported via phone link integration) | Yes (Navigation supported via phone link integration) |
| Touchscreen Size | — | — | Not Applicable (No Touchscreen Audio fitted on base Sigma trim) | 7 inches | 7 inches | 7 inches | 7 inches | 7 inches | 7 inches | 9 inches | 9 inches |
| Internal Hard Drive | — | — | No | No | No | No | No | No | No | No | No |
| USB Compatibility | — | — | No | Yes | Yes | Yes | Yes | Yes | Yes | Yes | Yes |
| AM/FM Radio | — | — | No | Yes | Yes | Yes | Yes | Yes | Yes | Yes | Yes |
| Smart Connectivity | — | — | No | No (Suzuki Connect App telematics reserved for Zeta/Alpha) | No (Suzuki Connect App telematics reserved for Zeta/Alpha) | No (Suzuki Connect App telematics reserved for Zeta/Alpha) | Yes (Suzuki Connect Mobile App Suite) | Yes (Suzuki Connect Mobile App Suite) | Yes (Suzuki Connect Mobile App Suite) | Yes (Suzuki Connect Mobile App Suite) | Yes (Suzuki Connect Mobile App Suite) |
| Head Unit Size | — | — | Not Applicable | 7 inches | 7 inches | 7 inches | 7 inches | 7 inches | 7 inches | 9 inches | 9 inches |
| iPod Compatibility | — | — | No | Yes | Yes | Yes | Yes | Yes | Yes | Yes | Yes |
| Emergency Call | — | — | No | No | No | No | No | No | No | No | No |
| Mobile App Features | |||||||||||
| Find My Car | No | Yes | No | No | No | No | Yes | Yes | Yes | Yes | Yes |
| Remote AC: On / Off via App | No | No | No | No | No | No | No (Limited to Automatic Alpha trims only) | No (Limited to Automatic Alpha trims only) | No | No (Remote AC control limited to Automatic configurations) | Yes (Pre-cooling and cabin ventilation via application support) |
| Emergency Call Button | No | Yes | No | No | No | No | No | No | No | No | No |
| Alexa Compatibility | No | Yes | No | No | No | No | Yes | Yes | Yes | Yes | Yes |
| Over The Air (OTA) Updates | No | Yes | No | No | No | No | Yes | Yes | Yes | Yes | Yes |
| Check Vehicle Status via App | No | Yes | No | No | No | No | Yes | Yes | Yes | Yes | Yes |
| Geo-fence | No | Yes | No | No | No | No | Yes | Yes | Yes | Yes | Yes |
| Remote Car Lock/Unlock via App | No | Yes | No | No | No | No | Yes | Yes | Yes | Yes | Yes |
| Car Light Flashing & Honking via App | No | Yes | No | No | No | No | Yes | Yes | Yes | Yes | Yes |
| Remote Sunroof: Open / Close via App | — | — | No | No | No | No | No | No | No | No | No |
| Instrumentation | |||||||||||
| Door Ajar Warning | No | Yes | Yes | Yes | Yes | Yes | Yes | Yes | Yes | Yes | Yes |
| Gear Indicator | Yes | Yes | No | No | Yes (Digital AMT Gear Position Indicator) | No | No | Yes (Digital AMT Gear Position Indicator) | No | No | Yes (Digital AMT Gear Position Indicator) |
| Shift Indicator | Yes | Yes | Yes (Gear Shift Indicator) | Yes (Gear Shift Indicator) | No (Not Applicable for Automatic / AMT Layout) | Yes (Gear Shift Indicator) | Yes (Gear Shift Indicator) | No (Not Applicable for Automatic / AMT Layout) | Yes (Gear Shift Indicator) | Yes (Gear Shift Indicator) | No (Not Applicable for Automatic / AMT Layout) |
| Clock | Digital | Digital | Yes (Digital) | Yes (Digital) | Yes (Digital) | Yes (Digital) | Yes (Digital) | Yes (Digital) | Yes (Digital) | Yes (Digital) | Yes (Digital) |
| Average Speed | No | Yes | Yes | Yes | Yes | Yes | Yes | Yes | Yes | Yes | Yes |
| Heads Up Display (HUD) | No | No | No | No | No | No | No (Reserved for Alpha variant) | No (Reserved for Alpha variant) | No (Reserved for Alpha variant) | Yes (Pop-Up Type Heads Up Display) | Yes (Pop-Up Type Heads Up Display) |
| Tachometer | Analogue Tachometer | Analogue Tachometer | Yes (Analogue Dial) | Yes (Analogue Dial) | Yes (Analogue Dial) | Yes (Analogue Dial) | Yes (Analogue Dial) | Yes (Analogue Dial) | Yes (Analogue Dial) | Yes (Analogue Dial) | Yes (Analogue Dial) |
| Trip Meter | Electronic Trip Meter (2 Trips) | Electronic Trip Meter (2 Trips) | Yes (Dual Trip Meters) | Yes (Dual Trip Meters) | Yes (Dual Trip Meters) | Yes (Dual Trip Meters) | Yes (Dual Trip Meters) | Yes (Dual Trip Meters) | Yes (Dual Trip Meters) | Yes (Dual Trip Meters) | Yes (Dual Trip Meters) |
| Average Fuel Consumption | — | Yes | Yes | Yes | Yes | Yes (Dual Fuel Consumption tracking for Petrol/CNG modes) | Yes | Yes | Yes (Dual Fuel Consumption tracking for Petrol/CNG modes) | Yes | Yes |
| Low Fuel Level Warning | — | Yes | Yes | Yes | Yes | Yes (Low Fuel Warning for both Petrol & CNG) | Yes | Yes | Yes (Low Fuel Warning for both Petrol & CNG) | Yes | Yes |
| Distance to Empty | — | Yes | Yes | Yes | Yes | Yes (For Petrol mode) | Yes | Yes | Yes (For Petrol mode) | Yes | Yes |
| Instantaneous Consumption | — | — | Yes | Yes | Yes | Yes (For Petrol mode) | Yes | Yes | Yes (For Petrol mode) | Yes | Yes |
| Adjustable Cluster Brightness | — | — | Yes | Yes | Yes | Yes | Yes | Yes | Yes | Yes | Yes |
| Instrument Cluster | — | — | Analogue with Digital MID | Analogue with Digital MID | Analogue with Digital MID | Analogue with Digital MID | Analogue with Digital MID | Analogue with Digital MID | Analogue with Digital MID | Analogue with Digital MID | Analogue with Digital MID |
| Instrument Cluster Screen Type | — | — | Segment-Integrated LCD Screen | Segment-Integrated LCD Screen | Segment-Integrated LCD Screen | Segment-Integrated LCD Screen (With CNG Fuel Gauge) | 4.2-inch Color TFT Multi-Information Display Screen | 4.2-inch Color TFT Multi-Information Display Screen | 4.2-inch Color TFT Multi-Information Display Screen (With CNG Fuel Gauge) | 4.2-inch Color TFT Multi-Information Display Screen | 4.2-inch Color TFT Multi-Information Display Screen |
| Storage | |||||||||||
| Cup Holders | Front Only | Front Only | Yes (Front Tunnel Console) | Yes (Front Tunnel Console) | Yes (Front Tunnel Console) | Yes (Front Tunnel Console) | Yes (Front Tunnel Console) | Yes (Front Tunnel Console) | Yes (Front Tunnel Console) | Yes (Front Tunnel Console) | Yes (Front Tunnel Console) |
| Cooled Glovebox | No | No | No | No | No | No | No | No | No | No | No |
| Sunglass Holder | No | No | No | No | No | No | No | No | No | No | No |
| Driver Armrest Storage | No | Yes | No | No | No | No | Yes (Sliding Front Armrest Storage Box) | Yes (Sliding Front Armrest Storage Box) | Yes (Sliding Front Armrest Storage Box) | Yes (Sliding Front Armrest Storage Box) | Yes (Sliding Front Armrest Storage Box) |
| Cup Holders Position | — | — | Front Central Floor Console Tunnel layout | Front Central Floor Console Tunnel layout | Front Central Floor Console Tunnel layout | Front Central Floor Console Tunnel layout | Front Central Floor Console Tunnel layout | Front Central Floor Console Tunnel layout | Front Central Floor Console Tunnel layout | Front Central Floor Console Tunnel layout | Front Central Floor Console Tunnel layout |
| Comfort & Convenience | |||||||||||
| Cruise Control | No | No | No | No | No | No | No | No | No | Yes | Yes |
| Heater | Yes | Yes | Yes | Yes | Yes | Yes | Yes | Yes | Yes | Yes | Yes |
| Cabin Boot Access | Yes | Yes | Yes (Via folding rear seat layout) | Yes (Via 60:40 folding rear seat layout) | Yes (Via 60:40 folding rear seat layout) | No (Restricted due to factory-fitted CNG tank positioning) | Yes (Via 60:40 folding rear seat layout) | Yes (Via 60:40 folding rear seat layout) | No (Restricted due to factory-fitted CNG tank positioning) | Yes (Via 60:40 folding rear seat layout) | Yes (Via 60:40 folding rear seat layout) |
| Parking Assist | No | — | Rear Parking Sensors Only | Rear Parking Sensors Only | Rear Parking Sensors Only | Rear Parking Sensors Only | Rear Parking Sensors & Rear View Camera | Rear Parking Sensors & Rear View Camera | Rear Parking Sensors & Rear View Camera | 360 View Camera & Rear Parking Sensors | 360 View Camera & Rear Parking Sensors |
| Air Purifier | No | No | No | No | No | No | No | No | No | No | No |
| Keyless Start/ Button Start | No | Yes | No (Standard Key Turn Starter ignition) | No (Standard Key Turn Starter ignition) | No (Standard Key Turn Starter ignition) | No (Standard Key Turn Starter ignition) | Yes (Push Button Start/Stop with Smart Keyless Entry) | Yes (Push Button Start/Stop with Smart Keyless Entry) | Yes (Push Button Start/Stop with Smart Keyless Entry) | Yes (Push Button Start/Stop with Smart Keyless Entry) | Yes (Push Button Start/Stop with Smart Keyless Entry) |
| Air Conditioner | Yes | Yes | Yes (1-Zone Automatic Climate Control Setup) | Yes (1-Zone Automatic Climate Control Setup) | Yes (1-Zone Automatic Climate Control Setup) | Yes (1-Zone Automatic Climate Control Setup) | Yes (1-Zone Automatic Climate Control Setup) | Yes (1-Zone Automatic Climate Control Setup) | Yes (1-Zone Automatic Climate Control Setup) | Yes (1-Zone Automatic Climate Control Setup) | Yes (1-Zone Automatic Climate Control Setup) |
| Headlight and Ignition on Reminder | Yes | Yes | Yes | Yes | Yes | Yes | Yes | Yes | Yes | Yes | Yes |
| Steering Adjustment | Tilt | Tilt & Telescopic Steering Adjustment | Yes (Tilt Adjustable Steering Wheel) | Yes (Tilt Adjustable Steering Wheel) | Yes (Tilt Adjustable Steering Wheel) | Yes (Tilt Adjustable Steering Wheel) | Yes (Tilt & Telescopic Adjustable Steering Wheel) | Yes (Tilt & Telescopic Adjustable Steering Wheel) | Yes (Tilt & Telescopic Adjustable Steering Wheel) | Yes (Tilt & Telescopic Adjustable Steering Wheel) | Yes (Tilt & Telescopic Adjustable Steering Wheel) |
| Parking Sensors | Rear | Rear | Yes (Reverse Parking Sensors with Acoustic Warning Display) | Yes (Reverse Parking Sensors with Acoustic Warning Display) | Yes (Reverse Parking Sensors with Acoustic Warning Display) | Yes (Reverse Parking Sensors with Acoustic Warning Display) | Yes (Reverse Parking Sensors with Acoustic Warning Display) | Yes (Reverse Parking Sensors with Acoustic Warning Display) | Yes (Reverse Parking Sensors with Acoustic Warning Display) | Yes (Reverse Parking Sensors with 360 View Feed) | Yes (Reverse Parking Sensors with 360 View Feed) |
| Rear AC | — | — | No (Standard base model configuration drops rear vents) | No (Rear AC vents limited to Zeta & Alpha trims) | No (Rear AC vents limited to Zeta & Alpha trims) | No (Rear AC vents limited to Zeta & Alpha trims) | Yes (Rear AC Vents on Center Console) | Yes (Rear AC Vents on Center Console) | Yes (Rear AC Vents on Center Console) | Yes (Rear AC Vents on Center Console with USB Ports) | Yes (Rear AC Vents on Center Console with USB Ports) |
| Air Conditioner- Automatic/Zones | — | — | Yes (1-Zone Automatic Climate Control Setup from Base Trim) | Yes (1-Zone Automatic Climate Control Setup) | Yes (1-Zone Automatic Climate Control Setup) | Yes (1-Zone Automatic Climate Control Setup) | Yes (1-Zone Automatic Climate Control Setup) | Yes (1-Zone Automatic Climate Control Setup) | Yes (1-Zone Automatic Climate Control Setup) | Yes (1-Zone Automatic Climate Control Setup) | Yes (1-Zone Automatic Climate Control Setup) |
| Electronic Parking Brake | — | — | No (Mechanical Lever Parking Brake) | No (Mechanical Lever Parking Brake) | No (Mechanical Lever Parking Brake) | No (Mechanical Lever Parking Brake) | No (Mechanical Lever Parking Brake) | No (Mechanical Lever Parking Brake) | No (Mechanical Lever Parking Brake) | No (Mechanical Lever Parking Brake) | No (Mechanical Lever Parking Brake) |
| Third Row AC Zone | — | — | Not Applicable | Not Applicable | Not Applicable | Not Applicable | Not Applicable | Not Applicable | Not Applicable | Not Applicable | Not Applicable |
| Vanity Mirrors on Sun Visors | — | — | No | No | No | No | Yes (With Passenger Side Mirror) | Yes (With Passenger Side Mirror) | Yes (With Passenger Side Mirror) | Yes (With Illuminated Driver & Passenger Side Mirrors) | Yes (With Illuminated Driver & Passenger Side Mirrors) |
| 12V Power Outlets | — | — | Yes (Front Center Console Tunnel Outlet) | Yes (Front Center Console Tunnel Outlet) | Yes (Front Center Console Tunnel Outlet) | Yes (Front Center Console Tunnel Outlet) | Yes (Front Center Console Tunnel Outlet) | Yes (Front Center Console Tunnel Outlet) | Yes (Front Center Console Tunnel Outlet) | Yes (Front Center Console Tunnel Outlet) | Yes (Front Center Console Tunnel Outlet) |
| Anti-glare Mirrors | — | — | Yes (Manual Day/Night Adjustable IRVM) | Yes (Manual Day/Night Adjustable IRVM) | Yes (Manual Day/Night Adjustable IRVM) | Yes (Manual Day/Night Adjustable IRVM) | Yes (Auto-Dimming Electronic Internal IRVM) | Yes (Auto-Dimming Electronic Internal IRVM) | Yes (Auto-Dimming Electronic Internal IRVM) | Yes (Auto-Dimming Electronic Internal IRVM) | Yes (Auto-Dimming Electronic Internal IRVM) |
| Front AC | — | — | Yes | Yes | Yes | Yes | Yes | Yes | Yes | Yes | Yes |
| Umbrella Storage in Door | — | — | No | No | No | No | No | No | No | No | No |
| Lighting | |||||||||||
| Automatic Headlamps | No | Yes | No | No | No | No | Yes (Dusk-Sensing Automatic Headlamps) | Yes (Dusk-Sensing Automatic Headlamps) | Yes (Dusk-Sensing Automatic Headlamps) | Yes (Dusk-Sensing Automatic Headlamps) | Yes (Dusk-Sensing Automatic Headlamps) |
| Taillights | LED Taillights | LED Taillights | LED Combination Taillights Layout | LED Combination Taillights Layout | LED Combination Taillights Layout | LED Combination Taillights Layout | LED Combination Taillights Layout | LED Combination Taillights Layout | LED Combination Taillights Layout | LED Combination Taillights Layout | LED Combination Taillights Layout |
| Fog Lights | No | No | No | No | No | No | No (Reserved for Alpha variant) | No (Reserved for Alpha variant) | No (Reserved for Alpha variant) | Yes (Front LED Fog Lamps fitted) | Yes (Front LED Fog Lamps fitted) |
| Daytime Running Lights | No | No | No | No | No | No | No (Reserved for Alpha variant) | No (Reserved for Alpha variant) | No (Reserved for Alpha variant) | Yes (Signature LED Daytime Running Lights) | Yes (Signature LED Daytime Running Lights) |
| Follow Me Home Headlamps | No | Yes | No | No | No | No | Yes | Yes | Yes | Yes | Yes |
| Puddle Lamps | No | No | No | No | No | No | No | No | No | No | No |
| Ambient Interior Lighting | No | No | No | No | No | No | No (Footwell illumination only, full ambient pattern drops on Zeta) | No (Footwell illumination only, full ambient pattern drops on Zeta) | No (Footwell illumination only, full ambient pattern drops on Zeta) | Yes (Multi-Colour Ambient Lighting / Footwell & Door Pads) | Yes (Multi-Colour Ambient Lighting / Footwell & Door Pads) |
| Headlights | Halogen Headlights | LED Projector Headlights | Projector Headlamps Setup (Halogen) | Projector Headlamps Setup (Halogen) | Projector Headlamps Setup (Halogen) | Projector Headlamps Setup (Halogen) | LED Projector Headlamps Setup | LED Projector Headlamps Setup | LED Projector Headlamps Setup | LED Projector Headlamps Setup | LED Projector Headlamps Setup |
| Cornering Headlights | No | No | No | No | No | No | No | No | No | No | No |
| Reading Lamp | — | Yes | Yes (Front Row Map Reading Light) | Yes (Front Row Map Reading Light) | Yes (Front Row Map Reading Light) | Yes (Front Row Map Reading Light) | Yes (Front & Rear Reading Lights) | Yes (Front & Rear Reading Lights) | Yes (Front & Rear Reading Lights) | Yes (Front & Rear Reading Lights) | Yes (Front & Rear Reading Lights) |
| Glovebox Lamp | — | — | No | No | No | No | No | No | No | No | No |
| Rear Reading Lamp | — | — | No | No | No | No | Yes | Yes | Yes | No | No |
| Cabin Lamps | — | — | Yes | Yes | Yes | Yes | Yes | Yes | Yes | Yes | Yes |
| Cabin Lamps Position | — | — | Front Overhead Position | Front Overhead Position | Front Overhead Position | Front Overhead Position | Front Overhead & Rear Cabin Positions | Front Overhead & Rear Cabin Positions | Front Overhead & Rear Cabin Positions | Front Overhead & Rear Cabin Positions | Front Overhead & Rear Cabin Positions |
| Light on Vanity Mirrors | — | — | No | No | No | No | Yes (Illuminated Passenger Side Vanity Mirror) | Yes (Illuminated Passenger Side Vanity Mirror) | Yes (Illuminated Passenger Side Vanity Mirror) | Yes (Illuminated Driver & Passenger Side Vanity Mirrors) | Yes (Illuminated Driver & Passenger Side Vanity Mirrors) |
| Braking & Traction | |||||||||||
| Hill Descent Control | No | No | No | No | No | No | No | No | No | No | No |
| Anti-Lock Braking System (ABS) | Yes | Yes | Yes (4-Channel ABS Integration) | Yes (4-Channel ABS Integration) | Yes (4-Channel ABS Integration) | Yes (4-Channel ABS Integration) | Yes (4-Channel ABS Integration) | Yes (4-Channel ABS Integration) | Yes (4-Channel ABS Integration) | Yes (4-Channel ABS Integration) | Yes (4-Channel ABS Integration) |
| Brake Assist (BA) | Yes | Yes | Yes | Yes | Yes | Yes | Yes | Yes | Yes | Yes | Yes |
| Hill Hold Control | Yes | Yes | Yes | Yes | Yes (Standard on Delta AMT Variant) | Yes | Yes | Yes (Standard on Zeta AMT Variant) | Yes | Yes | Yes (Standard on Alpha AMT Variant) |
| Electronic Brake-force Distribution (EBD) | Yes | Yes | Yes | Yes | Yes | Yes | Yes | Yes | Yes | Yes | Yes |
| Electronic Stability Program (ESP) | Yes | Yes | Yes (Electronic Stability Program Standard) | Yes (Electronic Stability Program Standard) | Yes (Electronic Stability Program Standard) | Yes (Electronic Stability Program Standard) | Yes (Electronic Stability Program Standard) | Yes (Electronic Stability Program Standard) | Yes (Electronic Stability Program Standard) | Yes (Electronic Stability Program Standard) | Yes (Electronic Stability Program Standard) |
| Differential Lock | — | — | No | No | No | No | No | No | No | No | No |
| Ride Height Adjustment | — | — | No | No | No | No | No | No | No | No | No |
| Manufacturer Warranty | |||||||||||
| Battery Warranty (In Kilometres) | — | — | Standard Lead-Acid Battery Baseline Cover | Standard Lead-Acid Battery Baseline Cover | Standard Lead-Acid Battery Baseline Cover | Standard Lead-Acid Battery Baseline Cover | Standard Lead-Acid Battery Baseline Cover | Standard Lead-Acid Battery Baseline Cover | Standard Lead-Acid Battery Baseline Cover | Standard Lead-Acid Battery Baseline Cover | Standard Lead-Acid Battery Baseline Cover |
| Warranty (In Years) | — | — | 3 Years (Standard Maruti Suzuki Cover) | 3 Years (Standard Maruti Suzuki Cover) | 3 Years (Standard Maruti Suzuki Cover) | 3 Years (Standard Maruti Suzuki Cover) | 3 Years (Standard Maruti Suzuki Cover) | 3 Years (Standard Maruti Suzuki Cover) | 3 Years (Standard Maruti Suzuki Cover) | 3 Years (Standard Maruti Suzuki Cover) | 3 Years (Standard Maruti Suzuki Cover) |
| Battery Warranty (In Years) | — | — | 1 Year | 1 Year | 1 Year | 1 Year | 1 Year | 1 Year | 1 Year | 1 Year | 1 Year |
| Warranty (In Kilometres) | — | — | 1,00,000 km | 1,00,000 km | 1,00,000 km | 1,00,000 km | 1,00,000 km | 1,00,000 km | 1,00,000 km | 1,00,000 km | 1,00,000 km |
Recently Asked Questions on Maruti Suzuki Baleno
How much does the Maruti Suzuki Baleno cost?
The Maruti Suzuki Baleno starts at ₹6.66 L and goes up to ₹9.88 L, ex-showroom. The exact price depends on the variant you choose. On-road price varies by city — use the Get On Road Price button for an exact quote.
Which engines come with the Maruti Suzuki Baleno?
The Maruti Suzuki Baleno is offered with CNG, Petrol and CNG & Petrol engine options.
What mileage does the Maruti Suzuki Baleno give?
The claimed mileage of the Maruti Suzuki Baleno is CNG: CNG: 30.61 km/Kg | User Reported: 22.5 km/Kg, CNG: 30.61 km/Kg | User Reported: 25.5 km/Kg; Petrol: 22.35 kmpl, 22.94 kmpl; CNG & Petrol: 30.61 km/kg (CNG) / 22.35 kmpl (Petrol). It changes with the engine, gearbox and variant.
How many seats are there in the Maruti Suzuki Baleno?
All Maruti Suzuki Baleno variants are 5-seater.
Is there 4WD in the Maruti Suzuki Baleno?
No. The Maruti Suzuki Baleno is not offered with 4WD. It comes with FWD (Front-Wheel Drive) and Front Wheel Drive (FWD).
Maruti Suzuki
Baleno
Model price range
₹6.66 L - ₹9.88 L
Choose a variant to open its dedicated detail page.
Select a variant first to calculate EMI using that variant's price.
Maruti Suzuki Baleno Summary
- Variants 11 options
- Price Range ₹6.66 L - ₹9.88 L
- Variant Pages Available
Starting at
₹6.66 L