
Car
Land Rover Defender
Model overview, prices and all available variants
Ex-showroom price range
₹1.07 Crore - ₹2.62 Crore
12 variants available
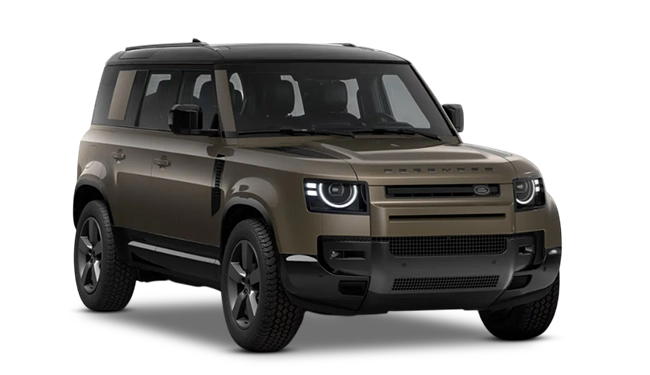
Representative model image from
110 X Dynamic HSE Petrol 2.0L Turbo Automatic 5 STR.
The Land Rover Defender is one of 12 available Land Rover Defender variants. Its ex-showroom price is On request. See the specifications and features below for this exact variant.
Land Rover Defender Specifications
- Engine
- It runs on a 998 cc K-Series petrol engine . Small specification differences can show up based on the fuel setup.
- Performance
- In the petrol variant, it can deliver up to 68 bhp and 91.1 Nm of torque.
- Gearbox
- There is a 5-speed manual option. Some variants come with a 5-speed AMT or AGS automatic.
- Fuel Types
- You can choose Petrol or CNG depending on the variant.
- Space and Size
- This is a 5-seat, 5-door hatchback . Length is 3,530 mm, width is 1,490 mm, and height is 1,520 mm.
- Features
- Features depend on the variant. Some versions may include central locking, an engine immobiliser, child safety locks, body-coloured bumpers, steel wheels, and other comfort items.
This is the common model page.
No variant is selected here. Each variant below has its own separate URL and detail page.
All Variants & Price (12)
| Variant | Fuel | Transmission | Price * | |
|---|---|---|---|---|
| 110 X Dynamic HSE Petrol 2.0L Turbo Automatic 5 STR | Petrol | 8-speed Automatic (ZF) | ₹1.07 Crore | View Details |
| 110 X Dynamic HSE Diesel 3.0L Turbo Automatic 5 STR | Diesel | 8-speed Automatic (ZF) | ₹1.25 Crore | View Details |
| 110 Diesel 3.0L Turbo Automatic 5 STR Trophy Edition Keswick | Diesel | 8-speed Automatic (ZF) | ₹1.19 Crore | View Details |
| 110 Diesel 3.0L Turbo Automatic 5 STR Trophy Edition | Diesel | 8-speed Automatic (ZF) | ₹1.19 Crore | View Details |
| 110 X Diesel 3.0L Turbo Automatic 5 STR | Diesel | 8-speed Automatic (ZF) | ₹1.35 Crore | View Details |
| 90 X Petrol 5.0L Turbo Automatic 5 STR | Petrol | 8-speed Automatic (ZF) | ₹1.61 Crore | View Details |
| 130 X Dynamic HSE Mild Hybrid (Electric + Diesel) 3.0L Turbo Automatic 8 STR | Mild Hybrid (Electric + Diesel) | 8-speed Automatic (ZF) | ₹1.46 Crore | View Details |
| 110 X Petrol 5.0L Turbo Automatic 5 STR | Petrol | 8-speed Automatic (ZF) | ₹1.67 Crore | View Details |
| 130 X Dynamic V8 HSE Petrol 5.0L Turbo Automatic 8 STR | Petrol | 8-speed Automatic (ZF) | ₹1.54 Crore | View Details |
| 130 X V8 Petrol 5.0L Turbo Automatic 8 STR | Petrol | 8-speed Automatic (ZF) | ₹1.63 Crore | View Details |
| Octa Mild Hybrid(Electric + Petrol) 4.4L Turbo Automatic 5 STR | Mild Hybrid (Electric + Petrol) | 8-speed Automatic (ZF) with Manual Shift Control | ₹2.42 Crore | View Details |
| Octa Black Mild Hybrid(Electric + Petrol) 4.4L Turbo Automatic 5 STR | Mild Hybrid (Electric + Petrol) | 8-speed Automatic (ZF) with Manual Shift Control | ₹2.62 Crore | View Details |
| Specification | 110 X Dynamic HSE Petrol 2.0L Turbo Automatic 5 STR | 110 X Dynamic HSE Diesel 3.0L Turbo Automatic 5 STR | 110 Diesel 3.0L Turbo Automatic 5 STR Trophy Edition Keswick | 110 Diesel 3.0L Turbo Automatic 5 STR Trophy Edition | 110 X Diesel 3.0L Turbo Automatic 5 STR | 90 X Petrol 5.0L Turbo Automatic 5 STR | 130 X Dynamic HSE Mild Hybrid (Electric + Diesel) 3.0L Turbo Automatic 8 STR | 110 X Petrol 5.0L Turbo Automatic 5 STR | 130 X Dynamic V8 HSE Petrol 5.0L Turbo Automatic 8 STR | 130 X V8 Petrol 5.0L Turbo Automatic 8 STR | Octa Mild Hybrid(Electric + Petrol) 4.4L Turbo Automatic 5 STR | Octa Black Mild Hybrid(Electric + Petrol) 4.4L Turbo Automatic 5 STR |
|---|---|---|---|---|---|---|---|---|---|---|---|---|
| Engine & Transmission | ||||||||||||
| Engine | 2.0L P300 Ingenium I4 | 3.0L D300 Ingenium I6 MHEV | 3.0L D300 Ingenium I6 MHEV | 3.0L D300 Ingenium I6 MHEV | 3.0L D300 Ingenium I6 MHEV | 5.0L P525 Supercharged V8 | 2997 cc, 6 Cylinders Inline | 5.0L P525 Supercharged V8 | 4999 cc, 8 Cylinders V-Shaped | 4999 cc, 8 Cylinders V-Shaped | 4395 cc, 8 Cylinders V-Shaped | 4395 cc, 8 Cylinders V-Shaped |
| Engine Type | 2.0-Litre Inline 4-Cylinder Turbocharged Petrol Engine | 3.0-Litre Inline 6-Cylinder Turbocharged Diesel Engine | 3.0-Litre Inline 6-Cylinder Turbocharged Diesel Engine | 3.0-Litre Inline 6-Cylinder Turbocharged Diesel Engine | 3.0-Litre Inline 6-Cylinder Turbocharged Diesel Engine | 5.0-Litre V8 Supercharged Petrol Engine | 3.0L D300 Ingenium Turbocharged I6 MHEV | 5.0-Litre V8 Supercharged Petrol Engine | 5.0L P525 Supercharged V8 Petrol Engine | 5.0L P525 Supercharged V8 Petrol Engine | 4.4L Twin-Turbocharged V8 BMW M-Sourced Engine (S63) | 4.4L Twin-Turbocharged V8 BMW M-Sourced Engine (S63) |
| Fuel Type | Petrol | Diesel | Diesel | Diesel | Diesel | Petrol | Mild Hybrid (Electric + Diesel) | Petrol | Petrol | Petrol | Mild Hybrid (Electric + Petrol) | Mild Hybrid (Electric + Petrol) |
| Acceleration (0-100 kmph) | 7.4 seconds | 7.0 seconds | 7.0 seconds | 7.0 seconds | 7.0 seconds | 5.2 seconds | 7.5 seconds | 5.4 seconds | 5.7 seconds | 5.7 seconds | 4.0 seconds | 4.0 seconds |
| Alternate Fuel | Not Applicable | Not Applicable | Not Applicable | Not Applicable | Not Applicable | Not Applicable | Not Applicable | Not Applicable | Not Applicable | Not Applicable | Not Applicable | Not Applicable |
| Mileage (ARAI) | 9.2 kmpl | 11.5 kmpl | 11.5 kmpl | 11.5 kmpl | 11.5 kmpl | 7.6 kmpl | 11.2 kmpl | 6.8 kmpl | 6.4 kmpl | 6.4 kmpl | 7.2 kmpl | 7.2 kmpl |
| City Mileage | 6.8 kmpl | 9.1 kmpl | 9.1 kmpl | 9.1 kmpl | 9.1 kmpl | 5.5 kmpl | 8.8 kmpl | 5.1 kmpl | 4.8 kmpl | 4.8 kmpl | 5.4 kmpl | 5.4 kmpl |
| Max Torque | 400 Nm @ 1500-4000 rpm | 650 Nm @ 1500-2500 rpm | 650 Nm @ 1500-2500 rpm | 650 Nm @ 1500-2500 rpm | 650 Nm @ 1500-2500 rpm | 625 Nm @ 2500-5500 rpm | 650 Nm @ 1500-2500 rpm | 625 Nm @ 2500-5500 rpm | 625 Nm @ 2500-5500 rpm | 625 Nm @ 2500-5500 rpm | 750 Nm @ 1800-5855 rpm (Up to 800 Nm in Octa Mode) | 750 Nm @ 1800-5855 rpm (Up to 800 Nm in Octa Mode) |
| Max Motor Performance | Not Applicable | Not Applicable | Not Applicable | Not Applicable | Not Applicable | Not Applicable | Not Applicable | Not Applicable | Not Applicable | Not Applicable | Not Applicable | Not Applicable |
| Emission Standard | BS VI Phase 2 / Euro 6d-Final | BS VI Phase 2 / Euro 6d-Final | BS VI Phase 2 / Euro 6d-Final | BS VI Phase 2 / Euro 6d-Final | BS VI Phase 2 / Euro 6d-Final | BS VI Phase 2 / Euro 6d-Final | BS VI Phase 2 / Euro 6d-Final | BS VI Phase 2 / Euro 6d-Final | BS VI Phase 2 / Euro 6d-Final | BS VI Phase 2 / Euro 6d-Final | BS VI Phase 2 / Euro 6d-Final | BS VI Phase 2 / Euro 6d-Final |
| Turbocharger / Supercharger | Twin-scroll Turbocharger | Twin-scroll Turbocharger | Twin-scroll Turbocharger | Twin-scroll Turbocharger | Twin-scroll Turbocharger | Roots-type Twin-Vortex Supercharger | Twin-scroll Turbocharger | Roots-type Twin-Vortex Supercharger | Roots-type Twin-Vortex Supercharger | Roots-type Twin-Vortex Supercharger | Twin-Turbocharger | Twin-Turbocharger |
| Battery | 12V Heavy Duty Starter Battery | 48V Lithium-ion Battery Pack (MHEV System) | 48V Lithium-ion Battery Pack (MHEV System) | 48V Lithium-ion Battery Pack (MHEV System) | 48V Lithium-ion Battery Pack (MHEV System) | 12V Heavy Duty Starter Battery | 48V Lithium-ion Battery pack | 12V Heavy Duty Starter Battery | 12V Heavy Duty Starter Battery | 12V Heavy Duty Starter Battery | 48V Lithium-ion Battery pack (MHEV Pack) | 48V Lithium-ion Battery pack (MHEV Pack) |
| Top Speed | 191 kmph | 191 kmph | 191 kmph | 191 kmph | 191 kmph | 240 kmph | 191 kmph | 240 kmph | 240 kmph | 240 kmph | 250 kmph (Electronically Limited) / 210 kmph with All-Terrain Tyres | 250 kmph (Electronically Limited) / 210 kmph with All-Terrain Tyres |
| Highway Mileage | 11.5 kmpl | 13.8 kmpl | 13.8 kmpl | 13.8 kmpl | 13.8 kmpl | 9.8 kmpl | 13.2 kmpl | 8.9 kmpl | 8.2 kmpl | 8.2 kmpl | 9.5 kmpl | 9.5 kmpl |
| Battery Charging | Not Applicable | Regenerative Braking (48V MHEV Battery Self-Charges) | Regenerative Braking (48V MHEV Battery Self-Charges) | Regenerative Braking (48V MHEV Battery Self-Charges) | Regenerative Braking (48V MHEV Battery Self-Charges) | Not Applicable | Regenerative Braking via BiSG | Not Applicable | Not Applicable | Not Applicable | Regenerative Braking via BiSG (Self-Charging Pack) | Regenerative Braking via BiSG (Self-Charging Pack) |
| Drivetrain | All-Wheel Drive (AWD) with Twin-Speed Transfer Box | All-Wheel Drive (AWD) with Twin-Speed Transfer Box | All-Wheel Drive (AWD) with Twin-Speed Transfer Box | All-Wheel Drive (AWD) with Twin-Speed Transfer Box | All-Wheel Drive (AWD) with Twin-Speed Transfer Box | All-Wheel Drive (AWD) with Electronic Active Rear Differential | All-Wheel Drive (AWD) with Twin-Speed Transfer Box | All-Wheel Drive (AWD) with Electronic Active Rear Differential | All-Wheel Drive (AWD) with Electronic Active Rear Differential | All-Wheel Drive (AWD) with Electronic Active Rear Differential | All-Wheel Drive (AWD) with Electronic Active Rear Locking Differential | All-Wheel Drive (AWD) with Electronic Active Rear Locking Differential |
| Performance on Alternate Fuel | Not Applicable | Not Applicable | Not Applicable | Not Applicable | Not Applicable | Not Applicable | Not Applicable | Not Applicable | Not Applicable | Not Applicable | Not Applicable | Not Applicable |
| Electric Motor Assist | No (Pure Internal Combustion Engine) | Mild Hybrid Electric Vehicle (MHEV) Bi-directional Starter Generator | Mild Hybrid Electric Vehicle (MHEV) Bi-directional Starter Generator | Mild Hybrid Electric Vehicle (MHEV) Bi-directional Starter Generator | Mild Hybrid Electric Vehicle (MHEV) Bi-directional Starter Generator | No (Pure Internal Combustion Engine) | Yes (Torque assist and energy recuperation) | No (Pure Internal Combustion Engine) | No (Pure Internal Combustion Engine) | No (Pure Internal Combustion Engine) | Yes (Torque assist and energy recuperation) | Yes (Torque assist and energy recuperation) |
| Max Power (bhp@rpm) | 296 bhp (300 PS) @ 5500 rpm | 296 bhp (300 PS) @ 4000 rpm | 296 bhp (300 PS) @ 4000 rpm | 296 bhp (300 PS) @ 4000 rpm | 296 bhp (300 PS) @ 4000 rpm | 518 bhp (525 PS) @ 6000 rpm | 296 bhp @ 4000 rpm | 518 bhp (525 PS) @ 6000 rpm | 518 bhp (525 PS) @ 6000 rpm | 518 bhp (525 PS) @ 6000 rpm | 626 bhp (635 PS) @ 5855-7000 rpm | 626 bhp (635 PS) @ 5855-7000 rpm |
| Range | Not Applicable | Not Applicable | Not Applicable | Not Applicable | Not Applicable | Not Applicable | Not Applicable | Not Applicable | Not Applicable | Not Applicable | Not Applicable | Not Applicable |
| Driving Range | Not Applicable | Not Applicable | Not Applicable | Not Applicable | Not Applicable | Not Applicable | Not Applicable | Not Applicable | Not Applicable | Not Applicable | Not Applicable | Not Applicable |
| Others | Terrain Response, Matrix LED Headlights, ClearSight Interior Rear View Mirror | Terrain Response, Matrix LED Headlights, ClearSight Interior Rear View Mirror | Custom Keswick Green Heritage Wrap, Expedition Roof Rack, Deployable Roof Ladder, Front Winch | Special Edition Eastnor Yellow Vehicle Wrap, Expedition Roof Rack, Front Undershield, Integrated Air Compressor | Electronic Active Differential with Torque Vectoring, Configurable Terrain Response 2, Starlight Satin Finish, Head-Up Display | Quad Exhaust Outlets, V8 Bespoke Dynamic Tuning, Terrain Response 2 with Dynamic Program | 3-Zone Climate Control, Meridian Sound System, Configurable Terrain Response 2, Panoramic Sunroof with 3rd-row Glass | Quad Exhaust Outlets, V8 Bespoke Dynamic Tuning, Terrain Response 2 with Dynamic Program | Quad Exhaust Outlets, V8 Bespoke Dynamic Air Suspension Tuning, Terrain Response 2 with Dynamic Program, 4-Zone Climate Control | Quad Exhaust Outlets, V8 Bespoke Dynamic Air Suspension Tuning, Terrain Response 2 with Dynamic Program, 4-Zone Climate Control | 6D Dynamics Interlinked Suspension, Brembo 400mm 6-piston front brakes, Octa Dynamic Mode, 1-metre Wading Capability | Bespoke Gloss Black Exterior Pack, 6D Dynamics Suspension, Brembo 400mm 6-piston front brakes, Octa Dynamic Mode, 1-metre Wading Capability |
| Electric Motor | Not Applicable | 48V Belt-integrated Starter Generator (BiSG) | 48V Belt-integrated Starter Generator (BiSG) | 48V Belt-integrated Starter Generator (BiSG) | 48V Belt-integrated Starter Generator (BiSG) | Not Applicable | 48V Belt-integrated Starter Generator (BiSG) | Not Applicable | Not Applicable | Not Applicable | 48V Belt-integrated Starter Generator (BiSG) | 48V Belt-integrated Starter Generator (BiSG) |
| Max Engine Torque (Nm@rpm) | 400 Nm @ 1500 rpm | 650 Nm @ 1500 rpm | 650 Nm @ 1500 rpm | 650 Nm @ 1500 rpm | 650 Nm @ 1500 rpm | 625 Nm @ 2500 rpm | 650 Nm @ 1500 rpm | 625 Nm @ 2500 rpm | 625 Nm @ 2500 rpm | 625 Nm @ 2500 rpm | 750 Nm @ 1800 rpm | 750 Nm @ 1800 rpm |
| Pure Electric Driving Mode | No | No | No | No | No | No | No | No | No | No | No | No |
| Transmission | 8-speed Automatic (ZF) | 8-speed Automatic (ZF) | 8-speed Automatic (ZF) | 8-speed Automatic (ZF) | 8-speed Automatic (ZF) | 8-speed Automatic (ZF) | 8-speed Automatic (ZF) | 8-speed Automatic (ZF) | 8-speed Automatic (ZF) | 8-speed Automatic (ZF) | 8-speed Automatic (ZF) with Manual Shift Control | 8-speed Automatic (ZF) with Manual Shift Control |
| E20 Compatibility | Compatible | Not Applicable | Not Applicable | Not Applicable | Not Applicable | Compatible | Not Applicable | Compatible | Compatible | Compatible | Yes (E20 Compliant) | Yes (E20 Compliant) |
| Direct Start in CNG | Not Applicable | Not Applicable | Not Applicable | Not Applicable | Not Applicable | Not Applicable | Not Applicable | Not Applicable | Not Applicable | Not Applicable | Not Applicable | Not Applicable |
| Fuel Change Over Switch | Not Applicable | Not Applicable | Not Applicable | Not Applicable | Not Applicable | Not Applicable | Not Applicable | Not Applicable | Not Applicable | Not Applicable | Not Applicable | Not Applicable |
| Suspensions, Brakes, Steering & Tyres | ||||||||||||
| Spare Wheel | Full Size Matching Spare Wheel (Tailgate Mounted) | Full Size Matching Spare Wheel (Tailgate Mounted) | Full Size Matching Spare Wheel (Tailgate Mounted) | Full Size Matching Spare Wheel (Tailgate Mounted) | Full Size Matching Spare Wheel (Tailgate Mounted) | Full Size Matching Spare Wheel (Tailgate Mounted) | Full Size Matching Spare Wheel (Tailgate Mounted) | Full Size Matching Spare Wheel (Tailgate Mounted) | Full Size Matching Spare Wheel (Tailgate Mounted) | Full Size Matching Spare Wheel (Tailgate Mounted) | Full Size Matching Spare Wheel (Tailgate Mounted) | Full Size Matching Spare Wheel (Tailgate Mounted) |
| Wheels | 20-inch Style 5098, 5 Spoke Satin Dark Grey Alloy Wheels | 20-inch Style 5098, 5 Spoke Satin Dark Grey Alloy Wheels | 18-inch White Gloss Steel Wheels (Heritage Style) | 20-inch 5-Spoke Gloss Black Alloy Wheels | 20-inch Style 5095, 5 Split-Spoke Gloss Dark Grey Alloys with Contrast Diamond Turned Finish | 22-inch Style 5098, 5 Spoke Satin Dark Grey Alloy Wheels | 20-inch Style 5098, 5 Spoke Satin Dark Grey Alloy Wheels | 22-inch Style 5098, 5 Spoke Satin Dark Grey Alloy Wheels | 22-inch Style 5098, 5 Spoke Satin Dark Grey Alloy Wheels | 22-inch Style 5098, 5 Spoke Satin Dark Grey Alloy Wheels | 22-inch Light-Alloy Wheels (Optional 20-inch Forged Alloys with Advanced All-Terrain Tyres) | 22-inch Gloss Black Alloy Wheels (Optional 20-inch Forged Alloys with Advanced All-Terrain Tyres) |
| Steering Type | Electric Power Assisted Steering (EPAS) | Electric Power Assisted Steering (EPAS) | Electric Power Assisted Steering (EPAS) | Electric Power Assisted Steering (EPAS) | Electric Power Assisted Steering (EPAS) | Electric Power Assisted Steering (EPAS) | Electric Power Assisted Steering (EPAS) | Electric Power Assisted Steering (EPAS) | Electric Power Assisted Steering (EPAS) | Electric Power Assisted Steering (EPAS) | Electric Power Assisted Steering (EPAS) with Reworked Quick-Ratio Rack | Electric Power Assisted Steering (EPAS) with Reworked Quick-Ratio Rack |
| Front Suspension | Double Wishbone Architecture with Electronic Air Suspension | Double Wishbone Architecture with Electronic Air Suspension | Double Wishbone Architecture with Electronic Air Suspension | Double Wishbone Architecture with Electronic Air Suspension | Double Wishbone Architecture with Electronic Air Suspension | Double Wishbone Architecture with Electronic Air Suspension and Stiffer Anti-Roll Bars | Double Wishbone Architecture with Electronic Air Suspension | Double Wishbone Architecture with Electronic Air Suspension and Stiffer Anti-Roll Bars | Double Wishbone Architecture with Electronic Air Suspension and Stiffer Anti-Roll Bars | Double Wishbone Architecture with Electronic Air Suspension and Stiffer Anti-Roll Bars | 6D Dynamics Hydraulic Interlinked System with Aluminium Wishbones | 6D Dynamics Hydraulic Interlinked System with Aluminium Wishbones |
| Rear Brake Type | Ventilated Discs | Ventilated Discs | Ventilated Discs | Ventilated Discs | Ventilated Discs | Ventilated Discs | Ventilated Discs | Ventilated Discs | Ventilated Discs | Ventilated Discs | Ventilated Discs | Ventilated Discs |
| Tyre Construction | Radial, Tubeless (All-Terrain) | Radial, Tubeless (All-Terrain) | Radial, Tubeless (Heavy-Duty All-Terrain) | Radial, Tubeless (All-Terrain) | Radial, Tubeless (All-Terrain) | Radial, Tubeless (High Performance All-Terrain) | Radial, Tubeless (All-Terrain) | Radial, Tubeless (High Performance All-Terrain) | Radial, Tubeless (High Performance All-Terrain) | Radial, Tubeless (High Performance All-Terrain) | Radial, Tubeless (High Performance All-Season / All-Terrain option) | Radial, Tubeless (High Performance All-Season / All-Terrain option) |
| Front Tyres | 255/60 R20 | 255/60 R20 | 255/70 R18 | 255/60 R20 | 255/60 R20 | 275/45 R22 | 255/60 R20 | 275/45 R22 | 275/45 R22 | 275/45 R22 | 275/50 R22 | 275/50 R22 |
| Minimum Turning Radius(m) | 6.42 m | 6.42 m | 6.42 m | 6.42 m | 6.42 m | 5.65 m | 6.42 m | 6.42 m | 6.42 m | 6.42 m | 6.42 m | 6.42 m |
| Rear Suspension | Multi-link Architecture with Electronic Air Suspension and Adaptive Dynamics | Multi-link Architecture with Electronic Air Suspension and Adaptive Dynamics | Multi-link Architecture with Electronic Air Suspension and Adaptive Dynamics | Multi-link Architecture with Electronic Air Suspension and Adaptive Dynamics | Multi-link Architecture with Electronic Air Suspension and Adaptive Dynamics | Multi-link Architecture with Electronic Air Suspension, Active Dampers and Continuously Variable Damping | Multi-link Architecture with Electronic Air Suspension and Adaptive Dynamics | Multi-link Architecture with Electronic Air Suspension, Active Dampers and Continuously Variable Damping | Multi-link Architecture with Electronic Air Suspension, Active Dampers and Continuously Variable Damping | Multi-link Architecture with Electronic Air Suspension, Active Dampers and Continuously Variable Damping | 6D Dynamics Hydraulic Interlinked System with Active Pitch and Roll Dampers | 6D Dynamics Hydraulic Interlinked System with Active Pitch and Roll Dampers |
| Front Brake Type | Ventilated Discs | Ventilated Discs | Ventilated Discs | Ventilated Discs | Ventilated Discs (Orange Brake Calipers) | Ventilated Discs (Brembo 20-inch Xenon Blue Calipers) | Ventilated Discs | Ventilated Discs (Brembo 20-inch Xenon Blue Calipers) | Ventilated Discs (Brembo 20-inch Xenon Blue Calipers) | Ventilated Discs (Brembo 20-inch Xenon Blue Calipers) | Ventilated Discs (Brembo 6-piston Calipers) | Ventilated Discs (Brembo 6-piston Calipers) |
| Four Wheel Steering | No | No | No | No | No | No | No | No | No | No | No | No |
| Rear Tyres | 255/60 R20 | 255/60 R20 | 255/70 R18 | 255/60 R20 | 255/60 R20 | 275/45 R22 | 255/60 R20 | 275/45 R22 | 275/45 R22 | 275/45 R22 | 275/50 R22 | 275/50 R22 |
| Dimensions & Weight | ||||||||||||
| Kerb Weight(kg) | 2261 kg | 2340 kg | 2340 kg | 2340 kg | 2340 kg | 2230 kg | 2585 kg | 2441 kg | 2615 kg | 2615 kg | 2510 kg | 2510 kg |
| Height(mm) | 1967 mm | 1967 mm | 1967 mm (Excluding Roof Rack) | 1967 mm (Excluding Roof Accessories) | 1967 mm | 1969 mm | 1970 mm | 1967 mm | 1970 mm | 1970 mm | 1995 mm | 1995 mm |
| Width(mm) | 2008 mm (Mirrors Folded) / 2105 mm (Mirrors Out) | 2008 mm (Mirrors Folded) / 2105 mm (Mirrors Out) | 2008 mm (Mirrors Folded) / 2105 mm (Mirrors Out) | 2008 mm (Mirrors Folded) / 2105 mm (Mirrors Out) | 2008 mm (Mirrors Folded) / 2105 mm (Mirrors Out) | 2008 mm (Mirrors Folded) / 2105 mm (Mirrors Out) | 2008 mm (Mirrors Folded) / 2105 mm (Mirrors Out) | 2008 mm (Mirrors Folded) / 2105 mm (Mirrors Out) | 2008 mm (Mirrors Folded) / 2105 mm (Mirrors Out) | 2008 mm (Mirrors Folded) / 2105 mm (Mirrors Out) | 2064 mm (Mirrors Folded) / 2105 mm (Mirrors Out) | 2064 mm (Mirrors Folded) / 2105 mm (Mirrors Out) |
| Length(mm) | 5018 mm (Including Spare Wheel) / 4758 mm (Excluding Spare Wheel) | 5018 mm (Including Spare Wheel) / 4758 mm (Excluding Spare Wheel) | 5018 mm (Including Spare Wheel) / 4758 mm (Excluding Spare Wheel) | 5018 mm (Including Spare Wheel) / 4758 mm (Excluding Spare Wheel) | 5018 mm (Including Spare Wheel) / 4758 mm (Excluding Spare Wheel) | 4583 mm (Including Spare Wheel) / 4323 mm (Excluding Spare Wheel) | 5358 mm (Including Spare Wheel) | 5018 mm (Including Spare Wheel) / 4758 mm (Excluding Spare Wheel) | 5358 mm (Including Spare Wheel) | 5358 mm (Including Spare Wheel) | 5003 mm (Including Spare Wheel) / 4758 mm (Excluding Spare Wheel) | 5003 mm (Including Spare Wheel) / 4758 mm (Excluding Spare Wheel) |
| Ground Clearance | 218 mm (Standard) / 291 mm (Off-Road Air Ride Height) | 218 mm (Standard) / 291 mm (Off-Road Air Ride Height) | 218 mm (Standard) / 291 mm (Off-Road Air Ride Height) | 218 mm (Standard) / 291 mm (Off-Road Air Ride Height) | 218 mm (Standard) / 291 mm (Off-Road Air Ride Height) | 216 mm (Standard) / 291 mm (Off-Road Air Ride Height) | 218 mm (Standard) / 290 mm (Off-Road Air Ride Height) | 218 mm (Standard) / 291 mm (Off-Road Air Ride Height) | 218 mm (Standard) / 290 mm (Off-Road Air Ride Height) | 218 mm (Standard) / 290 mm (Off-Road Air Ride Height) | 250 mm (Standard Ride Height) / up to 323 mm (Off-Road Mode Lift) | 250 mm (Standard Ride Height) / up to 323 mm (Off-Road Mode Lift) |
| Wheelbase(mm) | 3022 mm | 3022 mm | 3022 mm | 3022 mm | 3022 mm | 2587 mm | 3022 mm | 3022 mm | 3022 mm | 3022 mm | 3023 mm | 3023 mm |
| Capacity | ||||||||||||
| Fuel Tank Capacity(L) | 90 Litres | 89 Litres | 89 Litres | 89 Litres | 89 Litres | 90 Litres | 89 Litres | 90 Litres | 90 Litres | 90 Litres | 90 Litres | 90 Litres |
| Doors | 5 Doors | 5 Doors | 5 Doors | 5 Doors | 5 Doors | 3 Doors | 5 Doors | 5 Doors | 5 Doors | 5 Doors | 5 Doors | 5 Doors |
| Bootspace(L) | 857 Litres (Behind 2nd Row) | 857 Litres (Behind 2nd Row) | 857 Litres (Behind 2nd Row) | 857 Litres (Behind 2nd Row) | 857 Litres (Behind 2nd Row) | 297 Litres (Behind 2nd Row) | 389 Litres (All 3 rows up) / 1232 Litres (3rd row folded) | 857 Litres (Behind 2nd Row) | 389 Litres (All 3 rows up) / 1232 Litres (3rd row folded) | 389 Litres (All 3 rows up) / 1232 Litres (3rd row folded) | 972 Litres (Behind 2nd Row) | 972 Litres (Behind 2nd Row) |
| Seating Capacity | 5 Persons | 5 Persons | 5 Persons | 5 Persons | 5 Persons | 5 Persons | 8 Persons (2+3+3 Configuration) | 5 Persons | 8 Persons (2+3+3 Configuration) | 8 Persons (2+3+3 Configuration) | 5 Persons (Performance Front Body and Soul Seats) | 5 Persons (Performance Front Body and Soul Seats) |
| No of Rows | 2 Rows | 2 Rows | 2 Rows | 2 Rows | 2 Rows | 2 Rows | 3 Rows | 2 Rows | 3 Rows | 3 Rows | 2 Rows | 2 Rows |
| Feature | 110 X Dynamic HSE Petrol 2.0L Turbo Automatic 5 STR | 110 X Dynamic HSE Diesel 3.0L Turbo Automatic 5 STR | 110 Diesel 3.0L Turbo Automatic 5 STR Trophy Edition Keswick | 110 Diesel 3.0L Turbo Automatic 5 STR Trophy Edition | 110 X Diesel 3.0L Turbo Automatic 5 STR | 90 X Petrol 5.0L Turbo Automatic 5 STR | 130 X Dynamic HSE Mild Hybrid (Electric + Diesel) 3.0L Turbo Automatic 8 STR | 110 X Petrol 5.0L Turbo Automatic 5 STR | 130 X Dynamic V8 HSE Petrol 5.0L Turbo Automatic 8 STR | 130 X V8 Petrol 5.0L Turbo Automatic 8 STR | Octa Mild Hybrid(Electric + Petrol) 4.4L Turbo Automatic 5 STR | Octa Black Mild Hybrid(Electric + Petrol) 4.4L Turbo Automatic 5 STR |
|---|---|---|---|---|---|---|---|---|---|---|---|---|
| Exterior | ||||||||||||
| Rub-strips | No | No | No | No | No | No | No (Clean rugged lower cladding plates instead) | No (Durable lower off-road protective panel inserts instead) | No (Clean rugged lower cladding plates instead) | No (Durable side impact structural design plates instead) | No (Durable extreme off-road lower body cladding and underbody skid plates instead) | No (Durable extreme off-road lower body cladding and underbody skid plates instead) |
| Roof Rails | Yes (Black Roof Rails) | Yes (Black Roof Rails) | Yes (Black Roof Rails & Expedition Roof Rack Assembly) | Yes (Black Roof Rails & Expedition Roof Rack Assembly) | Yes (Black Roof Rails) | Yes (Black Roof Rails) | Yes (Black Roof Rails) | Yes (Gloss Black Sport Finish Roof Rails) | Yes (Black Roof Rails) | Yes (Gloss Black Signature V8 Finish Roof Rails) | No (Roof rails omitted to optimize high-speed aerodynamics and weight for the OCTA performance trim) | No (Roof rails omitted to optimize high-speed aerodynamics and weight for the OCTA performance trim) |
| Roof-mounted Antenna | Yes | Yes | Yes | Yes | Yes | Yes | Yes (Roof-mounted Shark Fin with Integrated ClearSight Camera Module) | Yes (Shark Fin Aerial incorporating a ClearSight rear-view video lens) | Yes (Roof-mounted Shark Fin with Integrated ClearSight Camera Module) | Yes (Roof-mounted Shark Fin with Integrated ClearSight Camera Module) | Yes (Roof-mounted Shark Fin with Integrated ClearSight Rear-View Camera Module) | Yes (Roof-mounted Shark Fin with Integrated ClearSight Rear-View Camera Module) |
| Chrome Finish Exhaust Pipe | No | No | No | No | No | No (Upgraded to quad outboard exhaust tailpipes for the 5.0L V8 powertrain layout) | No (Dual satin black or dark metallic industrial-styled tips) | No (Quad satin-black architectural performance exhaust pipes for V8 engine configuration) | No (Quad satin black high-performance industrial-styled quad tips for V8 engine) | No (Quad satin black high-performance exhaust pipes for V8 powertrain layout) | No (Bespoke OCTA active exhaust system with active flaps and quad matte black round tips) | No (Bespoke OCTA active exhaust system with active flaps and quad matte black round tips) |
| Body-coloured Bumpers | Yes (X-Dynamic Satin Silicon Silver Premium Finish) | Yes (X-Dynamic Satin Silicon Silver Premium Finish) | Yes (Trophy Edition Matte Black Wrap & Keswick Accent styling) | Yes (Trophy Edition Matte Black Wrap Accent Styling) | Yes (Defender X Gloss Black Contrast Bumpers & Cladding Finish) | Yes (Defender X Gloss Black Contrast Bumpers & Cladding Finish) | No (Narvik Black or Ceres Silver signature off-road rugged bumper finishes) | No (Sturdy off-road Ceres Silver or Narvik Black structural bumpers) | No (Narvik Black signature off-road rugged bumper finishes) | No (Sturdy off-road Narvik Black signature bumper finishes) | No (OCTA exclusive redesigned high-clearance off-road bumpers with carbon fiber accents) | No (OCTA exclusive redesigned high-clearance off-road bumpers with carbon fiber accents) |
| Body Kit | Yes (X-Dynamic Exterior Pack Styling Components Layout) | Yes (X-Dynamic Exterior Pack Styling Components Layout) | Yes (Trophy Pack Off-Road Kit with Front Undershield & Winch Mounting) | Yes (Trophy Pack Off-Road Kit with Front Undershield & Winch Mounting) | Yes (Defender X Exterior Pack Premium Styling Components Layout) | Yes (Defender X Premium Performance Pack Exterior Components Layout) | Yes (X-Dynamic rugged exterior styling pack with gloss black accents) | Yes (High-end Defender X exterior aesthetic package with orange brake calipers) | Yes (X-Dynamic rugged exterior styling pack with gloss black accents) | Yes (Premium Defender V8 bespoke exterior styling pack with dark accents) | Yes (Bespoke OCTA Widebody Performance Exterior package with extended wheel arches) | Yes (Bespoke OCTA Widebody Performance Exterior package with extended wheel arches) |
| Sunroof / Moonroof | Yes (Sliding Panoramic Glass Sunroof Setup) | Yes (Sliding Panoramic Glass Sunroof Setup) | Yes (Sliding Panoramic Glass Sunroof Setup) | Yes (Sliding Panoramic Glass Sunroof Setup) | Yes (Sliding Panoramic Glass Sunroof Setup) | Yes (Sliding Panoramic Glass Sunroof Setup) | Yes (Sliding Panoramic Sunroof for front rows + Alpine glass side panels) | Yes (Sliding Panoramic Sunroof paired with signature Alpine side lights) | Yes (Sliding Panoramic Sunroof for front rows + Alpine glass side panels) | Yes (Sliding Panoramic Sunroof for front rows + Alpine signature side glass panels) | Yes (Sliding Panoramic Sunroof + Alpine glass roof panels) | Yes (Sliding Panoramic Sunroof + Alpine glass roof panels) |
| Locks & Security | ||||||||||||
| Central Locking | Yes (Keyless Entry and Dynamic Proximity Central Locking) | Yes (Keyless Entry and Dynamic Proximity Central Locking) | Yes (Keyless Entry and Proximity Central Locking) | Yes (Keyless Entry and Proximity Central Locking) | Yes (Keyless Entry and Dynamic Proximity Central Locking) | Yes (Keyless Entry and Dynamic Proximity Central Locking) | Yes (Keyless Entry and Proximity Locking Grid) | Yes (Smart Proximity Entry & Walking Distance Auto-Locking system) | Yes (Keyless Entry and Proximity Locking Grid) | Yes (Smart Proximity Entry and Walking Distance Auto-Locking system) | Yes (Smart Keyless Proximity Entry and Automated Proximity Locking Grid) | Yes (Smart Keyless Proximity Entry and Automated Proximity Locking Grid) |
| Speed Sensing Door Lock | Yes | Yes | Yes | Yes | Yes | Yes | Yes | Yes | Yes | Yes | Yes | Yes |
| Engine Immobiliser | Yes | Yes | Yes | Yes | Yes | Yes | Yes | Yes | Yes | Yes | Yes | Yes |
| Child Safety Lock | Yes (Power Operated Child Safety Locks Setup) | Yes (Power Operated Child Safety Locks Setup) | Yes (Power Operated Child Safety Locks Setup) | Yes (Power Operated Child Safety Locks Setup) | Yes (Power Operated Child Safety Locks Setup) | No (Strictly 3-Door short-wheelbase cabin architecture layout) | Yes (Power-operated interior driver controls) | Yes (Electronic driver-isolated override controls) | Yes (Power-operated interior driver controls) | Yes (Power-operated interior driver controls isolation) | Yes (Power-operated driver cabin isolation door buttons) | Yes (Power-operated driver cabin isolation door buttons) |
| Seats & Upholstery | ||||||||||||
| Front Passenger Seat Adjustment | 14-Way Heated and Cooled Electric Memory Front Passenger Seat | 14-Way Heated and Cooled Electric Memory Front Passenger Seat | 14-Way Heated and Cooled Electric Memory Front Passenger Seat | 14-Way Heated and Cooled Electric Memory Front Passenger Seat | 14-Way Heated and Cooled Electric Memory Front Passenger Seat | 14-Way Heated and Cooled Electric Memory Front Passenger Seat | Yes (14-Way Heated and Cooled Electric Memory Front Passenger Seat) | Yes (14-Way Power Adjustable Heated & Cooled Climate Seat with Lumbar Memory) | Yes (14-Way Heated and Cooled Electric Memory Front Passenger Seat) | Yes (14-Way Power Adjustable Heated & Cooled Climate Seat with Lumbar Memory) | Yes (14-Way Power Performance Seat with Heated/Cooled Climate Functions & Memory) | Yes (14-Way Power Performance Seat with Heated/Cooled Climate Functions & Memory) |
| Rear Armrest | Yes (Second Row Center Armrest with Cup Holders Layout) | Yes (Second Row Center Armrest with Cup Holders Layout) | Yes (Second Row Center Armrest with Cup Holders Layout) | Yes (Second Row Center Armrest with Cup Holders Layout) | Yes (Second Row Center Armrest with Cup Holders Layout) | Yes (Rear Center Seat fold-down armrest component) | Yes (Fold-down second row and third row configurations with cup holders) | Yes (Second-row dropdown leather armrest containing dual cup receptacles) | Yes (Fold-down second row and third row configurations with cup holders) | Yes (Fold-down second row and third row configurations with cup holders) | Yes (Second-row dropdown leather armrest containing dual cup receptacles) | Yes (Second-row dropdown leather armrest containing dual cup receptacles) |
| Driver Seat Adjustment | 14-Way Heated and Cooled Electric Memory Driver Seat with 4-Way Lumbar | 14-Way Heated and Cooled Electric Memory Driver Seat with 4-Way Lumbar | 14-Way Heated and Cooled Electric Memory Driver Seat with 4-Way Lumbar | 14-Way Heated and Cooled Electric Memory Driver Seat with 4-Way Lumbar | 14-Way Heated and Cooled Electric Memory Driver Seat with 4-Way Lumbar | 14-Way Heated and Cooled Electric Memory Driver Seat with 4-Way Lumbar | Yes (14-Way Heated and Cooled Electric Memory Driver Seat with Lumbar) | Yes (14-Way Power Adjustable Heated & Cooled Sport Seating with Upper Backrest Profile Memory) | Yes (14-Way Heated and Cooled Electric Memory Driver Seat with Lumbar) | Yes (14-Way Power Adjustable Heated & Cooled Sport Seating with Upper Backrest Profile Memory) | Yes (14-Way Power OCTA Performance Seat with integrated headrest, bolster memory & Body and Soul audio technology) | Yes (14-Way Power OCTA Performance Seat with integrated headrest, bolster memory & Body and Soul audio technology) |
| Folding Rear Seat | Yes (40:20:40 Split Folding Rear Seat Layout) | Yes (40:20:40 Split Folding Rear Seat Layout) | Yes (40:20:40 Split Folding Rear Seat Layout) | Yes (40:20:40 Split Folding Rear Seat Layout) | Yes (40:20:40 Split Folding Rear Seat Layout) | Yes (40:20:40 Split Folding Rear Seat Layout) | Yes (40:20:40 split folding second row and 60:40 folding third row) | Yes (40:20:40 maximum cargo versatility layout configuration) | Yes (40:20:40 split folding second row and 60:40 folding third row) | Yes (40:20:40 split folding second row and 60:40 folding third row flat deck) | Yes (40:20:40 split folding second row folding completely flat into cargo deck) | Yes (40:20:40 split folding second row folding completely flat into cargo deck) |
| Seat Upholstery | Premium Windsor Leather with Robustec Accent Material Patches Layout | Premium Windsor Leather with Robustec Accent Material Patches Layout | Premium Windsor Leather with Robustec Accent Material Patches Layout | Premium Windsor Leather with Robustec Accent Material Patches Layout | Premium Windsor Leather with Steelcut Premium Textile Accents Layout | Premium Windsor Leather with Steelcut Premium Textile Accents Layout | Premium Windsor Leather combined with Robustec Textile Accents | Windsor Premium Leather combined with Kvadrat Premium Textile Accents | Premium Windsor Leather combined with Robustec Textile Accents | Windsor Premium Leather combined with Dinamica Suedecloth & Robustec Accents | Premium Semi-Aniline Leather with durable Ultrafabrics polyurethane accents | Premium Semi-Aniline Leather with durable Ultrafabrics polyurethane accents |
| Second Row Seat Adjustment | 40:20:40 Split Foldable with Manual Slide and Recline functionality | 40:20:40 Split Foldable with Manual Slide and Recline functionality | 40:20:40 Split Foldable with Manual Slide and Recline functionality | 40:20:40 Split Foldable with Manual Slide and Recline functionality | 40:20:40 Split Foldable with Manual Slide and Recline functionality | 40:20:40 Split Foldable with Manual Slide and Recline functionality | Yes (Forward/Backward sliding bench with mechanical recline mechanism) | Yes (Sliding and reclining functionality on second-row rails) | Yes (Forward/Backward sliding bench with mechanical recline mechanism) | Yes (Sliding and reclining functionality on second-row structural tracks) | Yes (Manual sliding and reclining rails standard on second row) | Yes (Manual sliding and reclining rails standard on second row) |
| Interior Colours | Ebony / Vintage Tan / Acorn options available | Ebony / Vintage Tan / Acorn options available | Ebony Exclusive Off-Road Trim Palette | Ebony Exclusive Off-Road Trim Palette | Ebony / Tan / Light Oyster top-tier variant specific configurations | Ebony / Tan / Light Oyster top-tier variant specific configurations | Ebony / Vintage Tan / Acorn options with X-Dynamic contrast finishes | Ebony / Vintage Tan / Khaki premium color schemes with exposed structural finishes | Ebony / Vintage Tan / Acorn options with X-Dynamic contrast finishes | Ebony V8 Theme with custom dark satin structural dashboard panel highlights | Burnt Sienna or Light Cloud premium multi-tone color options with Chopped Carbon decoration finishes | Ebony V8 Theme with custom dark satin structural dashboard panel highlights |
| Ventilated Seat Type | Heated & Cooled Perforated Luxury Setup | Heated & Cooled Perforated Luxury Setup | Heated & Cooled Perforated Luxury Setup | Heated & Cooled Perforated Luxury Setup | Heated & Cooled Perforated Luxury Setup | Heated & Cooled Perforated Luxury Setup | Front Rows and Second Row Ventilated (Heated and Cooled elements) | Front and Rear Row Ventilated Seating (Active Cooling and Multi-Stage Heating) | Front Rows and Second Row Ventilated (Heated and Cooled elements) | Front Rows Seating Ventilated (Active Cooling and Multi-Stage Heating) | Front Rows Seating Ventilated (Active Cooling and Multi-Stage Heating) | Front Rows Seating Ventilated (Active Cooling and Multi-Stage Heating) |
| Interiors | Premium Rugged Luxury Dashboard Layout with Cross Car Beam Powder Coated Finish | Premium Rugged Luxury Dashboard Layout with Cross Car Beam Powder Coated Finish | Premium Rugged Luxury Dashboard Layout with Cross Car Beam Powder Coated Finish | Premium Rugged Luxury Dashboard Layout with Cross Car Beam Powder Coated Finish | Premium Rugged Luxury Dashboard Layout with Rough-Cut Walnut Wood Veneer Finish | Premium Rugged Luxury Dashboard Layout with Rough-Cut Walnut Wood Veneer Finish | Exposed structural powder-coated dashboard beam with premium detailing | Premium leather wrap over an exposed cross-car satin black structural beam | Exposed structural powder-coated dashboard beam with premium detailing | Premium suedecloth/leather wrap over an exposed cross-car satin black structural beam | Premium leather and suedecloth wrap over an exposed cross-car satin black structural beam | Premium leather and suedecloth wrap over an exposed cross-car satin black structural beam |
| Rear Passenger Seat Type | 40:20:40 Split Bench Type (3-Passenger Configured Row Layout) | 40:20:40 Split Bench Type (3-Passenger Configured Row Layout) | 40:20:40 Split Bench Type (3-Passenger Configured Row Layout) | 40:20:40 Split Bench Type (3-Passenger Configured Row Layout) | 40:20:40 Split Bench Type (3-Passenger Configured Row Layout) | 40:20:40 Split Bench Type (3-Passenger Configured Row Layout) | Foldable & Adjustable Split Multi-Row Configuration | Sliding & Reclining Fold-Flat Adjustable Split Multi-Row Configuration | Foldable & Adjustable Split Multi-Row Configuration | Sliding & Reclining Fold-Flat Adjustable Split Multi-Row Configuration | Sliding & Reclining Fold-Flat Adjustable Split Multi-Row Configuration | Sliding & Reclining Fold-Flat Adjustable Split Multi-Row Configuration |
| Ventilated Seats | Yes (Front Rows Standard, Rear Rows Optional Upgrade) | Yes (Front Rows Standard, Rear Rows Optional Upgrade) | Yes (Front Rows Standard, Rear Rows Optional Upgrade) | Yes (Front Rows Standard, Rear Rows Optional Upgrade) | Yes (Front Rows Standard, Rear Rows Optional Upgrade) | Yes (Front Rows Standard, Rear Rows Optional Upgrade) | Yes (Multi-zone heated and ventilated seating array configuration) | Yes (Advanced heated and cooled ventilation modules built into front and outer rear zones) | Yes (Multi-zone heated and ventilated seating array configuration) | Yes (Multi-zone heated and ventilated seating array configuration) | Yes (Multi-zone heated and ventilated seating array configuration) | Yes (Multi-zone heated and ventilated seating array configuration) |
| Front Seatback Pockets | Yes | Yes | Yes | Yes | Yes | Yes | Yes (Rigid map pockets behind front seat backrests) | Yes (Heavy-duty rear pocket panels attached behind front sport backrests) | Yes (Rigid map pockets behind front seat backrests) | Yes (Rigid map storage envelopes behind front sport backrests) | Yes (Rigid map storage envelopes behind front performance seats) | Yes (Rigid map storage envelopes behind front performance seats) |
| Leather-wrapped Steering Wheel | Yes (Premium Leather-Wrapped Steering Wheel Rim) | Yes (Premium Leather-Wrapped Steering Wheel Rim) | Yes (Premium Leather-Wrapped Steering Wheel Rim) | Yes (Premium Leather-Wrapped Steering Wheel Rim) | Yes (Premium Leather-Wrapped Steering Wheel Rim) | Yes (Premium Leather-Wrapped Steering Wheel Rim) | Yes (Leather-wrapped or premium non-leather steering wheel hub) | Yes (Suedecloth or premium Windsor leather multi-function heated sport steering wheel) | Yes (Leather-wrapped or premium non-leather steering wheel hub) | Yes (Alcantara/Suedecloth wrapped multifunction heated sport steering wheel with satin paddles) | Yes (OCTA bespoke steering wheel with integrated illuminated dynamic drive mode hotkeys) | Yes (OCTA bespoke steering wheel with integrated illuminated dynamic drive mode hotkeys) |
| Rear Row Seat Adjustment | No (Limited to 5-Seater Cabin Layout Configuration) | No (Limited to 5-Seater Cabin Layout Configuration) | No (Limited to 5-Seater Cabin Layout Configuration) | No (Limited to 5-Seater Cabin Layout Configuration) | No (Limited to 5-Seater Cabin Layout Configuration) | No (Limited to 5-Seater Cabin Layout Configuration) | Yes (Third row seating features reclining capability adjustments) | No (Third-row assemblies omitted on this dedicated 5-Seater variant platform) | Yes (Third row seating features reclining capability adjustments) | Yes (Third row seating features manual reclining capability adjustments) | No (Third-row options omitted on this high-performance 5 STR extreme variant layout) | No (Third-row options omitted on this high-performance 5 STR extreme variant layout) |
| Driver Armrest | Yes (Front Center Console Armrest Option with Optional Refrigerator) | Yes (Front Center Console Armrest Option with Optional Refrigerator) | Yes (Front Center Console Armrest with Integrated Refrigerator Cooler) | Yes (Front Center Console Armrest with Integrated Refrigerator Cooler) | Yes (Front Center Console Armrest with Integrated Refrigerator Cooler) | Yes (Front Center Console Armrest with Integrated Refrigerator Cooler) | Yes (Front center console configuration with optional cooler compartment) | Yes (Longitudinally adjustable front center console armrest with built-in refrigerator block) | Yes (Front center console configuration with optional cooler compartment) | Yes (Front center console configuration with built-in active refrigerator block) | Yes (Front center console configuration with built-in active refrigerator block) | Yes (Front center console configuration with built-in active refrigerator block) |
| Leather-wrapped Gear Knob | Yes (Premium Leather-Wrapped Transmission Selector Shifter Toggle) | Yes (Premium Leather-Wrapped Transmission Selector Shifter Toggle) | Yes (Premium Leather-Wrapped Transmission Selector Shifter Toggle) | Yes (Premium Leather-Wrapped Transmission Selector Shifter Toggle) | Yes (Premium Leather-Wrapped Transmission Selector Shifter Toggle) | Yes (Premium Leather-Wrapped Transmission Selector Shifter Toggle) | Yes (Leather or Robustec heavy-duty wrapped selector handle) | Yes (Premium textured grip leather selector matching structural console layout) | Yes (Leather or Robustec heavy-duty wrapped selector handle) | Yes (Premium textured grip leather selector matching structural console layout) | Yes (Premium textured grip leather selector matching structural console layout) | Yes (Premium textured grip leather selector matching structural console layout) |
| Split Rear Seat | Yes (40:20:40 Split Configurations Framework) | Yes (40:20:40 Split Configurations Framework) | Yes (40:20:40 Split Configurations Framework) | Yes (40:20:40 Split Configurations Framework) | Yes (40:20:40 Split Configurations Framework) | Yes (40:20:40 Split Configurations Framework) | Yes (Highly versatile split fold mechanics for all rear zones) | Yes (3-Way 40:20:40 full horizontal fold-flat folding action) | Yes (Highly versatile split fold mechanics for all rear zones) | Yes (Highly versatile split fold mechanics for all rear luxury zones) | Yes (3-Way 40:20:40 full horizontal fold-flat folding action) | Yes (3-Way 40:20:40 full horizontal fold-flat folding action) |
| Headrests | Height Adjustable Active Protective Head Restraints on All Rows | Height Adjustable Active Protective Head Restraints on All Rows | Height Adjustable Active Protective Head Restraints on All Rows | Height Adjustable Active Protective Head Restraints on All Rows | Height Adjustable Active Protective Head Restraints on All Rows | Height Adjustable Active Protective Head Restraints on All Rows | Yes (8 Height-adjustable safety head restraints across 3 rows) | Yes (5 Adjustable height-safety head restraint frames across the 2 passenger rows) | Yes (8 Height-adjustable safety head restraints across 3 rows) | Yes (8 Height-adjustable safety head restraints configured across 3 rows) | Yes (5 Height-adjustable safety head restraint frames across the 2 passenger rows) | Yes (5 Height-adjustable safety head restraint frames across the 2 passenger rows) |
| Safety | ||||||||||||
| Lane Departure Prevention | Yes (Lane Keep Assist Infrastructure Suite via ADAS) | Yes (Lane Keep Assist Infrastructure Suite via ADAS) | Yes (Lane Keep Assist Infrastructure Suite via ADAS) | Yes (Lane Keep Assist Infrastructure Suite via ADAS) | Yes (Lane Keep Assist Infrastructure Suite via ADAS) | Yes (Lane Keep Assist Infrastructure Suite via ADAS) | Yes (Lane Keep Assist with automated steering correction inputs) | Yes (Active Lane Keep Assist with dynamic lane torque steering adjustments) | Yes (Lane Keep Assist with automated steering correction inputs) | Yes (Active Lane Keep Assist with dynamic lane torque steering adjustments) | Yes (Active Lane Keep Assist with dynamic lane torque steering adjustments) | Yes (Active Lane Keep Assist with dynamic lane torque steering adjustments) |
| Child Seat Anchor Points | Yes (ISOFIX Child Seat Lower Anchor Points on Outboard Second Row) | Yes (ISOFIX Child Seat Lower Anchor Points on Outboard Second Row) | Yes (ISOFIX Child Seat Lower Anchor Points on Outboard Second Row) | Yes (ISOFIX Child Seat Lower Anchor Points on Outboard Second Row) | Yes (ISOFIX Child Seat Lower Anchor Points on Outboard Second Row) | Yes (ISOFIX Child Seat Lower Anchor Points on Outboard Second Row) | Yes (ISOFIX child seat anchors on outer positions of rows 2 and 3) | Yes (ISOFIX child restraint anchor points on outer second-row positions) | Yes (ISOFIX child seat anchors on outer positions of rows 2 and 3) | Yes (ISOFIX child seat anchors on outer positions of rows 2 and 3) | Yes (ISOFIX child restraint anchor points on outer second-row positions) | Yes (ISOFIX child restraint anchor points on outer second-row positions) |
| Tyre Pressure Monitoring System (TPMS) | Yes (Highline System displaying Individual Wheel Real-Time Values) | Yes (Highline System displaying Individual Wheel Real-Time Values) | Yes (Highline System displaying Individual Wheel Real-Time Values) | Yes (Highline System displaying Individual Wheel Real-Time Values) | Yes (Highline System displaying Individual Wheel Real-Time Values) | Yes (Highline System displaying Individual Wheel Real-Time Values) | Yes (Direct real-time tyre pressure sensor display setup) | Yes (Direct independent TPMS wheel-sensor numerical data tracking) | Yes (Direct real-time tyre pressure sensor display setup) | Yes (Direct real-time tyre pressure sensor display setup data display) | Yes (Direct independent TPMS wheel-sensor numerical data tracking) | Yes (Direct independent TPMS wheel-sensor numerical data tracking) |
| Rear Middle Three Point Seatbelt | Yes (3-Point safety seatbelts for all 5 occupants) | Yes (3-Point safety seatbelts for all 5 occupants) | Yes (3-Point safety seatbelts for all 5 occupants) | Yes (3-Point safety seatbelts for all 5 occupants) | Yes (3-Point safety seatbelts for all 5 occupants) | Yes (3-Point safety seatbelts for all 5 occupants) | Yes | Yes | Yes | Yes | Yes | Yes |
| Lane Departure Warning | Yes (Lane Departure Warning standard via Radar ADAS setup) | Yes (Lane Departure Warning standard via Radar ADAS setup) | Yes (Lane Departure Warning standard via Radar ADAS setup) | Yes (Lane Departure Warning standard via Radar ADAS setup) | Yes (Lane Departure Warning standard via Radar ADAS setup) | Yes (Lane Departure Warning standard via Radar ADAS setup) | Yes (Visual cluster alarms and haptic steering feedback wheels) | Yes (Instrument panel warnings accompanied by immediate steering wheel haptic alerts) | Yes (Visual cluster alarms and haptic steering feedback wheels) | Yes (Camera-driven visual cluster alerts and haptic steering wheel pulses) | Yes (Instrument panel warnings accompanied by immediate steering wheel haptic alerts) | Yes (Instrument panel warnings accompanied by immediate steering wheel haptic alerts) |
| Automatic Emergency Braking (AEB) | Yes (Advanced Emergency Braking Layout Mitigation) | Yes (Advanced Emergency Braking Layout Mitigation) | Yes (Advanced Emergency Braking Layout Mitigation) | Yes (Advanced Emergency Braking Layout Mitigation) | Yes (Advanced Emergency Braking Layout Mitigation) | Yes (Advanced Emergency Braking Layout Mitigation) | Yes (Radar/Camera-based Emergency Braking system optimization) | Yes (Autonomous Emergency Braking with forward vehicle, intersection, and pedestrian tracking) | Yes (Radar/Camera-based Emergency Braking system optimization) | Yes (Autonomous Emergency Braking with forward vehicle, intersection, and pedestrian tracking) | Yes (Autonomous Emergency Braking with forward vehicle, intersection, and pedestrian tracking) | Yes (Autonomous Emergency Braking with forward vehicle, intersection, and pedestrian tracking) |
| Blind Spot Detection | Yes (Blind Spot Assist with active steering intervention support) | Yes (Blind Spot Assist with active steering intervention support) | Yes (Blind Spot Assist with active steering intervention support) | Yes (Blind Spot Assist with active steering intervention support) | Yes (Blind Spot Assist with active steering intervention support) | Yes (Blind Spot Assist with active steering intervention support) | Yes (Blind Spot Assist with active collision intervention loops) | Yes (Active Blind Spot Monitor with radar-driven collision avoidance intervention) | Yes (Blind Spot Assist with active collision intervention loops) | Yes (Active Blind Spot Monitor with radar-driven collision avoidance intervention) | Yes (Active Blind Spot Monitor with radar-driven collision avoidance intervention) | Yes (Active Blind Spot Monitor with radar-driven collision avoidance intervention) |
| Emergency Brake Light Flashing | Yes | Yes | Yes | Yes | Yes | Yes | Yes (Automatic hazard flash initialization under panic braking thresholds) | Yes (Automatic emergency flash warning execution under heavy decelerations) | Yes (Automatic hazard flash initialization under panic braking thresholds) | Yes (Automatic emergency flash warning execution under heavy panic decelerations) | Yes (Automatic emergency flash warning execution under heavy panic decelerations) | Yes (Automatic emergency flash warning execution under heavy panic decelerations) |
| Forward Collision Warning (FCW) | Yes (Forward Collision Warning Monitoring Alerts) | Yes (Forward Collision Warning Monitoring Alerts) | Yes (Forward Collision Warning Monitoring Alerts) | Yes (Forward Collision Warning Monitoring Alerts) | Yes (Forward Collision Warning Monitoring Alerts) | Yes (Forward Collision Warning Monitoring Alerts) | Yes (Integrated into the Forward Vehicle Sensing warning computer) | Yes (Integrated seamlessly inside the forward-looking radar hazard computer matrix) | Yes (Integrated into the Forward Vehicle Sensing warning computer) | Yes (Integrated seamlessly inside the forward-looking radar hazard computer matrix) | Yes (Integrated seamlessly inside the forward-looking radar hazard computer matrix) | Yes (Integrated seamlessly inside the forward-looking radar hazard computer matrix) |
| Dashcam | No (Provisioned for Optional integrated Dashcam architecture) | No (Provisioned for Optional integrated Dashcam architecture) | No (Provisioned for Optional integrated Dashcam architecture) | No (Provisioned for Optional integrated Dashcam architecture) | No (Provisioned for Optional integrated Dashcam architecture) | No (Provisioned for Optional integrated Dashcam architecture) | No (Offered inside JLR Approved OEM interior accessory extensions) | No (Offered inside original equipment manufacturer dealer custom accessory catalogues) | No (Offered inside JLR Approved OEM interior accessory extensions) | No (Offered inside JLR Approved OEM interior accessory extensions) | No (Offered inside JLR Approved OEM interior accessory extensions) | No (Offered inside JLR Approved OEM interior accessory extensions) |
| Seat Belt Warning | Yes (Audio-Visual warnings tailored for all seating rows occupant sensing) | Yes (Audio-Visual warnings tailored for all seating rows occupant sensing) | Yes (Audio-Visual warnings tailored for all seating rows occupant sensing) | Yes (Audio-Visual warnings tailored for all seating rows occupant sensing) | Yes (Audio-Visual warnings tailored for all seating rows occupant sensing) | Yes (Audio-Visual warnings tailored for all seating rows occupant sensing) | Yes (Audible and visual alarms active across all 8 occupant seating layouts) | Yes (Audible tone chime sequence matched with visual warnings for all 5 tracks) | Yes (Audible tone and light matrix active across all 8 occupant seating layouts) | Yes (Audible tone and light matrix active across all 8 occupant seating layouts) | Yes (Audible tone and light matrix active across all occupant seating layouts) | Yes (Audible tone and light matrix active across all occupant seating layouts) |
| Puncture Repair Kit | Yes (High-Performance Compressor Tyre Puncture Gel Mobility Repair Kit) | Yes (High-Performance Compressor Tyre Puncture Gel Mobility Repair Kit) | Yes (High-Performance Compressor Tyre Puncture Gel Mobility Repair Kit) | Yes (High-Performance Compressor Tyre Puncture Gel Mobility Repair Kit) | Yes (High-Performance Compressor Tyre Puncture Gel Mobility Repair Kit) | Yes (High-Performance Compressor Tyre Puncture Gel Mobility Repair Kit) | No (Standard heavy-duty full-sized exterior tailgate mounted spare wheel) | No (Equipped with an authentic exterior tailgate-mounted matching full-size alloy spare) | No (Standard heavy-duty full-sized exterior tailgate mounted spare wheel) | No (Standard heavy-duty full-sized exterior tailgate mounted spare wheel alloy) | No (Standard heavy-duty full-sized exterior tailgate mounted spare wheel alloy matching performance tyres) | No (Standard heavy-duty full-sized exterior tailgate mounted spare wheel alloy matching performance tyres) |
| High-beam Assist | Yes (Auto High-Beam Assist AHBA Matrix control) | Yes (Auto High-Beam Assist AHBA Matrix control) | Yes (Auto High-Beam Assist AHBA Matrix control) | Yes (Auto High-Beam Assist AHBA Matrix control) | Yes (Auto High-Beam Assist AHBA Matrix control) | Yes (Auto High-Beam Assist AHBA Matrix control) | Yes (Automatic High Beam Assist matching Matrix LED optics) | Yes (Automatic high-beam dynamic cut-out matching Matrix LED optics) | Yes (Automatic High Beam Assist matching Matrix LED optics) | Yes (Automatic High Beam Assist matching Matrix LED optics) | Yes (Automatic High Beam Assist matching Matrix LED optics) | Yes (Automatic High Beam Assist matching Matrix LED optics) |
| Airbags | 6 Airbags (Standard Dual Front, Side Thorax, and Full-Length Curtain Airbags) | 6 Airbags (Standard Dual Front, Side Thorax, and Full-Length Curtain Airbags) | 6 Airbags (Standard Dual Front, Side Thorax, and Full-Length Curtain Airbags) | 6 Airbags (Standard Dual Front, Side Thorax, and Full-Length Curtain Airbags) | 6 Airbags (Standard Dual Front, Side Thorax, and Full-Length Curtain Airbags) | 6 Airbags (Standard Dual Front, Side Thorax, and Full-Length Curtain Airbags) | 6 Airbags (Dual Front, Front Side Thorax, and Full-Length Side Curtains) | 6 Airbags (Dual Front, Thorax Side Front, and Full-Length Cabin Curtain arrays) | 6 Airbags (Dual Front, Front Side Thorax, and Full-Length Side Curtains) | 6 Airbags (Dual Front, Front Side Thorax, and Full-Length Side Curtains) | 6 Airbags (Dual Front, Front Side Thorax, and Full-Length Side Curtains) | 6 Airbags (Dual Front, Front Side Thorax, and Full-Length Side Curtains) |
| NCAP Rating | 5 Star (Euro NCAP Safety Testing Certification Benchmark) | 5 Star (Euro NCAP Safety Testing Certification Benchmark) | 5 Star (Euro NCAP Safety Testing Certification Benchmark) | 5 Star (Euro NCAP Safety Testing Certification Benchmark) | 5 Star (Euro NCAP Safety Testing Certification Benchmark) | 5 Star (Euro NCAP Safety Testing Certification Benchmark) | 5-Star (Euro NCAP Excellent Vehicle Structural Crash Assessment Rating) | 5-Star (Euro NCAP Comprehensive Passenger Crash Assessment Framework Rating) | 5-Star (Euro NCAP Excellent Vehicle Structural Crash Assessment Rating) | 5-Star (Euro NCAP Excellent Vehicle Structural Crash Assessment Rating) | 5-Star (Euro NCAP Excellent Vehicle Structural Crash Assessment Rating) | 5-Star (Euro NCAP Excellent Vehicle Structural Crash Assessment Rating) |
| Rear Cross-traffic Assist | Yes (Rear Traffic Monitor with Collision Mitigation Brake intervention) | Yes (Rear Traffic Monitor with Collision Mitigation Brake intervention) | Yes (Rear Traffic Monitor with Collision Mitigation Brake intervention) | Yes (Rear Traffic Monitor with Collision Mitigation Brake intervention) | Yes (Rear Traffic Monitor with Collision Mitigation Brake intervention) | Yes (Rear Traffic Monitor with Collision Mitigation Brake intervention) | Yes (Rear Traffic Monitor with automated rear braking mitigation control) | Yes (Rear Traffic Monitor system with automatic active brake intervention updates) | Yes (Rear Traffic Monitor with automated rear braking mitigation control) | Yes (Rear Cross Traffic Monitor system with automatic active brake intervention updates) | Yes (Rear Cross Traffic Monitor system with automatic active brake intervention updates) | Yes (Rear Cross Traffic Monitor system with automatic active brake intervention updates) |
| Rear Middle Head Rest | Yes (Adjustable Second Row Middle Cushion Headrest) | Yes (Adjustable Second Row Middle Cushion Headrest) | Yes (Adjustable Second Row Middle Cushion Headrest) | Yes (Adjustable Second Row Middle Cushion Headrest) | Yes (Adjustable Second Row Middle Cushion Headrest) | Yes (Adjustable Second Row Middle Cushion Headrest) | Yes (Low profile safety design to preserve rearview mirror sightlines) | Yes (Lowered silhouette configuration block to protect driver rear views) | Yes (Center Lower-Profile Restraint for Rearward Vision) | Yes (Center Lower-Profile Restraint for optimized rearward vision protection) | Yes (Center Lower-Profile Restraint for optimized rearward vision protection) | Yes (Center Lower-Profile Restraint for optimized rearward vision protection) |
| Overspeed Warning | Yes (Standard 80kmph and 120kmph Acoustic Warning Compliance Layout) | Yes (Standard 80kmph and 120kmph Acoustic Warning Compliance Layout) | Yes (Standard 80kmph and 120kmph Acoustic Warning Compliance Layout) | Yes (Standard 80kmph and 120kmph Acoustic Warning Compliance Layout) | Yes (Standard 80kmph and 120kmph Acoustic Warning Compliance Layout) | Yes (Standard 80kmph and 120kmph Acoustic Warning Compliance Layout) | Yes (Regional speed limit chime thresholds active via country specs) | Yes (Acoustic limits chime thresholds customized automatically per country regulations) | Yes (Regional speed limit chime thresholds active via country specs) | Yes (Regional speed limit chime thresholds active via camera traffic sign tracking) | Yes (Regional speed limit chime thresholds active via camera traffic sign tracking) | Yes (Regional speed limit chime thresholds active via camera traffic sign tracking) |
| Doors, Windows, Mirrors & Wipers | ||||||||||||
| Turn Indicators on ORVMs | Yes (LED Turn Indicators integrated on ORVM housings) | Yes (LED Turn Indicators integrated on ORVM housings) | Yes (LED Turn Indicators integrated on ORVM housings) | Yes (LED Turn Indicators integrated on ORVM housings) | Yes (LED Turn Indicators integrated on ORVM housings) | Yes (LED Turn Indicators integrated on ORVM housings) | Yes (Sleek LED indicator clusters integrated on side mirror shells) | Yes (Sleek sequential dynamic LED blink lines inside outer mirror shells) | Yes (Dynamic LED indicators integrated into Side Mirror Housings) | Yes (Dynamic LED indicators integrated into Side Mirror Housings) | Yes (Dynamic LED indicators integrated into Side Mirror Housings) | Yes (Dynamic LED indicators integrated into Side Mirror Housings) |
| Rain-sensing Wipers | Yes (Variable Automatic Intermittent Sensing Setup) | Yes (Variable Automatic Intermittent Sensing Setup) | Yes (Variable Automatic Intermittent Sensing Setup) | Yes (Variable Automatic Intermittent Sensing Setup) | Yes (Variable Automatic Intermittent Sensing Setup) | Yes (Variable Automatic Intermittent Sensing Setup) | Yes (Automatic speed adjusting variable wiper moisture sensor elements) | Yes (Intermittent automatic water concentration monitoring sensor matrix) | Yes (Automatic speed adjusting variable wiper moisture sensor elements) | Yes (Automatic speed adjusting variable wiper moisture sensor elements) | Yes (Automatic speed adjusting variable wiper moisture sensor elements) | Yes (Automatic speed adjusting variable wiper moisture sensor elements) |
| One Touch Up | Yes (All Passenger Doors Windows) | Yes (All Passenger Doors Windows) | Yes (All Passenger Doors Windows) | Yes (All Passenger Doors Windows) | Yes (All Passenger Doors Windows) | Yes (Front Driver and Passenger Doors Windows) | Yes (Anti-pinch parameters implemented across all window panels) | Yes (Equipped with safety auto-reverse pressure sensors across all panels) | Yes (Equipped with Anti-Pinch Pressure Sensors for all panels) | Yes (Equipped with Anti-Pinch Pressure Sensors for all panels) | Yes (Equipped with Anti-Pinch Pressure Sensors for all panels) | Yes (Equipped with Anti-Pinch Pressure Sensors for all panels) |
| One Touch Down | Yes (All Passenger Doors Windows) | Yes (All Passenger Doors Windows) | Yes (All Passenger Doors Windows) | Yes (All Passenger Doors Windows) | Yes (All Passenger Doors Windows) | Yes (Front Driver and Passenger Doors Windows) | Yes (One-touch automatic express drop functionality) | Yes (Continuous single trigger holding triggers immediate complete lowering) | Yes (Express lowering feature via continuous trigger holding) | Yes (Express lowering feature via continuous trigger holding) | Yes (Express lowering feature via continuous trigger holding) | Yes (Express lowering feature via continuous trigger holding) |
| Rear Windshield Blind | No | No | No | No | No | No | No (Deep factory-installed privacy window glass processing instead) | No (Premium factory smoked solar attenuating privacy glass applied instead) | No (Deep factory-installed privacy window glass processing instead) | No (Deep factory-installed privacy window glass processing instead) | No (Deep factory-installed privacy window glass processing instead) | No (Deep factory-installed privacy window glass processing instead) |
| Exterior Door Handles Finish | Gloss Black Premium Finish | Gloss Black Premium Finish | Gloss Black Premium Finish | Gloss Black Premium Finish | Gloss Black Premium Finish | Gloss Black Premium Finish | Body-Coloured / Gloss Black contrast handles | Gloss Black / Body-Coloured depending on theme configuration choices | Body-Coloured / Gloss Black contrast handles | Gloss Black / Body-Coloured depending on theme configuration choices | Gloss Black / Body-Coloured handles depending on theme configuration choices | Gloss Black Finished dynamic handles |
| Interior Door Handles | Premium Noble Chrome/Satin Finish options | Premium Noble Chrome/Satin Finish options | Premium Noble Chrome/Satin Finish options | Premium Noble Chrome/Satin Finish options | Premium Noble Chrome/Satin Finish options | Premium Noble Chrome/Satin Finish options | Yes (Industrial structural metallic design pull hooks) | Yes (Exposed industrial structural metal pulling handles) | Yes (Industrial structural metallic design pull hooks) | Yes (Industrial structural metallic design pull hooks) | Yes (Industrial structural metallic design pull hooks) | Yes (Industrial structural metallic design pull hooks) |
| Scuff Plates | Yes (Illuminated Metal Treadplates with X-Dynamic Script branding) | Yes (Illuminated Metal Treadplates with X-Dynamic Script branding) | Yes (Illuminated Metal Treadplates with Trophy Script branding) | Yes (Illuminated Metal Treadplates with Trophy Script branding) | Yes (Illuminated Metal Treadplates with Defender Script branding) | Yes (Illuminated Metal Treadplates with Defender Script branding) | Yes (Illuminated metal plates bearing the X-Dynamic lettering logo) | Yes (Illuminated metal door plates bearing the customized Defender X logo) | Yes (Illuminated metal plates bearing the X-Dynamic lettering logo) | Yes (Illuminated metal plates bearing the premium V8 model lettering logo) | Yes (Illuminated metal plates bearing the bespoke OCTA diamond emblem) | Yes (Illuminated metal plates bearing the bespoke OCTA diamond emblem) |
| Adjustable ORVMs | Yes (Electrically Adjustable, Heated, Auto-Dimming Mirror Assemblies) | Yes (Electrically Adjustable, Heated, Auto-Dimming Mirror Assemblies) | Yes (Electrically Adjustable, Heated, Auto-Dimming Mirror Assemblies) | Yes (Electrically Adjustable, Heated, Auto-Dimming Mirror Assemblies) | Yes (Electrically Adjustable, Heated, Auto-Dimming Mirror Assemblies) | Yes (Electrically Adjustable, Heated, Auto-Dimming Mirror Assemblies) | Yes (Power Folding, Heated, Auto-dimming with approach memory settings) | Yes (Electrically folding, heated, auto-dimming with dynamic reverse tilt parameters) | Yes (Power Folding, Heated, Auto-Dimming with approach memory settings) | Yes (Power Folding, Heated, Auto-Dimming with approach memory settings) | Yes (Power Folding, Heated, Auto-Dimming with approach memory settings) | Yes (Power Folding, Heated, Auto-Dimming with approach memory settings) |
| Exterior Door Handles | Pull Type Heavy-Duty Layout | Pull Type Heavy-Duty Layout | Pull Type Heavy-Duty Layout | Pull Type Heavy-Duty Layout | Pull Type Heavy-Duty Layout | Pull Type Heavy-Duty Layout | Yes (Heavy-duty pull handle design matches off-road utility profile) | Yes (Heavy-duty exterior off-road grip assemblies) | Yes (Heavy-duty pull handle design matches off-road utility profile) | Yes (Heavy-duty pull handle design matches off-road utility profile) | Yes (Heavy-duty pull handle design matches off-road utility profile) | Yes (Heavy-duty pull handle design matches off-road utility profile) |
| Rear Defogger | Yes (Heated Rear Windshield Glass with Timer Layout) | Yes (Heated Rear Windshield Glass with Timer Layout) | Yes (Heated Rear Windshield Glass with Timer Layout) | Yes (Heated Rear Windshield Glass with Timer Layout) | Yes (Heated Rear Windshield Glass with Timer Layout) | Yes (Heated Rear Windshield Glass with Timer Layout) | Yes (Electric resistive element matrix embedded in rear panoramic glass) | Yes (High-speed defrosting microgrid lines layered into rear canopy glass) | Yes (Electric resistive element matrix embedded in rear panoramic glass) | Yes (Electric resistive element matrix embedded in rear panoramic glass) | Yes (Electric resistive element matrix embedded in rear panoramic glass) | Yes (Electric resistive element matrix embedded in rear panoramic glass) |
| Door Pockets | Yes (Front & Rear Door Pads with Rigid Storage Bottle Slots) | Yes (Front & Rear Door Pads with Rigid Storage Bottle Slots) | Yes (Front & Rear Door Pads with Rigid Storage Bottle Slots) | Yes (Front & Rear Door Pads with Rigid Storage Bottle Slots) | Yes (Front & Rear Door Pads with Rigid Storage Bottle Slots) | Yes (Front Door Pads with Rigid Storage Bottle Slots) | Yes (Deep open door card slots lined with durable easy-clean rubber surfaces) | Yes (Deep open door card slots lined with anti-vibration rubber protective sleeves) | Yes (Deep open door card slots lined with durable easy-clean rubber surfaces) | Yes (Deep open door card slots lined with durable easy-clean rubber surfaces) | Yes (Deep open door card slots lined with durable easy-clean rubber surfaces) | Yes (Deep open door card slots lined with durable easy-clean rubber surfaces) |
| Rear Wiper | Yes (Integrated Window Washer setup) | Yes (Integrated Window Washer setup) | Yes (Integrated Window Washer setup) | Yes (Integrated Window Washer setup) | Yes (Integrated Window Washer setup) | Yes (Integrated Window Washer setup) | Yes (Equipped with integrated washer nozzles and continuous cycle mode) | Yes (Equipped with fluid injection nozzles and automatic reverse gear sync) | Yes (Equipped with integrated washer nozzles and continuous cycle mode) | Yes (Equipped with integrated washer nozzles and continuous cycle mode) | Yes (Equipped with integrated washer nozzles and continuous cycle mode) | Yes (Equipped with integrated washer nozzles and continuous cycle mode) |
| Side Window Blinds | No | No | No | No | No | No | No (Standard dark rear sun-blocking safety glass layout) | No | No (Standard dark rear sun-blocking safety glass layout) | No (Standard dark rear sun-blocking safety glass layout) | No (Standard dark rear sun-blocking safety glass layout) | No (Standard dark rear sun-blocking safety glass layout) |
| Power Windows | Yes (All Row Power Windows Array) | Yes (All Row Power Windows Array) | Yes (All Row Power Windows Array) | Yes (All Row Power Windows Array) | Yes (All Row Power Windows Array) | Yes (Front Power Windows Array) | Yes (All windows electric with child locking isolation safety switches) | Yes (All windows electric with child locking isolation safety switches) | Yes (All windows electric with child locking isolation safety switches) | Yes (All windows electric with child locking isolation safety switches) | Yes (All windows electric with child locking isolation safety switches) | Yes (All windows electric with child locking isolation safety switches) |
| ORVM Colour | Narvik Black High Contrast Finish | Narvik Black High Contrast Finish | Narvik Black High Contrast Finish | Narvik Black High Contrast Finish | Gloss Black Finish | Gloss Black Finish | Gloss Black / Narvik Black premium finishes | Gloss Black / Narvik Black contrast performance mirrors | Gloss Black / Narvik Black premium finishes | Gloss Black / Narvik Black premium finishes | Gloss Black / Narvik Black premium finishes | Gloss Black / Narvik Black premium finishes |
| Power Windows Position | Door Panel Trim Inserts Framework | Door Panel Trim Inserts Framework | Door Panel Trim Inserts Framework | Door Panel Trim Inserts Framework | Door Panel Trim Inserts Framework | Door Panel Trim Inserts Framework | Front Door Armrest Panel Master Console (with individual row overrides) | Driver Door Panel Master Controller Armrest | Driver Side Door Rest Panel Console Group | Driver Side Door Rest Panel Console Group | Driver Side Door Rest Panel Console Group | Driver Side Door Rest Panel Console Group |
| Interior Door Handles Finish | Satin Chrome / Brushed Structural Finish | Satin Chrome / Brushed Structural Finish | Satin Chrome / Brushed Structural Finish | Satin Chrome / Brushed Structural Finish | Satin Chrome / Brushed Structural Finish | Satin Chrome / Brushed Structural Finish | Noble Chrome or Satin Smoked Oak Powder Coat industrial finish | Satin Smoked Chrome or Powder-Coated Industrial Grey metal accents | Brushed Aluminum / Ceramic Dark Trim Finish accents | Satin Smoked Chrome or Powder-Coated Industrial Dark metal accents | Chopped Carbon Fiber composite or Satin Smoked Chrome metal accents | Chopped Carbon Fiber composite or Satin Smoked Chrome metal accents |
| Bootlid Opener | Power Operated (With Soft-Close & Remote Electronic Tailgate Release) | Power Operated (With Soft-Close & Remote Electronic Tailgate Release) | Power Operated (With Soft-Close & Remote Electronic Tailgate Release) | Power Operated (With Soft-Close & Remote Electronic Tailgate Release) | Power Operated (With Soft-Close & Remote Electronic Tailgate Release) | Power Operated (With Soft-Close & Remote Electronic Tailgate Release) | Manual Side-Hinged Tailgate with Soft-Close Assist | Manual Side-Hinged Tailgate with Soft-Close Assist | Manual Side-Hinged Tailgate with Soft-Close Assist | Manual Side-Hinged Tailgate with Soft-Close Assist | Manual Side-Hinged Tailgate with Soft-Close Assist | Manual Side-Hinged Tailgate with Soft-Close Assist |
| Entertainment, Information & Communication | ||||||||||||
| Touchscreen Size | 11.4 inches | 11.4 inches | 11.4 inches | 11.4 inches | 11.4 inches | 11.4 inches | 11.4-inch Curved Glass Infotainment Touchscreen Screen Layout | 11.4-inch Curved Glass Infotainment Touchscreen Screen Layout | 11.4-inch Curved Glass Infotainment Touchscreen Screen Layout | 11.4-inch Curved Glass Infotainment Touchscreen Screen Layout | 11.4-inch Curved Glass Infotainment Touchscreen Screen Layout | 11.4-inch Curved Glass Infotainment Touchscreen Screen Layout |
| Internal Hard Drive | No (Replaced by cloud-connected dynamic caching within Pivi Pro architecture) | No (Replaced by cloud-connected dynamic caching within Pivi Pro architecture) | No (Replaced by cloud-connected dynamic caching within Pivi Pro architecture) | No (Replaced by cloud-connected dynamic caching within Pivi Pro architecture) | No (Replaced by cloud-connected dynamic caching within Pivi Pro architecture) | No (Replaced by cloud-connected dynamic caching within Pivi Pro architecture) | No (Cloud-Based Profile Ecosystem Storage Integration via Pivi Pro) | No (Cloud-Based Profile Ecosystem Storage Integration via Pivi Pro) | No (Cloud-Based Profile Ecosystem Storage Integration via Pivi Pro) | No (Cloud-Based Profile Ecosystem Storage Integration via Pivi Pro) | No (Cloud-Based Profile Ecosystem Storage Integration via Pivi Pro) | No (Cloud-Based Profile Ecosystem Storage Integration via Pivi Pro) |
| USB Compatibility | Yes (High-Speed Type-A & Type-C Interface Slots) | Yes (High-Speed Type-A & Type-C Interface Slots) | Yes (High-Speed Type-A & Type-C Interface Slots) | Yes (High-Speed Type-A & Type-C Interface Slots) | Yes (High-Speed Type-A & Type-C Interface Slots) | Yes (High-Speed Type-A & Type-C Interface Slots) | Yes (Multiple USB-A and USB-C Data & High-Power Charging Ports across all 3 rows) | Yes (Multiple USB-A and USB-C Data & High-Power Charging Ports across all zones) | Yes (Multiple USB-A and USB-C Data & High-Power Charging Ports across all 3 rows) | Yes (Multiple USB-A and USB-C Data & High-Power Charging Ports across all 3 rows) | Yes (Multiple USB-A and USB-C Data & High-Power Charging Ports across all zones) | Yes (Multiple USB-A and USB-C Data & High-Power Charging Ports across all zones) |
| Speakers | 10 Speakers + 1 Subwoofer (400W Meridian Sound System Setup) | 10 Speakers + 1 Subwoofer (400W Meridian Sound System Setup) | 14 Speakers + 1 Subwoofer (700W Meridian Surround Sound System Setup) | 14 Speakers + 1 Subwoofer (700W Meridian Surround Sound System Setup) | 14 Speakers + 1 Subwoofer (700W Meridian Surround Sound System Setup) | 14 Speakers + 1 Subwoofer (700W Meridian Surround Sound System Setup) | 10 Speakers + Subwoofer (400W Meridian Sound System Standard) | 14 Speakers + Subwoofer (700W Meridian Surround Sound System Standard) | 14 Speakers + Subwoofer (700W Meridian Surround Sound System Standard) | 14 Speakers + Subwoofer (700W Meridian Surround Sound System Standard) | 14 Speakers + Subwoofer (700W Meridian Surround Sound System Standard) | 14 Speakers + Subwoofer (700W Meridian Surround Sound System Standard) |
| AM/FM Radio | Yes | Yes | Yes | Yes | Yes | Yes | Yes (FM Multiplex and DAB+ Digital Radio System Architecture) | Yes (FM Multiplex and DAB+ Digital Radio System Architecture) | Yes (FM Multiplex and DAB+ Digital Radio System Architecture) | Yes (FM Multiplex and DAB+ Digital Radio System Architecture) | Yes (FM Multiplex and DAB+ Digital Radio System Architecture) | Yes (FM Multiplex and DAB+ Digital Radio System Architecture) |
| Apple CarPlay | Yes (Wireless) | Yes (Wireless) | Yes (Wireless) | Yes (Wireless) | Yes (Wireless) | Yes (Wireless) | Yes (Wireless Apple CarPlay Integration) | Yes (Wireless Apple CarPlay Integration) | Yes (Wireless Apple CarPlay Integration) | Yes (Wireless Apple CarPlay Integration) | Yes (Wireless Apple CarPlay Integration) | Yes (Wireless Apple CarPlay Integration) |
| Voice Command | Yes (Advanced Voice Control Suite) | Yes (Advanced Voice Control Suite) | Yes (Advanced Voice Control Suite) | Yes (Advanced Voice Control Suite) | Yes (Advanced Voice Control Suite) | Yes (Advanced Voice Control Suite) | Yes (Pivi Pro Natural Language Voice Control System Engine) | Yes (Pivi Pro Natural Language Voice Control System Engine) | Yes (Pivi Pro Natural Language Voice Control System Engine) | Yes (Pivi Pro Natural Language Voice Control System Engine) | Yes (Pivi Pro Natural Language Voice Control System Engine) | Yes (Pivi Pro Natural Language Voice Control System Engine) |
| Steering-mounted controls | Yes (Steering Mounted Audio, Phone, Cruise & Interactive MID Cluster Controls) | Yes (Steering Mounted Audio, Phone, Cruise & Interactive MID Cluster Controls) | Yes (Steering Mounted Audio, Phone, Cruise & Interactive MID Cluster Controls) | Yes (Steering Mounted Audio, Phone, Cruise & Interactive MID Cluster Controls) | Yes (Steering Mounted Audio, Phone, Cruise & Interactive MID Cluster Controls) | Yes (Steering Mounted Audio, Phone, Cruise & Interactive MID Cluster Controls) | Yes (Multifunction Controls with Configurable Mechanical/Capacitive Toggles) | Yes (Multifunction Controls with Configurable Mechanical/Capacitive Toggles) | Yes (Multifunction Controls with Configurable Mechanical/Capacitive Toggles) | Yes (Multifunction Controls with Configurable Mechanical/Capacitive Toggles) | Yes (Multifunction Controls with Configurable Mechanical/Capacitive Toggles) | Yes (Multifunction Controls with Configurable Mechanical/Capacitive Toggles) |
| Wireless Charger | Yes (Front Row Center Console induction charging slot) | Yes (Front Row Center Console induction charging slot) | Yes (Front Row Center Console induction charging slot) | Yes (Front Row Center Console induction charging slot) | Yes (Front Row Center Console induction charging slot) | Yes (Front Row Center Console induction charging slot) | Yes (Wireless Smartphone Charging Deck with Signal Booster Module) | Yes (Wireless Smartphone Charging Deck with Signal Booster Module) | Yes (Wireless Smartphone Charging Deck with Signal Booster Module) | Yes (Wireless Smartphone Charging Deck with Signal Booster Module) | Yes (Wireless Smartphone Charging Deck with Signal Booster Module) | Yes (Wireless Smartphone Charging Deck with Signal Booster Module) |
| AUX Compatibility | No | No | No | No | No | No | No | No | No | No | No | No |
| Bluetooth Compatibility | Yes (With Multi-Device Audio Streaming & Phone Calling Support) | Yes (With Multi-Device Audio Streaming & Phone Calling Support) | Yes (With Multi-Device Audio Streaming & Phone Calling Support) | Yes (With Multi-Device Audio Streaming & Phone Calling Support) | Yes (With Multi-Device Audio Streaming & Phone Calling Support) | Yes (With Multi-Device Audio Streaming & Phone Calling Support) | Yes (Simultaneous Dual-Device Bluetooth Pairing Ecosystem) | Yes (Simultaneous Dual-Device Bluetooth Pairing Ecosystem) | Yes (Simultaneous Dual-Device Bluetooth Pairing Ecosystem) | Yes (Simultaneous Dual-Device Bluetooth Pairing Ecosystem) | Yes (Simultaneous Dual-Device Bluetooth Pairing Ecosystem) | Yes (Simultaneous Dual-Device Bluetooth Pairing Ecosystem) |
| Display | 11.4-inch Pivi Pro Touchscreen + 12.3-inch Interactive Driver Display Display Screen Layout | 11.4-inch Pivi Pro Touchscreen + 12.3-inch Interactive Driver Display Display Screen Layout | 11.4-inch Pivi Pro Touchscreen + 12.3-inch Interactive Driver Display Display Screen Layout | 11.4-inch Pivi Pro Touchscreen + 12.3-inch Interactive Driver Display Display Screen Layout | 11.4-inch Pivi Pro Touchscreen + 12.3-inch Interactive Driver Display Display Screen Layout | 11.4-inch Pivi Pro Touchscreen + 12.3-inch Interactive Driver Display Display Screen Layout | Digital Display (Pivi Pro Connected Architecture Platform) | Digital Display (Pivi Pro Connected Architecture Platform) | Digital Display (Pivi Pro Connected Architecture Platform) | Digital Display (Pivi Pro Connected Architecture Platform) | Digital Display (Pivi Pro Connected Architecture Platform) | Digital Display (Pivi Pro Connected Architecture Platform) |
| Integrated (in-dash) Music System | Yes (Pivi Pro Infotainment Music System Setup) | Yes (Pivi Pro Infotainment Music System Setup) | Yes (Pivi Pro Infotainment Music System Setup) | Yes (Pivi Pro Infotainment Music System Setup) | Yes (Pivi Pro Infotainment Music System Setup) | Yes (Pivi Pro Infotainment Music System Setup) | Yes (Flush Structural Magnesium Transverse Beam Dashboard Unit) | Yes (Flush Structural Magnesium Transverse Beam Dashboard Unit) | Yes (Flush Structural Magnesium Transverse Beam Dashboard Unit) | Yes (Flush Structural Magnesium Transverse Beam Dashboard Unit) | Yes (Flush Structural Magnesium Transverse Beam Dashboard Unit) | Yes (Flush Structural Magnesium Transverse Beam Dashboard Unit) |
| Smart Connectivity | Yes (InControl Remote Connected Application Suite) | Yes (InControl Remote Connected Application Suite) | Yes (InControl Remote Connected Application Suite) | Yes (InControl Remote Connected Application Suite) | Yes (InControl Remote Connected Application Suite) | Yes (InControl Remote Connected Application Suite) | Yes (InControl Remote Smart Connected Ecosystem Apps) | Yes (InControl Remote Smart Connected Ecosystem Apps) | Yes (InControl Remote Smart Connected Ecosystem Apps) | Yes (InControl Remote Smart Connected Ecosystem Apps) | Yes (InControl Remote Smart Connected Ecosystem Apps) | Yes (InControl Remote Smart Connected Ecosystem Apps) |
| Android Auto | Yes (Wireless) | Yes (Wireless) | Yes (Wireless) | Yes (Wireless) | Yes (Wireless) | Yes (Wireless) | Yes (Wireless Android Auto Integration) | Yes (Wireless Android Auto Integration) | Yes (Wireless Android Auto Integration) | Yes (Wireless Android Auto Integration) | Yes (Wireless Android Auto Integration) | Yes (Wireless Android Auto Integration) |
| Head Unit Size | 11.4 inches | 11.4 inches | 11.4 inches | 11.4 inches | 11.4 inches | 11.4 inches | Not Applicable (Integrated Floating High-Definition Curved Screen Profile) | Not Applicable (Integrated Floating High-Definition Curved Screen Profile) | Not Applicable (Integrated Floating High-Definition Curved Screen Profile) | Not Applicable (Integrated Floating High-Definition Curved Screen Profile) | Not Applicable (Integrated Floating High-Definition Curved Screen Profile) | Not Applicable (Integrated Floating High-Definition Curved Screen Profile) |
| iPod Compatibility | Yes | Yes | Yes | Yes | Yes | Yes | Yes (Fully Optimized Data Stream Over Type-C Ports) | Yes (Fully Optimized Data Stream Over Type-C Ports) | Yes (Fully Optimized Data Stream Over Type-C Ports) | Yes (Fully Optimized Data Stream Over Type-C Ports) | Yes (Fully Optimized Data Stream Over Type-C Ports) | Yes (Fully Optimized Data Stream Over Type-C Ports) |
| GPS Navigation System | Yes (Connected Navigation Pro with 3D Mapping & Real-Time Traffic Updates) | Yes (Connected Navigation Pro with 3D Mapping & Real-Time Traffic Updates) | Yes (Connected Navigation Pro with 3D Mapping & Real-Time Traffic Updates) | Yes (Connected Navigation Pro with 3D Mapping & Real-Time Traffic Updates) | Yes (Connected Navigation Pro with 3D Mapping & Real-Time Traffic Updates) | Yes (Connected Navigation Pro with 3D Mapping & Real-Time Traffic Updates) | Yes (Built-in Connected Navigation Pro with 3D Terrain Mapping) | Yes (Built-in Connected Navigation Pro with 3D Terrain Mapping) | Yes (Built-in Connected Navigation Pro with 3D Terrain Mapping) | Yes (Built-in Connected Navigation Pro with 3D Terrain Mapping) | Yes (Built-in Connected Navigation Pro with 3D Terrain Mapping) | Yes (Built-in Connected Navigation Pro with 3D Terrain Mapping) |
| Emergency Call | Yes (Automated SOS e-Call Emergency Response Notification) | Yes (Automated SOS e-Call Emergency Response Notification) | Yes (Automated SOS e-Call Emergency Response Notification) | Yes (Automated SOS e-Call Emergency Response Notification) | Yes (Automated SOS e-Call Emergency Response Notification) | Yes (Automated SOS e-Call Emergency Response Notification) | Yes (Automated Crash Network Signal Transmission upon Airbag Event Deployment) | Yes (Automated Crash Network Signal Transmission upon Airbag Event Deployment) | Yes (Automated Crash Network Signal Transmission upon Airbag Event Deployment) | Yes (Automated Crash Network Signal Transmission upon Airbag Event Deployment) | Yes (Automated Crash Network Signal Transmission upon Airbag Event Deployment) | Yes (Automated Crash Network Signal Transmission upon Airbag Event Deployment) |
| Mobile App Features | ||||||||||||
| Find My Car | Yes | Yes | Yes | Yes | Yes | Yes | Yes (Real-time GPS Tracking via Land Rover Remote Smartphone App) | Yes (Real-time GPS Tracking via Land Rover Remote Smartphone App) | Yes (Real-time GPS Tracking via Land Rover Remote Smartphone App) | Yes (Real-time GPS Tracking via Land Rover Remote Smartphone App) | Yes (Real-time GPS Tracking via Land Rover Remote Smartphone App) | Yes (Real-time GPS Tracking via Land Rover Remote Smartphone App) |
| Remote AC: On / Off via App | Yes (Remote Climate Engine Start Pre-Conditioning Layout Setup) | Yes (Remote Climate Engine Start Pre-Conditioning Layout Setup) | Yes (Remote Climate Engine Start Pre-Conditioning Layout Setup) | Yes (Remote Climate Engine Start Pre-Conditioning Layout Setup) | Yes (Remote Climate Engine Start Pre-Conditioning Layout Setup) | Yes (Remote Climate Engine Start Pre-Conditioning Layout Setup) | Yes (Remote Cabin Pre-conditioning and AC Control via Smartphone App) | Yes (Remote Cabin Pre-conditioning and AC Control via Smartphone App) | Yes (Remote Cabin Pre-conditioning and AC Control via Smartphone App) | Yes (Remote Cabin Pre-conditioning and AC Control via Smartphone App) | Yes (Remote Cabin Pre-conditioning and AC Control via Smartphone App) | Yes (Remote Cabin Pre-conditioning and AC Control via Smartphone App) |
| Emergency Call Button | Yes | Yes | Yes | Yes | Yes | Yes | Yes (Roof Console Emergency SOS Button Grid System) | Yes (Roof Console Emergency SOS Button Grid System) | Yes (Roof Console Emergency SOS Button Grid System) | Yes (Roof Console Emergency SOS Button Grid System) | Yes (Roof Console Emergency SOS Button Grid System) | Yes (Roof Console Emergency SOS Button Grid System) |
| Alexa Compatibility | Yes | Yes | Yes | Yes | Yes | Yes | Yes (Direct Amazon Alexa Embedded Ecosystem Support) | Yes (Direct Amazon Alexa Embedded Ecosystem Support) | Yes (Direct Amazon Alexa Embedded Ecosystem Support) | Yes (Direct Amazon Alexa Embedded Ecosystem Support) | Yes (Direct Amazon Alexa Embedded Ecosystem Support) | Yes (Direct Amazon Alexa Embedded Ecosystem Support) |
| Remote Sunroof: Open / Close via App | Yes (Remote Sunroof Venting and Closure functionality via application mapping) | Yes (Remote Sunroof Venting and Closure functionality via application mapping) | Yes (Remote Sunroof Venting and Closure functionality via application mapping) | Yes (Remote Sunroof Venting and Closure functionality via application mapping) | Yes (Remote Sunroof Venting and Closure functionality via application mapping) | Yes (Remote Sunroof Venting and Closure functionality via application mapping) | No | No | No | No | No | No |
| Over The Air (OTA) Updates | Yes (Over-The-Air Software Updates Support) | Yes (Over-The-Air Software Updates Support) | Yes (Over-The-Air Software Updates Support) | Yes (Over-The-Air Software Updates Support) | Yes (Over-The-Air Software Updates Support) | Yes (Over-The-Air Software Updates Support) | Yes (SOTA Over-The-Air Software Module Deployments) | Yes (SOTA Over-The-Air Software Module Deployments) | Yes (SOTA Over-The-Air Software Module Deployments) | Yes (SOTA Over-The-Air Software Module Deployments) | Yes (SOTA Over-The-Air Software Module Deployments) | Yes (SOTA Over-The-Air Software Module Deployments) |
| Check Vehicle Status via App | Yes (Real-Time Diagnostic Fluid Levels, Security Monitoring Data, and Status App) | Yes (Real-Time Diagnostic Fluid Levels, Security Monitoring Data, and Status App) | Yes (Real-Time Diagnostic Fluid Levels, Security Monitoring Data, and Status App) | Yes (Real-Time Diagnostic Fluid Levels, Security Monitoring Data, and Status App) | Yes (Real-Time Diagnostic Fluid Levels, Security Monitoring Data, and Status App) | Yes (Real-Time Diagnostic Fluid Levels, Security Monitoring Data, and Status App) | Yes (Monitors Range, Fuel Level, Lock Status, and Windows via App) | Yes (Monitors Range, Fuel Level, Lock Status, and Windows via App) | Yes (Monitors Range, Fuel Level, Lock Status, and Windows via App) | Yes (Monitors Range, Fuel Level, Lock Status, and Windows via App) | Yes (Monitors Range, Fuel Level, Lock Status, and Windows via App) | Yes (Monitors Range, Fuel Level, Lock Status, and Windows via App) |
| Geo-fence | Yes | Yes | Yes | Yes | Yes | Yes | Yes (Geofence Perimeter and Valet Boundary Alert Software) | Yes (Geofence Perimeter and Valet Boundary Alert Software) | Yes (Geofence Perimeter and Valet Boundary Alert Software) | Yes (Geofence Perimeter and Valet Boundary Alert Software) | Yes (Geofence Perimeter and Valet Boundary Alert Software) | Yes (Geofence Perimeter and Valet Boundary Alert Software) |
| Remote Car Lock/Unlock via App | Yes | Yes | Yes | Yes | Yes | Yes | Yes (Secure Remote Lock and Unlock Interface via Mobile Device) | Yes (Secure Remote Lock and Unlock Interface via Mobile Device) | Yes (Secure Remote Lock and Unlock Interface via Mobile Device) | Yes (Secure Remote Lock and Unlock Interface via Mobile Device) | Yes (Secure Remote Lock and Unlock Interface via Mobile Device) | Yes (Secure Remote Lock and Unlock Interface via Mobile Device) |
| Car Light Flashing & Honking via App | Yes | Yes | Yes | Yes | Yes | Yes | Yes (Remote Horn and Indicator Light Signal Control via App) | Yes (Remote Horn and Indicator Light Signal Control via App) | Yes (Remote Horn and Indicator Light Signal Control via App) | Yes (Remote Horn and Indicator Light Signal Control via App) | Yes (Remote Horn and Indicator Light Signal Control via App) | Yes (Remote Horn and Indicator Light Signal Control via App) |
| Instrumentation | ||||||||||||
| Door Ajar Warning | Yes | Yes | Yes | Yes | Yes | Yes | Yes (3D Vehicle Graphic Schematic Cluster Alarm Matrix) | Yes (3D Vehicle Graphic Schematic Cluster Alarm Matrix) | Yes (3D Vehicle Graphic Schematic Cluster Alarm Matrix) | Yes (3D Vehicle Graphic Schematic Cluster Alarm Matrix) | Yes (3D Vehicle Graphic Schematic Cluster Alarm Matrix) | Yes (3D Vehicle Graphic Schematic Cluster Alarm Matrix) |
| Gear Indicator | Yes (Digital Electronic Gear Selection Shifter Matrix Position Indicator) | Yes (Digital Electronic Gear Selection Shifter Matrix Position Indicator) | Yes (Digital Electronic Gear Selection Shifter Matrix Position Indicator) | Yes (Digital Electronic Gear Selection Shifter Matrix Position Indicator) | Yes (Digital Electronic Gear Selection Shifter Matrix Position Indicator) | Yes (Digital Electronic Gear Selection Shifter Matrix Position Indicator) | Yes (Displays Active Dynamic Range Selection in Digital Driver Display) | Yes (Displays Active Dynamic Range Selection in Digital Driver Display) | Yes (Displays Active Dynamic Range Selection in Digital Driver Display) | Yes (Displays Active Dynamic Range Selection in Digital Driver Display) | Yes (Displays Active Dynamic Range Selection in Digital Driver Display) | Yes (Displays Active Dynamic Range Selection in Digital Driver Display) |
| Shift Indicator | No (Not Applicable for Automatic / Torque-Converter Transmissions) | No (Not Applicable for Automatic / Torque-Converter Transmissions) | No (Not Applicable for Automatic / Torque-Converter Transmissions) | No (Not Applicable for Automatic / Torque-Converter Transmissions) | No (Not Applicable for Automatic / Torque-Converter Transmissions) | No (Not Applicable for Automatic / Torque-Converter Transmissions) | Yes (Efficiency Shift Calibration Indicators Embedded in Cluster View) | No (Shift indicators typically omitted on premium high-performance torque-converter automatic V8 models) | No (Shift indicators typically omitted on high-performance torque-converter automatic supercharged V8 layouts) | No (Shift indicators typically omitted on high-performance torque-converter automatic supercharged V8 layouts) | No (Shift indicators typically omitted on high-performance torque-converter automatic V8 layouts) | No (Shift indicators typically omitted on high-performance torque-converter automatic V8 layouts) |
| Instantaneous Consumption | Yes | Yes | Yes | Yes | Yes | Yes | Yes (Live L/100km or km/L Dynamic Engine Run Computations) | Yes (Live L/100km or km/L Dynamic Engine Run Computations) | Yes (Live L/100km or km/L Dynamic Engine Run Computations) | Yes (Live L/100km or km/L Dynamic Engine Run Computations) | Yes (Live L/100km or km/L Dynamic Engine Run Computations) | Yes (Live L/100km or km/L Dynamic Engine Run Computations) |
| Average Fuel Consumption | Yes | Yes | Yes | Yes | Yes | Yes | Yes (Dual Independent A/B Telemetry Engine Calculation Data Logs) | Yes (Dual Independent A/B Telemetry Engine Calculation Data Logs) | Yes (Dual Independent A/B Telemetry Engine Calculation Data Logs) | Yes (Dual Independent A/B Telemetry Engine Calculation Data Logs) | Yes (Dual Independent A/B Telemetry Engine Calculation Data Logs) | Yes (Dual Independent A/B Telemetry Engine Calculation Data Logs) |
| Clock | Yes (Digital Display Configuration) | Yes (Digital Display Configuration) | Yes (Digital Display Configuration) | Yes (Digital Display Configuration) | Yes (Digital Display Configuration) | Yes (Digital Display Configuration) | Yes (Satellite Auto-Sync Clock Interface) | Yes (Satellite Auto-Sync Clock Interface) | Yes (Satellite Auto-Sync Clock Interface) | Yes (Satellite Auto-Sync Clock Interface) | Yes (Satellite Auto-Sync Clock Interface) | Yes (Satellite Auto-Sync Clock Interface) |
| Average Speed | Yes | Yes | Yes | Yes | Yes | Yes | Yes (Evaluated Across Current Engine Trip Run Time Profiles) | Yes (Evaluated Across Current Engine Trip Run Time Profiles) | Yes (Evaluated Across Current Engine Trip Run Time Profiles) | Yes (Evaluated Across Current Engine Trip Run Time Profiles) | Yes (Evaluated Across Current Engine Trip Run Time Profiles) | Yes (Evaluated Across Current Engine Trip Run Time Profiles) |
| Heads Up Display (HUD) | Yes (Interactive Driver Projection Head-Up Display Layout) | Yes (Interactive Driver Projection Head-Up Display Layout) | Yes (Interactive Driver Projection Head-Up Display Layout) | Yes (Interactive Driver Projection Head-Up Display Layout) | Yes (Interactive Driver Projection Head-Up Display Layout) | Yes (Interactive Driver Projection Head-Up Display Layout) | Yes (High-Resolution Windscreen Projected HUD Configured) | Yes (High-Resolution Windscreen Projected HUD Configured) | Yes (High-Resolution Windscreen Projected HUD Configured) | Yes (High-Resolution Windscreen Projected HUD Configured) | Yes (High-Resolution Windscreen Projected HUD Configured) | Yes (High-Resolution Windscreen Projected HUD Configured) |
| Tachometer | Yes (Digital Rev Counter Layout Dial via Driver Cockpit Screen) | Yes (Digital Rev Counter Layout Dial via Driver Cockpit Screen) | Yes (Digital Rev Counter Layout Dial via Driver Cockpit Screen) | Yes (Digital Rev Counter Layout Dial via Driver Cockpit Screen) | Yes (Digital Rev Counter Layout Dial via Driver Cockpit Screen) | Yes (Digital Rev Counter Layout Dial via Driver Cockpit Screen) | Yes (Customizable Interactive Digital Gauge Profile Layouts) | Yes (Customizable Interactive Digital Gauge Profile Layouts) | Yes (Customizable Interactive Digital Gauge Profile Layouts) | Yes (Customizable Interactive Digital Gauge Profile Layouts) | Yes (Customizable Interactive Digital Gauge Profile Layouts) | Yes (Customizable Interactive Digital Gauge Profile Layouts) |
| Adjustable Cluster Brightness | Yes | Yes | Yes | Yes | Yes | Yes | Yes (Synchronized Menu Interface Display Management Controllers) | Yes (Synchronized Menu Interface Display Management Controllers) | Yes (Synchronized Menu Interface Display Management Controllers) | Yes (Synchronized Menu Interface Display Management Controllers) | Yes (Synchronized Menu Interface Display Management Controllers) | Yes (Synchronized Menu Interface Display Management Controllers) |
| Instrument Cluster | Fully Digital Multi-Screen Cockpit Console Layout | Fully Digital Multi-Screen Cockpit Console Layout | Fully Digital Multi-Screen Cockpit Console Layout | Fully Digital Multi-Screen Cockpit Console Layout | Fully Digital Multi-Screen Cockpit Console Layout | Fully Digital Multi-Screen Cockpit Console Layout | Digital (12.3-inch High-Definition Interactive Driver Display) | Digital (12.3-inch High-Definition Interactive Driver Display) | Digital (12.3-inch High-Definition Interactive Driver Display) | Digital (12.3-inch High-Definition Interactive Driver Display) | Digital (12.3-inch High-Definition Interactive Driver Display) | Digital (12.3-inch High-Definition Interactive Driver Display) |
| Instrument Cluster Screen Type | 12.3-inch High-Definition Interactive Driver TFT Instrument Display Screen | 12.3-inch High-Definition Interactive Driver TFT Instrument Display Screen | 12.3-inch High-Definition Interactive Driver TFT Instrument Display Screen | 12.3-inch High-Definition Interactive Driver TFT Instrument Display Screen | 12.3-inch High-Definition Interactive Driver TFT Instrument Display Screen | 12.3-inch High-Definition Interactive Driver TFT Instrument Display Screen | TFT High-Definition Multi-Theme Color Virtual Screen Matrix | TFT High-Definition Multi-Theme Color Virtual Screen Matrix | TFT High-Definition Multi-Theme Color Virtual Screen Matrix | TFT High-Definition Multi-Theme Color Virtual Screen Matrix | TFT High-Definition Multi-Theme Color Virtual Screen Matrix | TFT High-Definition Multi-Theme Color Virtual Screen Matrix |
| Low Fuel Level Warning | Yes | Yes | Yes | Yes | Yes | Yes | Yes (Illuminated Multi-Stage Cluster Warning Linked to Navigation Range Data) | Yes (Illuminated Multi-Stage Cluster Warning Linked to Navigation Range Data) | Yes (Illuminated Multi-Stage Cluster Warning Linked to Navigation Range Data) | Yes (Illuminated Multi-Stage Cluster Warning Linked to Navigation Range Data) | Yes (Illuminated Multi-Stage Cluster Warning Linked to Navigation Range Data) | Yes (Illuminated Multi-Stage Cluster Warning Linked to Navigation Range Data) |
| Distance to Empty | Yes | Yes | Yes | Yes | Yes | Yes | Yes (Dynamically Computed via Real-time Driving Telemetry Feeds) | Yes (Dynamically Computed via Real-time Driving Telemetry Feeds) | Yes (Dynamically Computed via Real-time Driving Telemetry Feeds) | Yes (Dynamically Computed via Real-time Driving Telemetry Feeds) | Yes (Dynamically Computed via Real-time Driving Telemetry Feeds) | Yes (Dynamically Computed via Real-time Driving Telemetry Feeds) |
| Trip Meter | Yes (Multi-Profile Electronic Trip Log Tracking) | Yes (Multi-Profile Electronic Trip Log Tracking) | Yes (Multi-Profile Electronic Trip Log Tracking) | Yes (Multi-Profile Electronic Trip Log Tracking) | Yes (Multi-Profile Electronic Trip Log Tracking) | Yes (Multi-Profile Electronic Trip Log Tracking) | Yes (Dual High-Accuracy Electronic Multi-Logs with Steering Menu Controls) | Yes (Dual High-Accuracy Electronic Multi-Logs with Steering Menu Controls) | Yes (Dual High-Accuracy Electronic Multi-Logs with Steering Menu Controls) | Yes (Dual High-Accuracy Electronic Multi-Logs with Steering Menu Controls) | Yes (Dual High-Accuracy Electronic Multi-Logs with Steering Menu Controls) | Yes (Dual High-Accuracy Electronic Multi-Logs with Steering Menu Controls) |
| Manufacturer Warranty | ||||||||||||
| Battery Warranty (In Kilometres) | Standard Lead-Acid Battery Baseline Cover Option | Standard Lead-Acid Battery Baseline Cover Option | Standard Lead-Acid Battery Baseline Cover Option | Standard Lead-Acid Battery Baseline Cover Option | Standard Lead-Acid Battery Baseline Cover Option | Standard Lead-Acid Battery Baseline Cover Option | Not Applicable (Mild-Hybrid 48V MHEV Traction Battery System Unit Spec) | Not Applicable (Standard internal combustion engine 12V system) | Not Applicable (Standard internal combustion engine 12V system battery) | Not Applicable (Standard internal combustion engine 12V system battery) | Not Applicable (Mild-hybrid subsystem tracking values outside standard mileage boundaries) | Not Applicable (Mild-hybrid traction battery metrics do not apply standard 12V terminal tracking rules) |
| Warranty (In Years) | 3 Years (Standard Land Rover India Protection Cover Package) | 3 Years (Standard Land Rover India Protection Cover Package) | 3 Years (Standard Land Rover India Protection Cover Package) | 3 Years (Standard Land Rover India Protection Cover Package) | 3 Years (Standard Land Rover India Protection Cover Package) | 3 Years (Standard Land Rover India Protection Cover Package) | 3 Years or 5 Years (Depending on Regional Importer Delivery Market Terms) | 3 Years or 5 Years (Depending on Regional Importer Delivery Market Terms) | 3 Years or 5 Years (Depending on Regional Importer Delivery Market Terms) | 3 Years or 5 Years (Depending on Regional Importer Delivery Market Terms) | 3 Years or 5 Years (Depending on Regional Importer Delivery Market Terms) | 3 Years or 5 Years (Depending on Regional Importer Delivery Market Terms) |
| Battery Warranty (In Years) | 1 Year | 1 Year | 1 Year | 1 Year | 1 Year | 1 Year | 5 Years or 8 Years (For the 48V MHEV Battery Subsystem Component Architecture) | Not Applicable | Not Applicable | Not Applicable | 5 Years or 8 Years (For MHEV powertrain components) | 5 Years or 8 Years (For MHEV powertrain components) |
| Warranty (In Kilometres) | 1,00,000 km | 1,00,000 km | 1,00,000 km | 1,00,000 km | 1,00,000 km | 1,00,000 km | 100,000 km or 150,000 km (Varies According to Regional Dealership Frameworks) | 100,000 km or 150,000 km (Varies According to Regional Dealership Frameworks) | 100,000 km or 150,000 km (Varies According to Regional Dealership Frameworks) | 100,000 km or 150,000 km (Varies According to Regional Dealership Frameworks) | 100,000 km or 150,000 km (Varies According to Regional Dealership Frameworks) | 100,000 km or 150,000 km (Varies According to Regional Dealership Frameworks) |
| Storage | ||||||||||||
| Cup Holders | Yes (Front and Second Row Console Cup Holders) | Yes (Front and Second Row Console Cup Holders) | Yes (Front and Second Row Console Cup Holders) | Yes (Front and Second Row Console Cup Holders) | Yes (Front and Second Row Console Cup Holders) | Yes (Front and Second Row Console Cup Holders) | Yes (Oversized Channels Configured Across Rows 1, 2, and 3) | Yes (Oversized Channels Configured Across Row 1 and Row 2) | Yes (Oversized Channels Configured Across Rows 1, 2, and 3) | Yes (Oversized Channels Configured Across Rows 1, 2, and 3) | Yes (Oversized Channels Configured Across Row 1 and Row 2) | Yes (Oversized Channels Configured Across Row 1 and Row 2) |
| Cooled Glovebox | No (Replaced by Front Center Armrest Refrigerator Cooler Compartment Option) | No (Replaced by Front Center Armrest Refrigerator Cooler Compartment Option) | No (Replaced by Front Center Armrest Refrigerator Cooler Compartment Option) | No (Replaced by Front Center Armrest Refrigerator Cooler Compartment Option) | No (Replaced by Front Center Armrest Refrigerator Cooler Compartment Option) | No (Replaced by Front Center Armrest Refrigerator Cooler Compartment Option) | Yes (Variable Chilled Cool Air Flow Chamber Inside Main Dashboard Box) | Yes (Variable Chilled Cool Air Flow Chamber Inside Main Dashboard Box) | Yes (Variable Chilled Cool Air Flow Chamber Inside Main Dashboard Box) | Yes (Variable Chilled Cool Air Flow Chamber Inside Main Dashboard Box) | Yes (Variable Chilled Cool Air Flow Chamber Inside Main Dashboard Box) | Yes (Variable Chilled Cool Air Flow Chamber Inside Main Dashboard Box) |
| Sunglass Holder | No | No | No | No | No | No | No (Optimized Ceiling Panel Spaces for Sunroof Mechanics and eCall Blocks) | No (Optimized Ceiling Panel Spaces for Sunroof Mechanics and eCall Blocks) | No (Optimized Ceiling Panel Spaces for Sunroof Mechanics and eCall Blocks) | No (Optimized Ceiling Panel Spaces for Sunroof Mechanics and eCall Blocks) | No (Optimized Ceiling Panel Spaces for Sunroof Mechanics and eCall Blocks) | No (Optimized Ceiling Panel Spaces for Sunroof Mechanics and eCall Blocks) |
| Driver Armrest Storage | Yes (Spacious Under-Armrest Center Console Storage Tray) | Yes (Spacious Under-Armrest Center Console Storage Tray) | Yes (Spacious Under-Armrest Center Console Storage Tray) | Yes (Spacious Under-Armrest Center Console Storage Tray) | Yes (Spacious Under-Armrest Center Console Storage Tray) | Yes (Spacious Under-Armrest Center Console Storage Tray) | Yes (Deep Multilayer Console Tray with Integrated Refrigerator Compartment Option) | Yes (Deep Multilayer Console Tray with Integrated Refrigerator Compartment Option) | Yes (Deep Multilayer Console Tray with Integrated Refrigerator Compartment Option) | Yes (Deep Multilayer Console Tray with Integrated Refrigerator Compartment Option) | Yes (Deep Multilayer Console Tray with Integrated Refrigerator Compartment Option) | Yes (Deep Multilayer Console Tray with Integrated Refrigerator Compartment Option) |
| Cup Holders Position | Front Central Floor Console & Second Row Fold-Down Center Armrest area | Front Central Floor Console & Second Row Fold-Down Center Armrest area | Front Central Floor Console & Second Row Fold-Down Center Armrest area | Front Central Floor Console & Second Row Fold-Down Center Armrest area | Front Central Floor Console & Second Row Fold-Down Center Armrest area | Front Central Floor Console & Second Row Fold-Down Center Armrest area | Front Center Console, Rear Armrest, Side Wall Panels for Row 3 | Front Center Console and Rear Seat Center Armrest | Front Center Console, Rear Armrest, Side Wall Panels for Row 3 | Front Center Console, Rear Armrest, Side Wall Panels for Row 3 | Front Center Console and Rear Seat Center Armrest | Front Center Console and Rear Seat Center Armrest |
| Comfort & Convenience | ||||||||||||
| Cruise Control | Yes (Adaptive Performance Cruise Control with Stop/Go Assist) | Yes (Adaptive Performance Cruise Control with Stop/Go Assist) | Yes (Adaptive Performance Cruise Control with Stop/Go Assist) | Yes (Adaptive Performance Cruise Control with Stop/Go Assist) | Yes (Adaptive Performance Cruise Control with Stop/Go Assist) | Yes (Adaptive Performance Cruise Control with Stop/Go Assist) | Yes (Adaptive Cruise Control with Steering Assist and Stop & Go Layout) | Yes (Adaptive Cruise Control with Steering Assist and Stop & Go Layout) | Yes (Adaptive Cruise Control with Steering Assist and Stop & Go Layout) | Yes (Adaptive Cruise Control with Steering Assist and Stop & Go Layout) | Yes (Adaptive Cruise Control with Steering Assist and Stop & Go Layout) | Yes (Adaptive Cruise Control with Steering Assist and Stop & Go Layout) |
| Rear AC | Yes (Rear B-Pillar & Center Console AC Vents with Independent Control) | Yes (Rear B-Pillar & Center Console AC Vents with Independent Control) | Yes (Rear B-Pillar & Center Console AC Vents with Independent Control) | Yes (Rear B-Pillar & Center Console AC Vents with Independent Control) | Yes (Rear B-Pillar & Center Console AC Vents with Independent Control) | Yes (Rear B-Pillar & Center Console AC Vents with Independent Control) | Yes (Dedicated Roof-Mounted Air Vents with Pillar Blowers for Rows 2 and 3) | Yes (Dedicated pillar blowers and air distribution for row 2 passengers) | Yes (Dedicated Roof-Mounted Air Vents with Pillar Blowers for Rows 2 and 3) | Yes (Dedicated Roof-Mounted Air Vents with Pillar Blowers for Rows 2 and 3) | Yes (Dedicated pillar blowers and air distribution for row 2 passengers) | Yes (Dedicated pillar blowers and air distribution for row 2 passengers) |
| Heater | Yes | Yes | Yes | Yes | Yes | Yes | Yes (High-Capacity Positive Temperature Coefficient PTC Auxiliary Core Element) | Yes (High-Capacity Positive Temperature Coefficient PTC Auxiliary Core Element) | Yes (High-Capacity Positive Temperature Coefficient PTC Auxiliary Core Element) | Yes (High-Capacity Positive Temperature Coefficient PTC Auxiliary Core Element) | Yes (High-Capacity Positive Temperature Coefficient PTC Auxiliary Core Element) | Yes (High-Capacity Positive Temperature Coefficient PTC Auxiliary Core Element) |
| Air Conditioner- Automatic/Zones | Yes (3-Zone Automatic Climate Control Integration Setup) | Yes (3-Zone Automatic Climate Control Integration Setup) | Yes (3-Zone Automatic Climate Control Integration Setup) | Yes (3-Zone Automatic Climate Control Integration Setup) | Yes (3-Zone Automatic Climate Control Integration Setup) | Yes (3-Zone Automatic Climate Control Integration Setup) | Yes (Four-Zone Automatic Climate Control System Architecture) | Yes (Three-Zone Automatic Climate Control System Architecture) | Yes (Four-Zone Automatic Climate Control System Architecture) | Yes (Four-Zone Automatic Climate Control System Architecture) | Yes (Three-Zone Automatic Climate Control System Architecture) | Yes (Three-Zone Automatic Climate Control System Architecture) |
| Electronic Parking Brake | Yes (With Automatic Auto-Hold System Assist) | Yes (With Automatic Auto-Hold System Assist) | Yes (With Automatic Auto-Hold System Assist) | Yes (With Automatic Auto-Hold System Assist) | Yes (With Automatic Auto-Hold System Assist) | Yes (With Automatic Auto-Hold System Assist) | Yes (Electronic Parking Brake with Auto Hill-Release Safety Automation) | Yes (Electronic Parking Brake with Auto Hill-Release Safety Automation) | Yes (Electronic Parking Brake with Auto Hill-Release Safety Automation) | Yes (Electronic Parking Brake with Auto Hill-Release Safety Automation) | Yes (Electronic Parking Brake with Auto Hill-Release Safety Automation) | Yes (Electronic Parking Brake with Auto Hill-Release Safety Automation) |
| Cabin Boot Access | Yes (Spacious Rear Loadspace Area accessibility layout) | Yes (Spacious Rear Loadspace Area accessibility layout) | Yes (Spacious Rear Loadspace Area accessibility layout) | Yes (Spacious Rear Loadspace Area accessibility layout) | Yes (Spacious Rear Loadspace Area accessibility layout) | Yes (Spacious Rear Loadspace Area accessibility layout) | Yes (Highly Configurable Fold-Down Rear Row Configurations Entry) | Yes (Rear seat middle pass-through layout access to cargo floor area) | Yes (Highly Configurable Fold-Down Rear Row Configurations Entry) | Yes (Highly Configurable Fold-Down Rear Row Configurations Entry) | Yes (Rear seat middle pass-through layout access to cargo floor area) | Yes (Rear seat middle pass-through layout access to cargo floor area) |
| Parking Assist | 3D Surround Camera View System with Front & Rear Sensors Matrix Feed | 3D Surround Camera View System with Front & Rear Sensors Matrix Feed | 3D Surround Camera View System with Front & Rear Sensors Matrix Feed | 3D Surround Camera View System with Front & Rear Sensors Matrix Feed | 3D Surround Camera View System with Front & Rear Sensors Matrix Feed | 3D Surround Camera View System with Front & Rear Sensors Matrix Feed | Yes (3D Surround Camera System with 360-Degree Park Distance Sensing Matrix) | Yes (3D Surround Camera System with 360-Degree Park Distance Sensing Matrix) | Yes (3D Surround Camera System with 360-Degree Park Distance Sensing Matrix) | Yes (3D Surround Camera System with 360-Degree Park Distance Sensing Matrix) | Yes (3D Surround Camera System with 360-Degree Park Distance Sensing Matrix) | Yes (3D Surround Camera System with 360-Degree Park Distance Sensing Matrix) |
| Air Purifier | Yes (Cabin Air Purification Plus Setup with PM2.5 Filtration) | Yes (Cabin Air Purification Plus Setup with PM2.5 Filtration) | Yes (Cabin Air Purification Plus Setup with PM2.5 Filtration) | Yes (Cabin Air Purification Plus Setup with PM2.5 Filtration) | Yes (Cabin Air Purification Plus Setup with PM2.5 Filtration) | Yes (Cabin Air Purification Plus Setup with PM2.5 Filtration) | Yes (Cabin Air Purification Plus System with PM2.5 Filtration and Nanoe-X Engine) | Yes (Cabin Air Purification Plus System with PM2.5 Filtration and Nanoe-X Engine) | Yes (Cabin Air Purification Plus System with PM2.5 Filtration and Nanoe-X Engine) | Yes (Cabin Air Purification Plus System with PM2.5 Filtration and Nanoe-X Engine) | Yes (Cabin Air Purification Plus System with PM2.5 Filtration and Nanoe-X Engine) | Yes (Cabin Air Purification Plus System with PM2.5 Filtration and Nanoe-X Engine) |
| Third Row AC Zone | Not Applicable (Strictly 5-Seater Cabin Layout Configuration) | Not Applicable (Strictly 5-Seater Cabin Layout Configuration) | Not Applicable (Strictly 5-Seater Cabin Layout Configuration) | Not Applicable (Strictly 5-Seater Cabin Layout Configuration) | Not Applicable (Strictly 5-Seater Cabin Layout Configuration) | Not Applicable (Strictly 5-Seater Cabin Layout Configuration) | Yes (Independent climate zone with controls for Third Row occupants) | No (Dedicated 5-Seater variant configuration) | Yes (Independent climate zone with controls for Third Row occupants) | Yes (Independent climate zone with controls for Third Row occupants) | No (Dedicated 5-Seater variant configuration) | No (Dedicated 5-Seater variant configuration) |
| Keyless Start/ Button Start | Yes (Keyless Entry with Push Button Start/Stop Switch Ignition System) | Yes (Keyless Entry with Push Button Start/Stop Switch Ignition System) | Yes (Keyless Entry with Push Button Start/Stop Switch Ignition System) | Yes (Keyless Entry with Push Button Start/Stop Switch Ignition System) | Yes (Keyless Entry with Push Button Start/Stop Switch Ignition System) | Yes (Keyless Entry with Push Button Start/Stop Switch Ignition System) | Yes (Engine Start/Stop button positioned on dashboard center stack) | Yes (Engine Start/Stop button positioned on dashboard center stack) | Yes (Engine Start/Stop button positioned on dashboard center stack) | Yes (Engine Start/Stop button positioned on dashboard center stack) | Yes (Engine Start/Stop button positioned on dashboard center stack) | Yes (Engine Start/Stop button positioned on dashboard center stack) |
| Vanity Mirrors on Sun Visors | Yes (With Illuminated Driver & Passenger Side Vanity Mirrors Layout) | Yes (With Illuminated Driver & Passenger Side Vanity Mirrors Layout) | Yes (With Illuminated Driver & Passenger Side Vanity Mirrors Layout) | Yes (With Illuminated Driver & Passenger Side Vanity Mirrors Layout) | Yes (With Illuminated Driver & Passenger Side Vanity Mirrors Layout) | Yes (With Illuminated Driver & Passenger Side Vanity Mirrors Layout) | Yes (Illuminated vanity mirrors behind sun visor sliding covers) | Yes (Illuminated vanity mirrors behind sun visor sliding covers) | Yes (Illuminated vanity mirrors behind sun visor sliding covers) | Yes (Illuminated vanity mirrors behind sun visor sliding covers) | Yes (Illuminated vanity mirrors behind sun visor sliding covers) | Yes (Illuminated vanity mirrors behind sun visor sliding covers) |
| Air Conditioner | Yes (3-Zone Automatic Climate Control Setup) | Yes (3-Zone Automatic Climate Control Setup) | Yes (3-Zone Automatic Climate Control Setup) | Yes (3-Zone Automatic Climate Control Setup) | Yes (3-Zone Automatic Climate Control Setup) | Yes (3-Zone Automatic Climate Control Setup) | Yes (Four-Zone Automatic Climate Control with Air Purifier Plus System) | Yes (Three-Zone Automatic Climate Control with Air Purifier Plus System) | Yes (Four-Zone Automatic Climate Control with Air Purifier Plus System) | Yes (Four-Zone Automatic Climate Control with Air Purifier Plus System) | Yes (Three-Zone Automatic Climate Control with Air Purifier Plus System) | Yes (Three-Zone Automatic Climate Control with Air Purifier Plus System) |
| 12V Power Outlets | Yes (Front Center Console, Loadspace, and Row 2 Outlets Layout) | Yes (Front Center Console, Loadspace, and Row 2 Outlets Layout) | Yes (Front Center Console, Loadspace, and Row 2 Outlets Layout) | Yes (Front Center Console, Loadspace, and Row 2 Outlets Layout) | Yes (Front Center Console, Loadspace, and Row 2 Outlets Layout) | Yes (Front Center Console, Loadspace, and Row 2 Outlets Layout) | Yes (12V Ports in Front Row Center Console and Rear Luggage Area) | Yes (12V Ports in Front Row Center Console and Rear Luggage Area) | Yes (12V Ports in Front Row Center Console and Rear Luggage Area) | Yes (12V Ports in Front Row Center Console and Rear Luggage Area) | Yes (12V Ports in Front Row Center Console and Rear Luggage Area) | Yes (12V Power Outlets inside Front Row Center Console and Rear Luggage Area) |
| Anti-glare Mirrors | Yes (ClearSight Digital Rear-View Mirror & Auto-Dimming Door Mirrors) | Yes (ClearSight Digital Rear-View Mirror & Auto-Dimming Door Mirrors) | Yes (ClearSight Digital Rear-View Mirror & Auto-Dimming Door Mirrors) | Yes (ClearSight Digital Rear-View Mirror & Auto-Dimming Door Mirrors) | Yes (ClearSight Digital Rear-View Mirror & Auto-Dimming Door Mirrors) | Yes (ClearSight Digital Rear-View Mirror & Auto-Dimming Door Mirrors) | Yes (Auto-Dimming Rearview & Driver-Side Mirrors + ClearSight Digital Mirror) | Yes (Auto-Dimming Rearview & Driver-Side Mirrors + ClearSight Digital Mirror) | Yes (Auto-Dimming Rearview & Driver-Side Mirrors + ClearSight Digital Mirror) | Yes (Auto-Dimming Rearview & Driver-Side Mirrors + ClearSight Digital Mirror) | Yes (Auto-Dimming Rearview & Driver-Side Mirrors + ClearSight Digital Mirror) | Yes (Auto-Dimming Rearview & Driver-Side Mirrors + ClearSight Digital Mirror) |
| Front AC | Yes | Yes | Yes | Yes | Yes | Yes | Yes (Dual-Zone Front Air Conditioning with Digital Control Array) | Yes (Dual-Zone Front Air Conditioning with Digital Control Array) | Yes (Dual-Zone Front Air Conditioning with Digital Control Array) | Yes (Dual-Zone Front Air Conditioning with Digital Control Array) | Yes (Dual-Zone Front Air Conditioning with Digital Control Array) | Yes (Dual-Zone Front Air Conditioning with Digital Control Array Interface) |
| Headlight and Ignition on Reminder | Yes | Yes | Yes | Yes | Yes | Yes | Yes (Acoustic Notification with On-Screen Dash Alert Prompts) | Yes (Acoustic Notification with On-Screen Dash Alert Prompts) | Yes (Acoustic Notification with On-Screen Dash Alert Prompts) | Yes (Acoustic Notification with On-Screen Dash Alert Prompts) | Yes (Acoustic Notification with On-Screen Dash Alert Prompts) | Yes (Acoustic Notification accompanied by an On-Screen Dash Alert Prompt) |
| Steering Adjustment | Yes (Electrically Adjustable Steering Column for Tilt & Reach) | Yes (Electrically Adjustable Steering Column for Tilt & Reach) | Yes (Electrically Adjustable Steering Column for Tilt & Reach) | Yes (Electrically Adjustable Steering Column for Tilt & Reach) | Yes (Electrically Adjustable Steering Column for Tilt & Reach) | Yes (Electrically Adjustable Steering Column for Tilt & Reach) | Yes (Electric Tilt & Reach Variable Adjusting Steering Column with Memory) | Yes (Electric Tilt & Reach Variable Adjusting Steering Column with Memory) | Yes (Electric Tilt & Reach Variable Adjusting Steering Column with Memory) | Yes (Electric Tilt & Reach Variable Adjusting Steering Column with Memory) | Yes (Electric Tilt & Reach Variable Adjusting Steering Column with Memory) | Yes (Electric Tilt & Reach Variable Adjusting Steering Column with Memory) |
| Umbrella Storage in Door | No | No | No | No | No | No | No (Deep Industrial Lower Door Storage Channels with Drainage Inlets Only) | No (Deep Industrial Lower Door Storage Channels with Drainage Inlets Only) | No (Deep Industrial Lower Door Storage Channels with Drainage Inlets Only) | No (Deep Industrial Lower Door Storage Channels with Drainage Inlets Only) | No (Deep Industrial Lower Door Storage Channels with Drainage Inlets Only) | No (Deep Industrial Lower Door Storage Channels with Drainage Inlets Only) |
| Parking Sensors | Yes (360 Degree Parking Aid view overlay setup feed) | Yes (360 Degree Parking Aid view overlay setup feed) | Yes (360 Degree Parking Aid view overlay setup feed) | Yes (360 Degree Parking Aid view overlay setup feed) | Yes (360 Degree Parking Aid view overlay setup feed) | Yes (360 Degree Parking Aid view overlay setup feed) | Yes (360-Degree Park Distance Control Sensors with 3D Surround Camera View) | Yes (360-Degree Park Distance Control Sensors with 3D Surround Camera View) | Yes (360-Degree Park Distance Control Sensors with 3D Surround Camera View) | Yes (360-Degree Park Distance Control Sensors with 3D Surround Camera View) | Yes (360-Degree Park Distance Control Sensors with 3D Surround Camera View) | Yes (360-Degree Park Distance Control Sensors with 3D Surround Camera View) |
| Lighting | ||||||||||||
| Automatic Headlamps | Yes (Dusk-Sensing Automatic Activation System) | Yes (Dusk-Sensing Automatic Activation System) | Yes (Dusk-Sensing Automatic Activation System) | Yes (Dusk-Sensing Automatic Activation System) | Yes (Dusk-Sensing Automatic Activation System) | Yes (Dusk-Sensing Automatic Activation System) | Yes (Dusk-Sensing Auto Headlamp Sensor System Setup) | Yes (Dusk-Sensing Auto Headlamp Sensor System Setup) | Yes (Dusk-Sensing Auto Headlamp Sensor System Setup) | Yes (Dusk-Sensing Auto Headlamp Sensor System Setup) | Yes (Dusk-Sensing Auto Headlamp Sensor System Setup) | Yes (Dusk-Sensing Auto Headlamp Sensor System Configuration Setup) |
| Taillights | Premium LED Tail Lamps Layout with Signature Geometric Design | Premium LED Tail Lamps Layout with Signature Geometric Design | Premium LED Tail Lamps Layout with Signature Geometric Design | Premium LED Tail Lamps Layout with Signature Geometric Design | Premium LED Tail Lamps Layout with Signature Geometric Design | Premium LED Tail Lamps Layout with Signature Geometric Design | LED (Signature High-Mount Smoked Square Clusters with Dynamic Indicators) | LED (Signature High-Mount Smoked Square Clusters with Dynamic Indicators) | LED (Signature High-Mount Smoked Square Clusters with Dynamic Indicators) | LED (Signature High-Mount Smoked Square Clusters with Dynamic Indicators) | LED (Signature High-Mount Smoked Square Clusters with Dynamic Indicators) | LED (Signature High-Mount Smoked Square Clusters with Dynamic Indicators) |
| Fog Lights | Yes (Front & Rear Premium LED Fog Lights fitted) | Yes (Front & Rear Premium LED Fog Lights fitted) | Yes (Front & Rear Premium LED Fog Lights fitted) | Yes (Front & Rear Premium LED Fog Lights fitted) | Yes (Front & Rear Premium LED Fog Lights fitted) | Yes (Front & Rear Premium LED Fog Lights fitted) | Yes (Premium Integrated All-Weather High-Output Lower Bumper LEDs) | Yes (Premium Integrated All-Weather High-Output Lower Bumper LEDs) | Yes (Premium Integrated All-Weather High-Output Lower Bumper LEDs) | Yes (Premium Integrated All-Weather High-Output Lower Bumper LEDs) | Yes (Premium Integrated All-Weather High-Output Lower Bumper LEDs) | Yes (Premium Integrated All-Weather High-Output Lower Bumper LEDs) |
| Daytime Running Lights | Yes (Signature Graphic LED Daytime Running Lights) | Yes (Signature Graphic LED Daytime Running Lights) | Yes (Signature Graphic LED Daytime Running Lights) | Yes (Signature Graphic LED Daytime Running Lights) | Yes (Signature Graphic LED Daytime Running Lights) | Yes (Signature Graphic LED Daytime Running Lights) | LED (Distinctive Outer Square Signature Halo DRL Patterns) | LED (Distinctive Outer Square Signature Halo DRL Patterns) | LED (Distinctive Outer Square Signature Halo DRL Patterns) | LED (Distinctive Outer Square Signature Halo DRL Patterns) | LED (Distinctive Outer Square Signature Halo DRL Patterns) | LED (Distinctive Outer Square Signature Halo DRL Patterns) |
| Glovebox Lamp | Yes | Yes | Yes | Yes | Yes | Yes | Yes (Cool White LED Area Illumination Module) | Yes (Bright LED Module Housed Inside Main Dashboard Box) | Yes (Bright LED Module Housed Inside Main Dashboard Box) | Yes (Bright LED Module Housed Inside Main Dashboard Box) | Yes (Bright LED Module Housed Inside Main Dashboard Box) | Yes (Bright LED Module Housed Seamlessly Inside Main Dashboard Box) |
| Follow Me Home Headlamps | Yes | Yes | Yes | Yes | Yes | Yes | Yes (Configurable Pathway Delay Settings Programmed via Pivi Pro) | Yes (Configurable Pathway Delay Settings Programmed via Pivi Pro) | Yes (Configurable Pathway Delay Settings Programmed via Pivi Pro) | Yes (Configurable Pathway Delay Settings Programmed via Pivi Pro) | Yes (Configurable Pathway Delay Settings Programmed via Pivi Pro) | Yes (Configurable Pathway Delay Settings Programmed directly via Pivi Pro) |
| Rear Reading Lamp | Yes (Second Row Individual Overhead Premium Map Lights Layout) | Yes (Second Row Individual Overhead Premium Map Lights Layout) | Yes (Second Row Individual Overhead Premium Map Lights Layout) | Yes (Second Row Individual Overhead Premium Map Lights Layout) | Yes (Second Row Individual Overhead Premium Map Lights Layout) | Yes (Second Row Individual Overhead Premium Map Lights Layout) | Yes (Touch-Activated Independent Overhead Reading LED Modules for Row 2 & 3) | Yes (Touch-Activated Independent Overhead Reading LED Modules for Row 2) | Yes (Touch-Activated Independent Overhead Reading LED Modules for Row 2 & 3) | Yes (Touch-Activated Independent Overhead Reading LED Modules for Row 2 & 3) | Yes (Touch-Activated Independent Overhead Reading LED Modules for Row 2) | Yes (Touch-Activated Independent Overhead Reading LED Modules for Row 2 Passenger Space) |
| Puddle Lamps | Yes (Premium Approach LED Puddle Lamps Under Side Mirror Cases) | Yes (Premium Approach LED Puddle Lamps Under Side Mirror Cases) | Yes (Premium Approach LED Puddle Lamps Under Side Mirror Cases) | Yes (Premium Approach LED Puddle Lamps Under Side Mirror Cases) | Yes (Premium Approach LED Puddle Lamps Under Side Mirror Cases) | Yes (Premium Approach LED Puddle Lamps Under Side Mirror Cases) | Yes (Downward Mirror Projections with Distinctive Defender Graphic Silhouette) | Yes (Downward Mirror Projections with Distinctive Defender Graphic Silhouette) | Yes (Downward Mirror Projections with Distinctive Defender Graphic Silhouette) | Yes (Downward Mirror Projections with Distinctive Defender Graphic Silhouette) | Yes (Downward Mirror Projections with Distinctive Defender Graphic Silhouette) | Yes (Downward Mirror Projections with Distinctive Defender Graphic Silhouette) |
| Cabin Lamps | Yes | Yes | Yes | Yes | Yes | Yes | Yes (Full Extended Premium LED Dimmable Ambient Configuration System) | Yes (Full Extended Premium LED Dimmable Ambient Configuration System) | Yes (Full Extended Premium LED Dimmable Ambient Configuration System) | Yes (Full Extended Premium LED Dimmable Ambient Configuration System) | Yes (Full Extended Premium LED Dimmable Ambient Configuration System) | Yes (Full Extended Premium LED Dimmable Ambient Configuration System Layout) |
| Cabin Lamps Position | Front Overhead, Center Console, Side Handles, and Loadspace Positions | Front Overhead, Center Console, Side Handles, and Loadspace Positions | Front Overhead, Center Console, Side Handles, and Loadspace Positions | Front Overhead, Center Console, Side Handles, and Loadspace Positions | Front Overhead, Center Console, Side Handles, and Loadspace Positions | Front Overhead, Center Console, Side Handles, and Loadspace Positions | Front Overhead Structure, Mid Pillar Lining, and Rear Side Wall Trim Panels | Front Overhead Structure, Mid Pillar Lining, and Rear Side Wall Trim Panels | Front Overhead Structure, Mid Pillar Lining, and Rear Side Wall Trim Panels | Front Overhead Structure, Mid Pillar Lining, and Rear Side Wall Trim Panels | Front Overhead Structure, Mid Pillar Lining, and Rear Side Wall Trim Panels | Front Overhead Structure, Mid Pillar Lining, and Rear Side Wall Trim Panels |
| Ambient Interior Lighting | Yes (Configurable Premium Multi-Colour Ambient LED Architecture) | Yes (Configurable Premium Multi-Colour Ambient LED Architecture) | Yes (Configurable Premium Multi-Colour Ambient LED Architecture) | Yes (Configurable Premium Multi-Colour Ambient LED Architecture) | Yes (Configurable Premium Multi-Colour Ambient LED Architecture) | Yes (Configurable Premium Multi-Colour Ambient LED Architecture) | Yes (Premium Multi-Zone Configurable Multi-Colour Cabin Ambient Light Strips) | Yes (Premium Multi-Zone Configurable Multi-Colour Cabin Ambient Light Strips) | Yes (Premium Multi-Zone Configurable Multi-Colour Cabin Ambient Light Strips) | Yes (Premium Multi-Zone Configurable Multi-Colour Cabin Ambient Light Strips) | Yes (Premium Multi-Zone Configurable Multi-Colour Cabin Ambient Light Strips) | Yes (Premium Multi-Zone Configurable Multi-Colour Cabin Ambient Light Strips Grid) |
| Headlights | Premium Matrix LED Headlamps Setup with Signature DRL | Premium Matrix LED Headlamps Setup with Signature DRL | Premium Matrix LED Headlamps Setup with Signature DRL | Premium Matrix LED Headlamps Setup with Signature DRL | Premium Matrix LED Headlamps Setup with Signature DRL | Premium Matrix LED Headlamps Setup with Signature DRL | Matrix LED (High-Definition Auto-Levelling Adaptive Driving Beam Modules) | Matrix LED (High-Definition Auto-Levelling Adaptive Driving Beam Modules) | Matrix LED (High-Definition Auto-Levelling Adaptive Driving Beam Modules) | Matrix LED (High-Definition Auto-Levelling Adaptive Driving Beam Modules) | Matrix LED (High-Definition Auto-Levelling Adaptive Driving Beam Modules) | Matrix LED (High-Definition Auto-Levelling Adaptive Driving Beam System Modules) |
| Reading Lamp | Yes (Front Map Reading & Rear Row Passengers Task Illumination Array) | Yes (Front Map Reading & Rear Row Passengers Task Illumination Array) | Yes (Front Map Reading & Rear Row Passengers Task Illumination Array) | Yes (Front Map Reading & Rear Row Passengers Task Illumination Array) | Yes (Front Map Reading & Rear Row Passengers Task Illumination Array) | Yes (Front Map Reading & Rear Row Passengers Task Illumination Array) | Yes (Premium Capacitive Touch-Activated Overhead Map and Cab Lights) | Yes (Premium Capacitive Touch-Activated Overhead Map and Cab Lights) | Yes (Premium Capacitive Touch-Activated Overhead Map and Cab Lights) | Yes (Premium Capacitive Touch-Activated Overhead Map and Cab Lights) | Yes (Premium Capacitive Touch-Activated Overhead Map and Cab Lights) | Yes (Premium Capacitive Touch-Activated Overhead Map and General Cab Lights) |
| Cornering Headlights | Yes (Dynamic Static Bending Headlight Turning System Setup) | Yes (Dynamic Static Bending Headlight Turning System Setup) | Yes (Dynamic Static Bending Headlight Turning System Setup) | Yes (Dynamic Static Bending Headlight Turning System Setup) | Yes (Dynamic Static Bending Headlight Turning System Setup) | Yes (Dynamic Static Bending Headlight Turning System Setup) | Yes (Dynamic Predictive Steering Active Curve Tracking Headlamp System) | Yes (Dynamic Predictive Steering Active Curve Tracking Headlamp System) | Yes (Dynamic Predictive Steering Active Curve Tracking Headlamp System) | Yes (Dynamic Predictive Steering Active Curve Tracking Headlamp System) | Yes (Dynamic Predictive Steering Active Curve Tracking Headlamp System) | Yes (Dynamic Predictive Steering Active Curve Tracking Headlamp System Integration) |
| Light on Vanity Mirrors | Yes (Illuminated Driver & Passenger Sun Visor Vanity Mirror Units) | Yes (Illuminated Driver & Passenger Sun Visor Vanity Mirror Units) | Yes (Illuminated Driver & Passenger Sun Visor Vanity Mirror Units) | Yes (Illuminated Driver & Passenger Sun Visor Vanity Mirror Units) | Yes (Illuminated Driver & Passenger Sun Visor Vanity Mirror Units) | Yes (Illuminated Driver & Passenger Sun Visor Vanity Mirror Units) | Yes (High-Intensity LED Array Blocks linked to Visor Panel Covers) | Yes (High-Intensity LED Array Blocks linked to Visor Panel Covers) | Yes (High-Intensity LED Array Blocks linked to Visor Panel Covers) | Yes (High-Intensity LED Array Blocks linked to Visor Panel Covers) | Yes (High-Intensity LED Array Blocks linked to Visor Panel Covers) | Yes (High-Intensity LED Array Blocks linked to Visor Slider Sensor Panels) |
| Braking & Traction | ||||||||||||
| Hill Descent Control | Yes (Integrated Hill Descent Control HDC with Terrain Response Framework) | Yes (Integrated Hill Descent Control HDC with Terrain Response Framework) | Yes (Integrated Hill Descent Control HDC with Terrain Response Framework) | Yes (Integrated Hill Descent Control HDC with Terrain Response Framework) | Yes (Integrated Hill Descent Control HDC with Terrain Response Framework) | Yes (Integrated Hill Descent Control HDC with Terrain Response Framework) | Yes (All-Terrain Adaptive Response Hill Descent Control System Array) | Yes (All-Terrain Adaptive Response Hill Descent Control System Array) | Yes (All-Terrain Adaptive Response Hill Descent Control System Array) | Yes (All-Terrain Adaptive Response Hill Descent Control System Array) | Yes (All-Terrain Adaptive Response Hill Descent Control System Array) | Yes (All-Terrain Adaptive Response Hill Descent Control Software Braking Array) |
| Differential Lock | Yes (Electronic Active Rear Locking Differential Setup Integration) | Yes (Electronic Active Rear Locking Differential Setup Integration) | Yes (Electronic Active Rear Locking Differential Setup Integration) | Yes (Electronic Active Rear Locking Differential Setup Integration) | Yes (Electronic Active Rear Locking Differential Setup Integration) | Yes (Electronic Active Rear Locking Differential Setup Integration) | Yes (Electronic Active Center Diff Lock & Active Rear Locking Differential) | Yes (Electronic Active Center Diff Lock & Active Rear Locking Differential) | Yes (Electronic Active Center Diff Lock & Active Rear Locking Differential) | Yes (Electronic Active Center Diff Lock & Active Rear Locking Differential) | Yes (Electronic Active Center Diff Lock & Active Rear Locking Differential) | Yes (Electronic Active Center Diff Lock & Active Rear Locking Differential Modules) |
| Anti-Lock Braking System (ABS) | Yes (4-Channel Off-Road Optimized ABS Integration) | Yes (4-Channel Off-Road Optimized ABS Integration) | Yes (4-Channel Off-Road Optimized ABS Integration) | Yes (4-Channel Off-Road Optimized ABS Integration) | Yes (4-Channel Off-Road Optimized ABS Integration) | Yes (4-Channel Off-Road Optimized ABS Integration) | Yes (Heavy-Duty Off-Road Multi-Channel Anti-Lock Logic Braking Matrix) | Yes (Heavy-Duty Off-Road Multi-Channel Anti-Lock Logic Braking Matrix) | Yes (Heavy-Duty Off-Road Multi-Channel Anti-Lock Logic Braking Matrix) | Yes (Heavy-Duty Off-Road Multi-Channel Anti-Lock Logic Braking Matrix) | Yes (Heavy-Duty Off-Road Multi-Channel Anti-Lock Logic Braking Matrix) | Yes (Heavy-Duty Off-Road Multi-Channel Anti-Lock Logic Braking Safety Matrix) |
| Brake Assist (BA) | Yes (Emergency Brake Assist EBA & Dynamic Brake Support Infrastructure) | Yes (Emergency Brake Assist EBA & Dynamic Brake Support Infrastructure) | Yes (Emergency Brake Assist EBA & Dynamic Brake Support Infrastructure) | Yes (Emergency Brake Assist EBA & Dynamic Brake Support Infrastructure) | Yes (Emergency Brake Assist EBA & Dynamic Brake Support Infrastructure) | Yes (Emergency Brake Assist EBA & Dynamic Brake Support Infrastructure) | Yes (Advanced Emergency Brake Assist Safety Mitigation Computer Modules) | Yes (Advanced Emergency Brake Assist Safety Mitigation Computer Modules) | Yes (Advanced Emergency Brake Assist Safety Mitigation Computer Modules) | Yes (Advanced Emergency Brake Assist Safety Mitigation Computer Modules) | Yes (Advanced Emergency Brake Assist Safety Mitigation Computer Modules) | Yes (Advanced Emergency Brake Assist Safety Mitigation Computer Modules Core) |
| Hill Hold Control | Yes | Yes | Yes | Yes | Yes | Yes | Yes (Gradient Torque-Holding Anti-Roll Back Safety Assist Module) | Yes (Gradient Torque-Holding Anti-Roll Back Safety Assist Module) | Yes (Gradient Torque-Holding Anti-Roll Back Safety Assist Module) | Yes (Gradient Torque-Holding Anti-Roll Back Safety Assist Module) | Yes (Gradient Torque-Holding Anti-Roll Back Safety Assist Module) | Yes (Gradient Torque-Holding Anti-Roll Back Safety Assist Electronic Module) |
| Ride Height Adjustment | Yes (Electronic Air Suspension with Automatic Variable Level Control Architecture) | Yes (Electronic Air Suspension with Automatic Variable Level Control Architecture) | Yes (Electronic Air Suspension with Automatic Variable Level Control Architecture) | Yes (Electronic Air Suspension with Automatic Variable Level Control Architecture) | Yes (Electronic Air Suspension with Automatic Variable Level Control Architecture) | Yes (Electronic Air Suspension with Automatic Variable Level Control Architecture) | Yes (Electronic Braking Electronic Air Suspension - Lowers/Raises 40mm to 75mm) | Yes (Electronic Air Suspension - Adjusts Entry, Off-Road, and Maximum Clearance Heights) | Yes (Electronic Air Suspension - Adjusts Entry, Off-Road, and Maximum Clearance Heights) | Yes (Electronic Air Suspension - Adjusts Entry, Off-Road, and Maximum Clearance Heights) | Yes (Advanced 6D Dynamics Suspension System - Hydraulically Interlinked Semiactive Air Set) | Yes (Advanced 6D Dynamics Suspension System - Hydraulically Interlinked Air Layout) |
| Electronic Brake-force Distribution (EBD) | Yes | Yes | Yes | Yes | Yes | Yes | Yes (Cornering Brake Control and Electronic Force Balancing Subsystems) | Yes (Cornering Brake Control and Electronic Force Balancing Subsystems) | Yes (Cornering Brake Control and Electronic Force Balancing Subsystems) | Yes (Cornering Brake Control and Electronic Force Balancing Subsystems) | Yes (Cornering Brake Control and Electronic Force Balancing Subsystems) | Yes (Cornering Brake Control and Electronic Force Balancing Subsystems Matrix) |
| Electronic Stability Program (ESP) | Yes (Dynamic Stability Control DSC with Off-Road Terrain Traction Tuning) | Yes (Dynamic Stability Control DSC with Off-Road Terrain Traction Tuning) | Yes (Dynamic Stability Control DSC with Off-Road Terrain Traction Tuning) | Yes (Dynamic Stability Control DSC with Off-Road Terrain Traction Tuning) | Yes (Dynamic Stability Control DSC with Off-Road Terrain Traction Tuning) | Yes (Dynamic Stability Control DSC with Off-Road Terrain Traction Tuning) | Yes (Dynamic Stability Control with Configurable Terrain Response 2 Programs) | Yes (Dynamic Stability Control with Configurable Terrain Response 2 Dynamic Programs) | Yes (Dynamic Stability Control with Configurable Terrain Response 2 Dynamic Programs) | Yes (Dynamic Stability Control with Configurable Terrain Response 2 Dynamic Programs) | Yes (Dynamic Stability Control with Configurable Terrain Response 2 Dynamic Performance Programs) | Yes (Dynamic Stability Control with Configurable Terrain Response 2 Dynamic Performance Programs) |
Recently Asked Questions on Land Rover Defender
How much does the Land Rover Defender cost?
The Land Rover Defender starts at ₹1.07 Crore and goes up to ₹2.62 Crore, ex-showroom. The exact price depends on the variant you choose. On-road price varies by city — use the Get On Road Price button for an exact quote.
Which engines come with the Land Rover Defender?
The Land Rover Defender is offered with Petrol, Diesel, Mild Hybrid (Electric + Diesel) and Mild Hybrid (Electric + Petrol) engine options.
What mileage does the Land Rover Defender give?
The claimed mileage of the Land Rover Defender is Petrol: 9.2 kmpl, 7.6 kmpl, 6.8 kmpl, 6.4 kmpl; Diesel: 11.5 kmpl; Mild Hybrid (Electric + Diesel): 11.2 kmpl; Mild Hybrid (Electric + Petrol): 7.2 kmpl. It changes with the engine, gearbox and variant.
How many seats are there in the Land Rover Defender?
Most Land Rover Defender variants are 5-seater. A few variants come as 8-seater.
Is there 4WD in the Land Rover Defender?
Yes. All-Wheel Drive (AWD) with Twin-Speed Transfer Box, All-Wheel Drive (AWD) with Electronic Active Rear Differential and All-Wheel Drive (AWD) with Electronic Active Rear Locking Differential is available on select variants: 110 X Dynamic HSE Petrol 2.0L Turbo Automatic 5 STR, 110 X Dynamic HSE Diesel 3.0L Turbo Automatic 5 STR, 110 Diesel 3.0L Turbo Automatic 5 STR Trophy Edition Keswick and 110 Diesel 3.0L Turbo Automatic 5 STR Trophy Edition and 8 more.
Land Rover
Defender
Model price range
₹1.07 Crore - ₹2.62 Crore
Choose a variant to open its dedicated detail page.
Select a variant first to calculate EMI using that variant's price.
Land Rover Defender Summary
- Variants 12 options
- Price Range ₹1.07 Crore - ₹2.62 Crore
- Variant Pages Available
Starting at
₹1.07 Crore