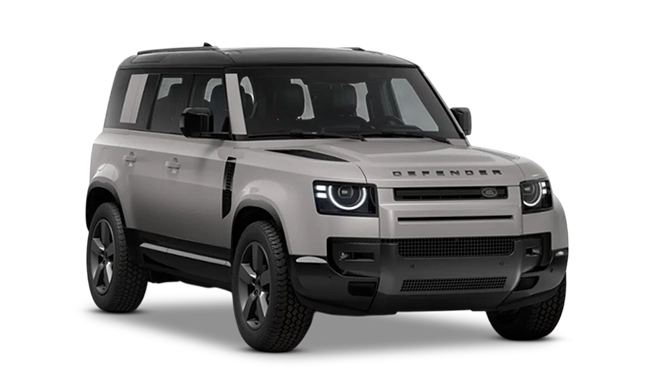
| Exterior |
| Rub-strips |
No |
No |
No |
No |
No |
No |
No (Clean rugged lower cladding plates instead) |
No (Durable lower off-road protective panel inserts instead) |
No (Clean rugged lower cladding plates instead) |
No (Durable side impact structural design plates instead) |
No (Durable extreme off-road lower body cladding and underbody skid plates instead) |
No (Durable extreme off-road lower body cladding and underbody skid plates instead) |
| Roof Rails |
Yes (Black Roof Rails) |
Yes (Black Roof Rails) |
Yes (Black Roof Rails & Expedition Roof Rack Assembly) |
Yes (Black Roof Rails & Expedition Roof Rack Assembly) |
Yes (Black Roof Rails) |
Yes (Black Roof Rails) |
Yes (Black Roof Rails) |
Yes (Gloss Black Sport Finish Roof Rails) |
Yes (Black Roof Rails) |
Yes (Gloss Black Signature V8 Finish Roof Rails) |
No (Roof rails omitted to optimize high-speed aerodynamics and weight for the OCTA performance trim) |
No (Roof rails omitted to optimize high-speed aerodynamics and weight for the OCTA performance trim) |
| Roof-mounted Antenna |
Yes |
Yes |
Yes |
Yes |
Yes |
Yes |
Yes (Roof-mounted Shark Fin with Integrated ClearSight Camera Module) |
Yes (Shark Fin Aerial incorporating a ClearSight rear-view video lens) |
Yes (Roof-mounted Shark Fin with Integrated ClearSight Camera Module) |
Yes (Roof-mounted Shark Fin with Integrated ClearSight Camera Module) |
Yes (Roof-mounted Shark Fin with Integrated ClearSight Rear-View Camera Module) |
Yes (Roof-mounted Shark Fin with Integrated ClearSight Rear-View Camera Module) |
| Chrome Finish Exhaust Pipe |
No |
No |
No |
No |
No |
No (Upgraded to quad outboard exhaust tailpipes for the 5.0L V8 powertrain layout) |
No (Dual satin black or dark metallic industrial-styled tips) |
No (Quad satin-black architectural performance exhaust pipes for V8 engine configuration) |
No (Quad satin black high-performance industrial-styled quad tips for V8 engine) |
No (Quad satin black high-performance exhaust pipes for V8 powertrain layout) |
No (Bespoke OCTA active exhaust system with active flaps and quad matte black round tips) |
No (Bespoke OCTA active exhaust system with active flaps and quad matte black round tips) |
| Body-coloured Bumpers |
Yes (X-Dynamic Satin Silicon Silver Premium Finish) |
Yes (X-Dynamic Satin Silicon Silver Premium Finish) |
Yes (Trophy Edition Matte Black Wrap & Keswick Accent styling) |
Yes (Trophy Edition Matte Black Wrap Accent Styling) |
Yes (Defender X Gloss Black Contrast Bumpers & Cladding Finish) |
Yes (Defender X Gloss Black Contrast Bumpers & Cladding Finish) |
No (Narvik Black or Ceres Silver signature off-road rugged bumper finishes) |
No (Sturdy off-road Ceres Silver or Narvik Black structural bumpers) |
No (Narvik Black signature off-road rugged bumper finishes) |
No (Sturdy off-road Narvik Black signature bumper finishes) |
No (OCTA exclusive redesigned high-clearance off-road bumpers with carbon fiber accents) |
No (OCTA exclusive redesigned high-clearance off-road bumpers with carbon fiber accents) |
| Body Kit |
Yes (X-Dynamic Exterior Pack Styling Components Layout) |
Yes (X-Dynamic Exterior Pack Styling Components Layout) |
Yes (Trophy Pack Off-Road Kit with Front Undershield & Winch Mounting) |
Yes (Trophy Pack Off-Road Kit with Front Undershield & Winch Mounting) |
Yes (Defender X Exterior Pack Premium Styling Components Layout) |
Yes (Defender X Premium Performance Pack Exterior Components Layout) |
Yes (X-Dynamic rugged exterior styling pack with gloss black accents) |
Yes (High-end Defender X exterior aesthetic package with orange brake calipers) |
Yes (X-Dynamic rugged exterior styling pack with gloss black accents) |
Yes (Premium Defender V8 bespoke exterior styling pack with dark accents) |
Yes (Bespoke OCTA Widebody Performance Exterior package with extended wheel arches) |
Yes (Bespoke OCTA Widebody Performance Exterior package with extended wheel arches) |
| Sunroof / Moonroof |
Yes (Sliding Panoramic Glass Sunroof Setup) |
Yes (Sliding Panoramic Glass Sunroof Setup) |
Yes (Sliding Panoramic Glass Sunroof Setup) |
Yes (Sliding Panoramic Glass Sunroof Setup) |
Yes (Sliding Panoramic Glass Sunroof Setup) |
Yes (Sliding Panoramic Glass Sunroof Setup) |
Yes (Sliding Panoramic Sunroof for front rows + Alpine glass side panels) |
Yes (Sliding Panoramic Sunroof paired with signature Alpine side lights) |
Yes (Sliding Panoramic Sunroof for front rows + Alpine glass side panels) |
Yes (Sliding Panoramic Sunroof for front rows + Alpine signature side glass panels) |
Yes (Sliding Panoramic Sunroof + Alpine glass roof panels) |
Yes (Sliding Panoramic Sunroof + Alpine glass roof panels) |
| Locks & Security |
| Central Locking |
Yes (Keyless Entry and Dynamic Proximity Central Locking) |
Yes (Keyless Entry and Dynamic Proximity Central Locking) |
Yes (Keyless Entry and Proximity Central Locking) |
Yes (Keyless Entry and Proximity Central Locking) |
Yes (Keyless Entry and Dynamic Proximity Central Locking) |
Yes (Keyless Entry and Dynamic Proximity Central Locking) |
Yes (Keyless Entry and Proximity Locking Grid) |
Yes (Smart Proximity Entry & Walking Distance Auto-Locking system) |
Yes (Keyless Entry and Proximity Locking Grid) |
Yes (Smart Proximity Entry and Walking Distance Auto-Locking system) |
Yes (Smart Keyless Proximity Entry and Automated Proximity Locking Grid) |
Yes (Smart Keyless Proximity Entry and Automated Proximity Locking Grid) |
| Speed Sensing Door Lock |
Yes |
Yes |
Yes |
Yes |
Yes |
Yes |
Yes |
Yes |
Yes |
Yes |
Yes |
Yes |
| Engine Immobiliser |
Yes |
Yes |
Yes |
Yes |
Yes |
Yes |
Yes |
Yes |
Yes |
Yes |
Yes |
Yes |
| Child Safety Lock |
Yes (Power Operated Child Safety Locks Setup) |
Yes (Power Operated Child Safety Locks Setup) |
Yes (Power Operated Child Safety Locks Setup) |
Yes (Power Operated Child Safety Locks Setup) |
Yes (Power Operated Child Safety Locks Setup) |
No (Strictly 3-Door short-wheelbase cabin architecture layout) |
Yes (Power-operated interior driver controls) |
Yes (Electronic driver-isolated override controls) |
Yes (Power-operated interior driver controls) |
Yes (Power-operated interior driver controls isolation) |
Yes (Power-operated driver cabin isolation door buttons) |
Yes (Power-operated driver cabin isolation door buttons) |
| Seats & Upholstery |
| Front Passenger Seat Adjustment |
14-Way Heated and Cooled Electric Memory Front Passenger Seat |
14-Way Heated and Cooled Electric Memory Front Passenger Seat |
14-Way Heated and Cooled Electric Memory Front Passenger Seat |
14-Way Heated and Cooled Electric Memory Front Passenger Seat |
14-Way Heated and Cooled Electric Memory Front Passenger Seat |
14-Way Heated and Cooled Electric Memory Front Passenger Seat |
Yes (14-Way Heated and Cooled Electric Memory Front Passenger Seat) |
Yes (14-Way Power Adjustable Heated & Cooled Climate Seat with Lumbar Memory) |
Yes (14-Way Heated and Cooled Electric Memory Front Passenger Seat) |
Yes (14-Way Power Adjustable Heated & Cooled Climate Seat with Lumbar Memory) |
Yes (14-Way Power Performance Seat with Heated/Cooled Climate Functions & Memory) |
Yes (14-Way Power Performance Seat with Heated/Cooled Climate Functions & Memory) |
| Rear Armrest |
Yes (Second Row Center Armrest with Cup Holders Layout) |
Yes (Second Row Center Armrest with Cup Holders Layout) |
Yes (Second Row Center Armrest with Cup Holders Layout) |
Yes (Second Row Center Armrest with Cup Holders Layout) |
Yes (Second Row Center Armrest with Cup Holders Layout) |
Yes (Rear Center Seat fold-down armrest component) |
Yes (Fold-down second row and third row configurations with cup holders) |
Yes (Second-row dropdown leather armrest containing dual cup receptacles) |
Yes (Fold-down second row and third row configurations with cup holders) |
Yes (Fold-down second row and third row configurations with cup holders) |
Yes (Second-row dropdown leather armrest containing dual cup receptacles) |
Yes (Second-row dropdown leather armrest containing dual cup receptacles) |
| Driver Seat Adjustment |
14-Way Heated and Cooled Electric Memory Driver Seat with 4-Way Lumbar |
14-Way Heated and Cooled Electric Memory Driver Seat with 4-Way Lumbar |
14-Way Heated and Cooled Electric Memory Driver Seat with 4-Way Lumbar |
14-Way Heated and Cooled Electric Memory Driver Seat with 4-Way Lumbar |
14-Way Heated and Cooled Electric Memory Driver Seat with 4-Way Lumbar |
14-Way Heated and Cooled Electric Memory Driver Seat with 4-Way Lumbar |
Yes (14-Way Heated and Cooled Electric Memory Driver Seat with Lumbar) |
Yes (14-Way Power Adjustable Heated & Cooled Sport Seating with Upper Backrest Profile Memory) |
Yes (14-Way Heated and Cooled Electric Memory Driver Seat with Lumbar) |
Yes (14-Way Power Adjustable Heated & Cooled Sport Seating with Upper Backrest Profile Memory) |
Yes (14-Way Power OCTA Performance Seat with integrated headrest, bolster memory & Body and Soul audio technology) |
Yes (14-Way Power OCTA Performance Seat with integrated headrest, bolster memory & Body and Soul audio technology) |
| Folding Rear Seat |
Yes (40:20:40 Split Folding Rear Seat Layout) |
Yes (40:20:40 Split Folding Rear Seat Layout) |
Yes (40:20:40 Split Folding Rear Seat Layout) |
Yes (40:20:40 Split Folding Rear Seat Layout) |
Yes (40:20:40 Split Folding Rear Seat Layout) |
Yes (40:20:40 Split Folding Rear Seat Layout) |
Yes (40:20:40 split folding second row and 60:40 folding third row) |
Yes (40:20:40 maximum cargo versatility layout configuration) |
Yes (40:20:40 split folding second row and 60:40 folding third row) |
Yes (40:20:40 split folding second row and 60:40 folding third row flat deck) |
Yes (40:20:40 split folding second row folding completely flat into cargo deck) |
Yes (40:20:40 split folding second row folding completely flat into cargo deck) |
| Seat Upholstery |
Premium Windsor Leather with Robustec Accent Material Patches Layout |
Premium Windsor Leather with Robustec Accent Material Patches Layout |
Premium Windsor Leather with Robustec Accent Material Patches Layout |
Premium Windsor Leather with Robustec Accent Material Patches Layout |
Premium Windsor Leather with Steelcut Premium Textile Accents Layout |
Premium Windsor Leather with Steelcut Premium Textile Accents Layout |
Premium Windsor Leather combined with Robustec Textile Accents |
Windsor Premium Leather combined with Kvadrat Premium Textile Accents |
Premium Windsor Leather combined with Robustec Textile Accents |
Windsor Premium Leather combined with Dinamica Suedecloth & Robustec Accents |
Premium Semi-Aniline Leather with durable Ultrafabrics polyurethane accents |
Premium Semi-Aniline Leather with durable Ultrafabrics polyurethane accents |
| Second Row Seat Adjustment |
40:20:40 Split Foldable with Manual Slide and Recline functionality |
40:20:40 Split Foldable with Manual Slide and Recline functionality |
40:20:40 Split Foldable with Manual Slide and Recline functionality |
40:20:40 Split Foldable with Manual Slide and Recline functionality |
40:20:40 Split Foldable with Manual Slide and Recline functionality |
40:20:40 Split Foldable with Manual Slide and Recline functionality |
Yes (Forward/Backward sliding bench with mechanical recline mechanism) |
Yes (Sliding and reclining functionality on second-row rails) |
Yes (Forward/Backward sliding bench with mechanical recline mechanism) |
Yes (Sliding and reclining functionality on second-row structural tracks) |
Yes (Manual sliding and reclining rails standard on second row) |
Yes (Manual sliding and reclining rails standard on second row) |
| Interior Colours |
Ebony / Vintage Tan / Acorn options available |
Ebony / Vintage Tan / Acorn options available |
Ebony Exclusive Off-Road Trim Palette |
Ebony Exclusive Off-Road Trim Palette |
Ebony / Tan / Light Oyster top-tier variant specific configurations |
Ebony / Tan / Light Oyster top-tier variant specific configurations |
Ebony / Vintage Tan / Acorn options with X-Dynamic contrast finishes |
Ebony / Vintage Tan / Khaki premium color schemes with exposed structural finishes |
Ebony / Vintage Tan / Acorn options with X-Dynamic contrast finishes |
Ebony V8 Theme with custom dark satin structural dashboard panel highlights |
Burnt Sienna or Light Cloud premium multi-tone color options with Chopped Carbon decoration finishes |
Ebony V8 Theme with custom dark satin structural dashboard panel highlights |
| Ventilated Seat Type |
Heated & Cooled Perforated Luxury Setup |
Heated & Cooled Perforated Luxury Setup |
Heated & Cooled Perforated Luxury Setup |
Heated & Cooled Perforated Luxury Setup |
Heated & Cooled Perforated Luxury Setup |
Heated & Cooled Perforated Luxury Setup |
Front Rows and Second Row Ventilated (Heated and Cooled elements) |
Front and Rear Row Ventilated Seating (Active Cooling and Multi-Stage Heating) |
Front Rows and Second Row Ventilated (Heated and Cooled elements) |
Front Rows Seating Ventilated (Active Cooling and Multi-Stage Heating) |
Front Rows Seating Ventilated (Active Cooling and Multi-Stage Heating) |
Front Rows Seating Ventilated (Active Cooling and Multi-Stage Heating) |
| Interiors |
Premium Rugged Luxury Dashboard Layout with Cross Car Beam Powder Coated Finish |
Premium Rugged Luxury Dashboard Layout with Cross Car Beam Powder Coated Finish |
Premium Rugged Luxury Dashboard Layout with Cross Car Beam Powder Coated Finish |
Premium Rugged Luxury Dashboard Layout with Cross Car Beam Powder Coated Finish |
Premium Rugged Luxury Dashboard Layout with Rough-Cut Walnut Wood Veneer Finish |
Premium Rugged Luxury Dashboard Layout with Rough-Cut Walnut Wood Veneer Finish |
Exposed structural powder-coated dashboard beam with premium detailing |
Premium leather wrap over an exposed cross-car satin black structural beam |
Exposed structural powder-coated dashboard beam with premium detailing |
Premium suedecloth/leather wrap over an exposed cross-car satin black structural beam |
Premium leather and suedecloth wrap over an exposed cross-car satin black structural beam |
Premium leather and suedecloth wrap over an exposed cross-car satin black structural beam |
| Rear Passenger Seat Type |
40:20:40 Split Bench Type (3-Passenger Configured Row Layout) |
40:20:40 Split Bench Type (3-Passenger Configured Row Layout) |
40:20:40 Split Bench Type (3-Passenger Configured Row Layout) |
40:20:40 Split Bench Type (3-Passenger Configured Row Layout) |
40:20:40 Split Bench Type (3-Passenger Configured Row Layout) |
40:20:40 Split Bench Type (3-Passenger Configured Row Layout) |
Foldable & Adjustable Split Multi-Row Configuration |
Sliding & Reclining Fold-Flat Adjustable Split Multi-Row Configuration |
Foldable & Adjustable Split Multi-Row Configuration |
Sliding & Reclining Fold-Flat Adjustable Split Multi-Row Configuration |
Sliding & Reclining Fold-Flat Adjustable Split Multi-Row Configuration |
Sliding & Reclining Fold-Flat Adjustable Split Multi-Row Configuration |
| Ventilated Seats |
Yes (Front Rows Standard, Rear Rows Optional Upgrade) |
Yes (Front Rows Standard, Rear Rows Optional Upgrade) |
Yes (Front Rows Standard, Rear Rows Optional Upgrade) |
Yes (Front Rows Standard, Rear Rows Optional Upgrade) |
Yes (Front Rows Standard, Rear Rows Optional Upgrade) |
Yes (Front Rows Standard, Rear Rows Optional Upgrade) |
Yes (Multi-zone heated and ventilated seating array configuration) |
Yes (Advanced heated and cooled ventilation modules built into front and outer rear zones) |
Yes (Multi-zone heated and ventilated seating array configuration) |
Yes (Multi-zone heated and ventilated seating array configuration) |
Yes (Multi-zone heated and ventilated seating array configuration) |
Yes (Multi-zone heated and ventilated seating array configuration) |
| Front Seatback Pockets |
Yes |
Yes |
Yes |
Yes |
Yes |
Yes |
Yes (Rigid map pockets behind front seat backrests) |
Yes (Heavy-duty rear pocket panels attached behind front sport backrests) |
Yes (Rigid map pockets behind front seat backrests) |
Yes (Rigid map storage envelopes behind front sport backrests) |
Yes (Rigid map storage envelopes behind front performance seats) |
Yes (Rigid map storage envelopes behind front performance seats) |
| Leather-wrapped Steering Wheel |
Yes (Premium Leather-Wrapped Steering Wheel Rim) |
Yes (Premium Leather-Wrapped Steering Wheel Rim) |
Yes (Premium Leather-Wrapped Steering Wheel Rim) |
Yes (Premium Leather-Wrapped Steering Wheel Rim) |
Yes (Premium Leather-Wrapped Steering Wheel Rim) |
Yes (Premium Leather-Wrapped Steering Wheel Rim) |
Yes (Leather-wrapped or premium non-leather steering wheel hub) |
Yes (Suedecloth or premium Windsor leather multi-function heated sport steering wheel) |
Yes (Leather-wrapped or premium non-leather steering wheel hub) |
Yes (Alcantara/Suedecloth wrapped multifunction heated sport steering wheel with satin paddles) |
Yes (OCTA bespoke steering wheel with integrated illuminated dynamic drive mode hotkeys) |
Yes (OCTA bespoke steering wheel with integrated illuminated dynamic drive mode hotkeys) |
| Rear Row Seat Adjustment |
No (Limited to 5-Seater Cabin Layout Configuration) |
No (Limited to 5-Seater Cabin Layout Configuration) |
No (Limited to 5-Seater Cabin Layout Configuration) |
No (Limited to 5-Seater Cabin Layout Configuration) |
No (Limited to 5-Seater Cabin Layout Configuration) |
No (Limited to 5-Seater Cabin Layout Configuration) |
Yes (Third row seating features reclining capability adjustments) |
No (Third-row assemblies omitted on this dedicated 5-Seater variant platform) |
Yes (Third row seating features reclining capability adjustments) |
Yes (Third row seating features manual reclining capability adjustments) |
No (Third-row options omitted on this high-performance 5 STR extreme variant layout) |
No (Third-row options omitted on this high-performance 5 STR extreme variant layout) |
| Driver Armrest |
Yes (Front Center Console Armrest Option with Optional Refrigerator) |
Yes (Front Center Console Armrest Option with Optional Refrigerator) |
Yes (Front Center Console Armrest with Integrated Refrigerator Cooler) |
Yes (Front Center Console Armrest with Integrated Refrigerator Cooler) |
Yes (Front Center Console Armrest with Integrated Refrigerator Cooler) |
Yes (Front Center Console Armrest with Integrated Refrigerator Cooler) |
Yes (Front center console configuration with optional cooler compartment) |
Yes (Longitudinally adjustable front center console armrest with built-in refrigerator block) |
Yes (Front center console configuration with optional cooler compartment) |
Yes (Front center console configuration with built-in active refrigerator block) |
Yes (Front center console configuration with built-in active refrigerator block) |
Yes (Front center console configuration with built-in active refrigerator block) |
| Leather-wrapped Gear Knob |
Yes (Premium Leather-Wrapped Transmission Selector Shifter Toggle) |
Yes (Premium Leather-Wrapped Transmission Selector Shifter Toggle) |
Yes (Premium Leather-Wrapped Transmission Selector Shifter Toggle) |
Yes (Premium Leather-Wrapped Transmission Selector Shifter Toggle) |
Yes (Premium Leather-Wrapped Transmission Selector Shifter Toggle) |
Yes (Premium Leather-Wrapped Transmission Selector Shifter Toggle) |
Yes (Leather or Robustec heavy-duty wrapped selector handle) |
Yes (Premium textured grip leather selector matching structural console layout) |
Yes (Leather or Robustec heavy-duty wrapped selector handle) |
Yes (Premium textured grip leather selector matching structural console layout) |
Yes (Premium textured grip leather selector matching structural console layout) |
Yes (Premium textured grip leather selector matching structural console layout) |
| Split Rear Seat |
Yes (40:20:40 Split Configurations Framework) |
Yes (40:20:40 Split Configurations Framework) |
Yes (40:20:40 Split Configurations Framework) |
Yes (40:20:40 Split Configurations Framework) |
Yes (40:20:40 Split Configurations Framework) |
Yes (40:20:40 Split Configurations Framework) |
Yes (Highly versatile split fold mechanics for all rear zones) |
Yes (3-Way 40:20:40 full horizontal fold-flat folding action) |
Yes (Highly versatile split fold mechanics for all rear zones) |
Yes (Highly versatile split fold mechanics for all rear luxury zones) |
Yes (3-Way 40:20:40 full horizontal fold-flat folding action) |
Yes (3-Way 40:20:40 full horizontal fold-flat folding action) |
| Headrests |
Height Adjustable Active Protective Head Restraints on All Rows |
Height Adjustable Active Protective Head Restraints on All Rows |
Height Adjustable Active Protective Head Restraints on All Rows |
Height Adjustable Active Protective Head Restraints on All Rows |
Height Adjustable Active Protective Head Restraints on All Rows |
Height Adjustable Active Protective Head Restraints on All Rows |
Yes (8 Height-adjustable safety head restraints across 3 rows) |
Yes (5 Adjustable height-safety head restraint frames across the 2 passenger rows) |
Yes (8 Height-adjustable safety head restraints across 3 rows) |
Yes (8 Height-adjustable safety head restraints configured across 3 rows) |
Yes (5 Height-adjustable safety head restraint frames across the 2 passenger rows) |
Yes (5 Height-adjustable safety head restraint frames across the 2 passenger rows) |
| Safety |
| Lane Departure Prevention |
Yes (Lane Keep Assist Infrastructure Suite via ADAS) |
Yes (Lane Keep Assist Infrastructure Suite via ADAS) |
Yes (Lane Keep Assist Infrastructure Suite via ADAS) |
Yes (Lane Keep Assist Infrastructure Suite via ADAS) |
Yes (Lane Keep Assist Infrastructure Suite via ADAS) |
Yes (Lane Keep Assist Infrastructure Suite via ADAS) |
Yes (Lane Keep Assist with automated steering correction inputs) |
Yes (Active Lane Keep Assist with dynamic lane torque steering adjustments) |
Yes (Lane Keep Assist with automated steering correction inputs) |
Yes (Active Lane Keep Assist with dynamic lane torque steering adjustments) |
Yes (Active Lane Keep Assist with dynamic lane torque steering adjustments) |
Yes (Active Lane Keep Assist with dynamic lane torque steering adjustments) |
| Child Seat Anchor Points |
Yes (ISOFIX Child Seat Lower Anchor Points on Outboard Second Row) |
Yes (ISOFIX Child Seat Lower Anchor Points on Outboard Second Row) |
Yes (ISOFIX Child Seat Lower Anchor Points on Outboard Second Row) |
Yes (ISOFIX Child Seat Lower Anchor Points on Outboard Second Row) |
Yes (ISOFIX Child Seat Lower Anchor Points on Outboard Second Row) |
Yes (ISOFIX Child Seat Lower Anchor Points on Outboard Second Row) |
Yes (ISOFIX child seat anchors on outer positions of rows 2 and 3) |
Yes (ISOFIX child restraint anchor points on outer second-row positions) |
Yes (ISOFIX child seat anchors on outer positions of rows 2 and 3) |
Yes (ISOFIX child seat anchors on outer positions of rows 2 and 3) |
Yes (ISOFIX child restraint anchor points on outer second-row positions) |
Yes (ISOFIX child restraint anchor points on outer second-row positions) |
| Tyre Pressure Monitoring System (TPMS) |
Yes (Highline System displaying Individual Wheel Real-Time Values) |
Yes (Highline System displaying Individual Wheel Real-Time Values) |
Yes (Highline System displaying Individual Wheel Real-Time Values) |
Yes (Highline System displaying Individual Wheel Real-Time Values) |
Yes (Highline System displaying Individual Wheel Real-Time Values) |
Yes (Highline System displaying Individual Wheel Real-Time Values) |
Yes (Direct real-time tyre pressure sensor display setup) |
Yes (Direct independent TPMS wheel-sensor numerical data tracking) |
Yes (Direct real-time tyre pressure sensor display setup) |
Yes (Direct real-time tyre pressure sensor display setup data display) |
Yes (Direct independent TPMS wheel-sensor numerical data tracking) |
Yes (Direct independent TPMS wheel-sensor numerical data tracking) |
| Rear Middle Three Point Seatbelt |
Yes (3-Point safety seatbelts for all 5 occupants) |
Yes (3-Point safety seatbelts for all 5 occupants) |
Yes (3-Point safety seatbelts for all 5 occupants) |
Yes (3-Point safety seatbelts for all 5 occupants) |
Yes (3-Point safety seatbelts for all 5 occupants) |
Yes (3-Point safety seatbelts for all 5 occupants) |
Yes |
Yes |
Yes |
Yes |
Yes |
Yes |
| Lane Departure Warning |
Yes (Lane Departure Warning standard via Radar ADAS setup) |
Yes (Lane Departure Warning standard via Radar ADAS setup) |
Yes (Lane Departure Warning standard via Radar ADAS setup) |
Yes (Lane Departure Warning standard via Radar ADAS setup) |
Yes (Lane Departure Warning standard via Radar ADAS setup) |
Yes (Lane Departure Warning standard via Radar ADAS setup) |
Yes (Visual cluster alarms and haptic steering feedback wheels) |
Yes (Instrument panel warnings accompanied by immediate steering wheel haptic alerts) |
Yes (Visual cluster alarms and haptic steering feedback wheels) |
Yes (Camera-driven visual cluster alerts and haptic steering wheel pulses) |
Yes (Instrument panel warnings accompanied by immediate steering wheel haptic alerts) |
Yes (Instrument panel warnings accompanied by immediate steering wheel haptic alerts) |
| Automatic Emergency Braking (AEB) |
Yes (Advanced Emergency Braking Layout Mitigation) |
Yes (Advanced Emergency Braking Layout Mitigation) |
Yes (Advanced Emergency Braking Layout Mitigation) |
Yes (Advanced Emergency Braking Layout Mitigation) |
Yes (Advanced Emergency Braking Layout Mitigation) |
Yes (Advanced Emergency Braking Layout Mitigation) |
Yes (Radar/Camera-based Emergency Braking system optimization) |
Yes (Autonomous Emergency Braking with forward vehicle, intersection, and pedestrian tracking) |
Yes (Radar/Camera-based Emergency Braking system optimization) |
Yes (Autonomous Emergency Braking with forward vehicle, intersection, and pedestrian tracking) |
Yes (Autonomous Emergency Braking with forward vehicle, intersection, and pedestrian tracking) |
Yes (Autonomous Emergency Braking with forward vehicle, intersection, and pedestrian tracking) |
| Blind Spot Detection |
Yes (Blind Spot Assist with active steering intervention support) |
Yes (Blind Spot Assist with active steering intervention support) |
Yes (Blind Spot Assist with active steering intervention support) |
Yes (Blind Spot Assist with active steering intervention support) |
Yes (Blind Spot Assist with active steering intervention support) |
Yes (Blind Spot Assist with active steering intervention support) |
Yes (Blind Spot Assist with active collision intervention loops) |
Yes (Active Blind Spot Monitor with radar-driven collision avoidance intervention) |
Yes (Blind Spot Assist with active collision intervention loops) |
Yes (Active Blind Spot Monitor with radar-driven collision avoidance intervention) |
Yes (Active Blind Spot Monitor with radar-driven collision avoidance intervention) |
Yes (Active Blind Spot Monitor with radar-driven collision avoidance intervention) |
| Emergency Brake Light Flashing |
Yes |
Yes |
Yes |
Yes |
Yes |
Yes |
Yes (Automatic hazard flash initialization under panic braking thresholds) |
Yes (Automatic emergency flash warning execution under heavy decelerations) |
Yes (Automatic hazard flash initialization under panic braking thresholds) |
Yes (Automatic emergency flash warning execution under heavy panic decelerations) |
Yes (Automatic emergency flash warning execution under heavy panic decelerations) |
Yes (Automatic emergency flash warning execution under heavy panic decelerations) |
| Forward Collision Warning (FCW) |
Yes (Forward Collision Warning Monitoring Alerts) |
Yes (Forward Collision Warning Monitoring Alerts) |
Yes (Forward Collision Warning Monitoring Alerts) |
Yes (Forward Collision Warning Monitoring Alerts) |
Yes (Forward Collision Warning Monitoring Alerts) |
Yes (Forward Collision Warning Monitoring Alerts) |
Yes (Integrated into the Forward Vehicle Sensing warning computer) |
Yes (Integrated seamlessly inside the forward-looking radar hazard computer matrix) |
Yes (Integrated into the Forward Vehicle Sensing warning computer) |
Yes (Integrated seamlessly inside the forward-looking radar hazard computer matrix) |
Yes (Integrated seamlessly inside the forward-looking radar hazard computer matrix) |
Yes (Integrated seamlessly inside the forward-looking radar hazard computer matrix) |
| Dashcam |
No (Provisioned for Optional integrated Dashcam architecture) |
No (Provisioned for Optional integrated Dashcam architecture) |
No (Provisioned for Optional integrated Dashcam architecture) |
No (Provisioned for Optional integrated Dashcam architecture) |
No (Provisioned for Optional integrated Dashcam architecture) |
No (Provisioned for Optional integrated Dashcam architecture) |
No (Offered inside JLR Approved OEM interior accessory extensions) |
No (Offered inside original equipment manufacturer dealer custom accessory catalogues) |
No (Offered inside JLR Approved OEM interior accessory extensions) |
No (Offered inside JLR Approved OEM interior accessory extensions) |
No (Offered inside JLR Approved OEM interior accessory extensions) |
No (Offered inside JLR Approved OEM interior accessory extensions) |
| Seat Belt Warning |
Yes (Audio-Visual warnings tailored for all seating rows occupant sensing) |
Yes (Audio-Visual warnings tailored for all seating rows occupant sensing) |
Yes (Audio-Visual warnings tailored for all seating rows occupant sensing) |
Yes (Audio-Visual warnings tailored for all seating rows occupant sensing) |
Yes (Audio-Visual warnings tailored for all seating rows occupant sensing) |
Yes (Audio-Visual warnings tailored for all seating rows occupant sensing) |
Yes (Audible and visual alarms active across all 8 occupant seating layouts) |
Yes (Audible tone chime sequence matched with visual warnings for all 5 tracks) |
Yes (Audible tone and light matrix active across all 8 occupant seating layouts) |
Yes (Audible tone and light matrix active across all 8 occupant seating layouts) |
Yes (Audible tone and light matrix active across all occupant seating layouts) |
Yes (Audible tone and light matrix active across all occupant seating layouts) |
| Puncture Repair Kit |
Yes (High-Performance Compressor Tyre Puncture Gel Mobility Repair Kit) |
Yes (High-Performance Compressor Tyre Puncture Gel Mobility Repair Kit) |
Yes (High-Performance Compressor Tyre Puncture Gel Mobility Repair Kit) |
Yes (High-Performance Compressor Tyre Puncture Gel Mobility Repair Kit) |
Yes (High-Performance Compressor Tyre Puncture Gel Mobility Repair Kit) |
Yes (High-Performance Compressor Tyre Puncture Gel Mobility Repair Kit) |
No (Standard heavy-duty full-sized exterior tailgate mounted spare wheel) |
No (Equipped with an authentic exterior tailgate-mounted matching full-size alloy spare) |
No (Standard heavy-duty full-sized exterior tailgate mounted spare wheel) |
No (Standard heavy-duty full-sized exterior tailgate mounted spare wheel alloy) |
No (Standard heavy-duty full-sized exterior tailgate mounted spare wheel alloy matching performance tyres) |
No (Standard heavy-duty full-sized exterior tailgate mounted spare wheel alloy matching performance tyres) |
| High-beam Assist |
Yes (Auto High-Beam Assist AHBA Matrix control) |
Yes (Auto High-Beam Assist AHBA Matrix control) |
Yes (Auto High-Beam Assist AHBA Matrix control) |
Yes (Auto High-Beam Assist AHBA Matrix control) |
Yes (Auto High-Beam Assist AHBA Matrix control) |
Yes (Auto High-Beam Assist AHBA Matrix control) |
Yes (Automatic High Beam Assist matching Matrix LED optics) |
Yes (Automatic high-beam dynamic cut-out matching Matrix LED optics) |
Yes (Automatic High Beam Assist matching Matrix LED optics) |
Yes (Automatic High Beam Assist matching Matrix LED optics) |
Yes (Automatic High Beam Assist matching Matrix LED optics) |
Yes (Automatic High Beam Assist matching Matrix LED optics) |
| Airbags |
6 Airbags (Standard Dual Front, Side Thorax, and Full-Length Curtain Airbags) |
6 Airbags (Standard Dual Front, Side Thorax, and Full-Length Curtain Airbags) |
6 Airbags (Standard Dual Front, Side Thorax, and Full-Length Curtain Airbags) |
6 Airbags (Standard Dual Front, Side Thorax, and Full-Length Curtain Airbags) |
6 Airbags (Standard Dual Front, Side Thorax, and Full-Length Curtain Airbags) |
6 Airbags (Standard Dual Front, Side Thorax, and Full-Length Curtain Airbags) |
6 Airbags (Dual Front, Front Side Thorax, and Full-Length Side Curtains) |
6 Airbags (Dual Front, Thorax Side Front, and Full-Length Cabin Curtain arrays) |
6 Airbags (Dual Front, Front Side Thorax, and Full-Length Side Curtains) |
6 Airbags (Dual Front, Front Side Thorax, and Full-Length Side Curtains) |
6 Airbags (Dual Front, Front Side Thorax, and Full-Length Side Curtains) |
6 Airbags (Dual Front, Front Side Thorax, and Full-Length Side Curtains) |
| NCAP Rating |
5 Star (Euro NCAP Safety Testing Certification Benchmark) |
5 Star (Euro NCAP Safety Testing Certification Benchmark) |
5 Star (Euro NCAP Safety Testing Certification Benchmark) |
5 Star (Euro NCAP Safety Testing Certification Benchmark) |
5 Star (Euro NCAP Safety Testing Certification Benchmark) |
5 Star (Euro NCAP Safety Testing Certification Benchmark) |
5-Star (Euro NCAP Excellent Vehicle Structural Crash Assessment Rating) |
5-Star (Euro NCAP Comprehensive Passenger Crash Assessment Framework Rating) |
5-Star (Euro NCAP Excellent Vehicle Structural Crash Assessment Rating) |
5-Star (Euro NCAP Excellent Vehicle Structural Crash Assessment Rating) |
5-Star (Euro NCAP Excellent Vehicle Structural Crash Assessment Rating) |
5-Star (Euro NCAP Excellent Vehicle Structural Crash Assessment Rating) |
| Rear Cross-traffic Assist |
Yes (Rear Traffic Monitor with Collision Mitigation Brake intervention) |
Yes (Rear Traffic Monitor with Collision Mitigation Brake intervention) |
Yes (Rear Traffic Monitor with Collision Mitigation Brake intervention) |
Yes (Rear Traffic Monitor with Collision Mitigation Brake intervention) |
Yes (Rear Traffic Monitor with Collision Mitigation Brake intervention) |
Yes (Rear Traffic Monitor with Collision Mitigation Brake intervention) |
Yes (Rear Traffic Monitor with automated rear braking mitigation control) |
Yes (Rear Traffic Monitor system with automatic active brake intervention updates) |
Yes (Rear Traffic Monitor with automated rear braking mitigation control) |
Yes (Rear Cross Traffic Monitor system with automatic active brake intervention updates) |
Yes (Rear Cross Traffic Monitor system with automatic active brake intervention updates) |
Yes (Rear Cross Traffic Monitor system with automatic active brake intervention updates) |
| Rear Middle Head Rest |
Yes (Adjustable Second Row Middle Cushion Headrest) |
Yes (Adjustable Second Row Middle Cushion Headrest) |
Yes (Adjustable Second Row Middle Cushion Headrest) |
Yes (Adjustable Second Row Middle Cushion Headrest) |
Yes (Adjustable Second Row Middle Cushion Headrest) |
Yes (Adjustable Second Row Middle Cushion Headrest) |
Yes (Low profile safety design to preserve rearview mirror sightlines) |
Yes (Lowered silhouette configuration block to protect driver rear views) |
Yes (Center Lower-Profile Restraint for Rearward Vision) |
Yes (Center Lower-Profile Restraint for optimized rearward vision protection) |
Yes (Center Lower-Profile Restraint for optimized rearward vision protection) |
Yes (Center Lower-Profile Restraint for optimized rearward vision protection) |
| Overspeed Warning |
Yes (Standard 80kmph and 120kmph Acoustic Warning Compliance Layout) |
Yes (Standard 80kmph and 120kmph Acoustic Warning Compliance Layout) |
Yes (Standard 80kmph and 120kmph Acoustic Warning Compliance Layout) |
Yes (Standard 80kmph and 120kmph Acoustic Warning Compliance Layout) |
Yes (Standard 80kmph and 120kmph Acoustic Warning Compliance Layout) |
Yes (Standard 80kmph and 120kmph Acoustic Warning Compliance Layout) |
Yes (Regional speed limit chime thresholds active via country specs) |
Yes (Acoustic limits chime thresholds customized automatically per country regulations) |
Yes (Regional speed limit chime thresholds active via country specs) |
Yes (Regional speed limit chime thresholds active via camera traffic sign tracking) |
Yes (Regional speed limit chime thresholds active via camera traffic sign tracking) |
Yes (Regional speed limit chime thresholds active via camera traffic sign tracking) |
| Doors, Windows, Mirrors & Wipers |
| Turn Indicators on ORVMs |
Yes (LED Turn Indicators integrated on ORVM housings) |
Yes (LED Turn Indicators integrated on ORVM housings) |
Yes (LED Turn Indicators integrated on ORVM housings) |
Yes (LED Turn Indicators integrated on ORVM housings) |
Yes (LED Turn Indicators integrated on ORVM housings) |
Yes (LED Turn Indicators integrated on ORVM housings) |
Yes (Sleek LED indicator clusters integrated on side mirror shells) |
Yes (Sleek sequential dynamic LED blink lines inside outer mirror shells) |
Yes (Dynamic LED indicators integrated into Side Mirror Housings) |
Yes (Dynamic LED indicators integrated into Side Mirror Housings) |
Yes (Dynamic LED indicators integrated into Side Mirror Housings) |
Yes (Dynamic LED indicators integrated into Side Mirror Housings) |
| Rain-sensing Wipers |
Yes (Variable Automatic Intermittent Sensing Setup) |
Yes (Variable Automatic Intermittent Sensing Setup) |
Yes (Variable Automatic Intermittent Sensing Setup) |
Yes (Variable Automatic Intermittent Sensing Setup) |
Yes (Variable Automatic Intermittent Sensing Setup) |
Yes (Variable Automatic Intermittent Sensing Setup) |
Yes (Automatic speed adjusting variable wiper moisture sensor elements) |
Yes (Intermittent automatic water concentration monitoring sensor matrix) |
Yes (Automatic speed adjusting variable wiper moisture sensor elements) |
Yes (Automatic speed adjusting variable wiper moisture sensor elements) |
Yes (Automatic speed adjusting variable wiper moisture sensor elements) |
Yes (Automatic speed adjusting variable wiper moisture sensor elements) |
| One Touch Up |
Yes (All Passenger Doors Windows) |
Yes (All Passenger Doors Windows) |
Yes (All Passenger Doors Windows) |
Yes (All Passenger Doors Windows) |
Yes (All Passenger Doors Windows) |
Yes (Front Driver and Passenger Doors Windows) |
Yes (Anti-pinch parameters implemented across all window panels) |
Yes (Equipped with safety auto-reverse pressure sensors across all panels) |
Yes (Equipped with Anti-Pinch Pressure Sensors for all panels) |
Yes (Equipped with Anti-Pinch Pressure Sensors for all panels) |
Yes (Equipped with Anti-Pinch Pressure Sensors for all panels) |
Yes (Equipped with Anti-Pinch Pressure Sensors for all panels) |
| One Touch Down |
Yes (All Passenger Doors Windows) |
Yes (All Passenger Doors Windows) |
Yes (All Passenger Doors Windows) |
Yes (All Passenger Doors Windows) |
Yes (All Passenger Doors Windows) |
Yes (Front Driver and Passenger Doors Windows) |
Yes (One-touch automatic express drop functionality) |
Yes (Continuous single trigger holding triggers immediate complete lowering) |
Yes (Express lowering feature via continuous trigger holding) |
Yes (Express lowering feature via continuous trigger holding) |
Yes (Express lowering feature via continuous trigger holding) |
Yes (Express lowering feature via continuous trigger holding) |
| Rear Windshield Blind |
No |
No |
No |
No |
No |
No |
No (Deep factory-installed privacy window glass processing instead) |
No (Premium factory smoked solar attenuating privacy glass applied instead) |
No (Deep factory-installed privacy window glass processing instead) |
No (Deep factory-installed privacy window glass processing instead) |
No (Deep factory-installed privacy window glass processing instead) |
No (Deep factory-installed privacy window glass processing instead) |
| Exterior Door Handles Finish |
Gloss Black Premium Finish |
Gloss Black Premium Finish |
Gloss Black Premium Finish |
Gloss Black Premium Finish |
Gloss Black Premium Finish |
Gloss Black Premium Finish |
Body-Coloured / Gloss Black contrast handles |
Gloss Black / Body-Coloured depending on theme configuration choices |
Body-Coloured / Gloss Black contrast handles |
Gloss Black / Body-Coloured depending on theme configuration choices |
Gloss Black / Body-Coloured handles depending on theme configuration choices |
Gloss Black Finished dynamic handles |
| Interior Door Handles |
Premium Noble Chrome/Satin Finish options |
Premium Noble Chrome/Satin Finish options |
Premium Noble Chrome/Satin Finish options |
Premium Noble Chrome/Satin Finish options |
Premium Noble Chrome/Satin Finish options |
Premium Noble Chrome/Satin Finish options |
Yes (Industrial structural metallic design pull hooks) |
Yes (Exposed industrial structural metal pulling handles) |
Yes (Industrial structural metallic design pull hooks) |
Yes (Industrial structural metallic design pull hooks) |
Yes (Industrial structural metallic design pull hooks) |
Yes (Industrial structural metallic design pull hooks) |
| Scuff Plates |
Yes (Illuminated Metal Treadplates with X-Dynamic Script branding) |
Yes (Illuminated Metal Treadplates with X-Dynamic Script branding) |
Yes (Illuminated Metal Treadplates with Trophy Script branding) |
Yes (Illuminated Metal Treadplates with Trophy Script branding) |
Yes (Illuminated Metal Treadplates with Defender Script branding) |
Yes (Illuminated Metal Treadplates with Defender Script branding) |
Yes (Illuminated metal plates bearing the X-Dynamic lettering logo) |
Yes (Illuminated metal door plates bearing the customized Defender X logo) |
Yes (Illuminated metal plates bearing the X-Dynamic lettering logo) |
Yes (Illuminated metal plates bearing the premium V8 model lettering logo) |
Yes (Illuminated metal plates bearing the bespoke OCTA diamond emblem) |
Yes (Illuminated metal plates bearing the bespoke OCTA diamond emblem) |
| Adjustable ORVMs |
Yes (Electrically Adjustable, Heated, Auto-Dimming Mirror Assemblies) |
Yes (Electrically Adjustable, Heated, Auto-Dimming Mirror Assemblies) |
Yes (Electrically Adjustable, Heated, Auto-Dimming Mirror Assemblies) |
Yes (Electrically Adjustable, Heated, Auto-Dimming Mirror Assemblies) |
Yes (Electrically Adjustable, Heated, Auto-Dimming Mirror Assemblies) |
Yes (Electrically Adjustable, Heated, Auto-Dimming Mirror Assemblies) |
Yes (Power Folding, Heated, Auto-dimming with approach memory settings) |
Yes (Electrically folding, heated, auto-dimming with dynamic reverse tilt parameters) |
Yes (Power Folding, Heated, Auto-Dimming with approach memory settings) |
Yes (Power Folding, Heated, Auto-Dimming with approach memory settings) |
Yes (Power Folding, Heated, Auto-Dimming with approach memory settings) |
Yes (Power Folding, Heated, Auto-Dimming with approach memory settings) |
| Exterior Door Handles |
Pull Type Heavy-Duty Layout |
Pull Type Heavy-Duty Layout |
Pull Type Heavy-Duty Layout |
Pull Type Heavy-Duty Layout |
Pull Type Heavy-Duty Layout |
Pull Type Heavy-Duty Layout |
Yes (Heavy-duty pull handle design matches off-road utility profile) |
Yes (Heavy-duty exterior off-road grip assemblies) |
Yes (Heavy-duty pull handle design matches off-road utility profile) |
Yes (Heavy-duty pull handle design matches off-road utility profile) |
Yes (Heavy-duty pull handle design matches off-road utility profile) |
Yes (Heavy-duty pull handle design matches off-road utility profile) |
| Rear Defogger |
Yes (Heated Rear Windshield Glass with Timer Layout) |
Yes (Heated Rear Windshield Glass with Timer Layout) |
Yes (Heated Rear Windshield Glass with Timer Layout) |
Yes (Heated Rear Windshield Glass with Timer Layout) |
Yes (Heated Rear Windshield Glass with Timer Layout) |
Yes (Heated Rear Windshield Glass with Timer Layout) |
Yes (Electric resistive element matrix embedded in rear panoramic glass) |
Yes (High-speed defrosting microgrid lines layered into rear canopy glass) |
Yes (Electric resistive element matrix embedded in rear panoramic glass) |
Yes (Electric resistive element matrix embedded in rear panoramic glass) |
Yes (Electric resistive element matrix embedded in rear panoramic glass) |
Yes (Electric resistive element matrix embedded in rear panoramic glass) |
| Door Pockets |
Yes (Front & Rear Door Pads with Rigid Storage Bottle Slots) |
Yes (Front & Rear Door Pads with Rigid Storage Bottle Slots) |
Yes (Front & Rear Door Pads with Rigid Storage Bottle Slots) |
Yes (Front & Rear Door Pads with Rigid Storage Bottle Slots) |
Yes (Front & Rear Door Pads with Rigid Storage Bottle Slots) |
Yes (Front Door Pads with Rigid Storage Bottle Slots) |
Yes (Deep open door card slots lined with durable easy-clean rubber surfaces) |
Yes (Deep open door card slots lined with anti-vibration rubber protective sleeves) |
Yes (Deep open door card slots lined with durable easy-clean rubber surfaces) |
Yes (Deep open door card slots lined with durable easy-clean rubber surfaces) |
Yes (Deep open door card slots lined with durable easy-clean rubber surfaces) |
Yes (Deep open door card slots lined with durable easy-clean rubber surfaces) |
| Rear Wiper |
Yes (Integrated Window Washer setup) |
Yes (Integrated Window Washer setup) |
Yes (Integrated Window Washer setup) |
Yes (Integrated Window Washer setup) |
Yes (Integrated Window Washer setup) |
Yes (Integrated Window Washer setup) |
Yes (Equipped with integrated washer nozzles and continuous cycle mode) |
Yes (Equipped with fluid injection nozzles and automatic reverse gear sync) |
Yes (Equipped with integrated washer nozzles and continuous cycle mode) |
Yes (Equipped with integrated washer nozzles and continuous cycle mode) |
Yes (Equipped with integrated washer nozzles and continuous cycle mode) |
Yes (Equipped with integrated washer nozzles and continuous cycle mode) |
| Side Window Blinds |
No |
No |
No |
No |
No |
No |
No (Standard dark rear sun-blocking safety glass layout) |
No |
No (Standard dark rear sun-blocking safety glass layout) |
No (Standard dark rear sun-blocking safety glass layout) |
No (Standard dark rear sun-blocking safety glass layout) |
No (Standard dark rear sun-blocking safety glass layout) |
| Power Windows |
Yes (All Row Power Windows Array) |
Yes (All Row Power Windows Array) |
Yes (All Row Power Windows Array) |
Yes (All Row Power Windows Array) |
Yes (All Row Power Windows Array) |
Yes (Front Power Windows Array) |
Yes (All windows electric with child locking isolation safety switches) |
Yes (All windows electric with child locking isolation safety switches) |
Yes (All windows electric with child locking isolation safety switches) |
Yes (All windows electric with child locking isolation safety switches) |
Yes (All windows electric with child locking isolation safety switches) |
Yes (All windows electric with child locking isolation safety switches) |
| ORVM Colour |
Narvik Black High Contrast Finish |
Narvik Black High Contrast Finish |
Narvik Black High Contrast Finish |
Narvik Black High Contrast Finish |
Gloss Black Finish |
Gloss Black Finish |
Gloss Black / Narvik Black premium finishes |
Gloss Black / Narvik Black contrast performance mirrors |
Gloss Black / Narvik Black premium finishes |
Gloss Black / Narvik Black premium finishes |
Gloss Black / Narvik Black premium finishes |
Gloss Black / Narvik Black premium finishes |
| Power Windows Position |
Door Panel Trim Inserts Framework |
Door Panel Trim Inserts Framework |
Door Panel Trim Inserts Framework |
Door Panel Trim Inserts Framework |
Door Panel Trim Inserts Framework |
Door Panel Trim Inserts Framework |
Front Door Armrest Panel Master Console (with individual row overrides) |
Driver Door Panel Master Controller Armrest |
Driver Side Door Rest Panel Console Group |
Driver Side Door Rest Panel Console Group |
Driver Side Door Rest Panel Console Group |
Driver Side Door Rest Panel Console Group |
| Interior Door Handles Finish |
Satin Chrome / Brushed Structural Finish |
Satin Chrome / Brushed Structural Finish |
Satin Chrome / Brushed Structural Finish |
Satin Chrome / Brushed Structural Finish |
Satin Chrome / Brushed Structural Finish |
Satin Chrome / Brushed Structural Finish |
Noble Chrome or Satin Smoked Oak Powder Coat industrial finish |
Satin Smoked Chrome or Powder-Coated Industrial Grey metal accents |
Brushed Aluminum / Ceramic Dark Trim Finish accents |
Satin Smoked Chrome or Powder-Coated Industrial Dark metal accents |
Chopped Carbon Fiber composite or Satin Smoked Chrome metal accents |
Chopped Carbon Fiber composite or Satin Smoked Chrome metal accents |
| Bootlid Opener |
Power Operated (With Soft-Close & Remote Electronic Tailgate Release) |
Power Operated (With Soft-Close & Remote Electronic Tailgate Release) |
Power Operated (With Soft-Close & Remote Electronic Tailgate Release) |
Power Operated (With Soft-Close & Remote Electronic Tailgate Release) |
Power Operated (With Soft-Close & Remote Electronic Tailgate Release) |
Power Operated (With Soft-Close & Remote Electronic Tailgate Release) |
Manual Side-Hinged Tailgate with Soft-Close Assist |
Manual Side-Hinged Tailgate with Soft-Close Assist |
Manual Side-Hinged Tailgate with Soft-Close Assist |
Manual Side-Hinged Tailgate with Soft-Close Assist |
Manual Side-Hinged Tailgate with Soft-Close Assist |
Manual Side-Hinged Tailgate with Soft-Close Assist |
| Entertainment, Information & Communication |
| Touchscreen Size |
11.4 inches |
11.4 inches |
11.4 inches |
11.4 inches |
11.4 inches |
11.4 inches |
11.4-inch Curved Glass Infotainment Touchscreen Screen Layout |
11.4-inch Curved Glass Infotainment Touchscreen Screen Layout |
11.4-inch Curved Glass Infotainment Touchscreen Screen Layout |
11.4-inch Curved Glass Infotainment Touchscreen Screen Layout |
11.4-inch Curved Glass Infotainment Touchscreen Screen Layout |
11.4-inch Curved Glass Infotainment Touchscreen Screen Layout |
| Internal Hard Drive |
No (Replaced by cloud-connected dynamic caching within Pivi Pro architecture) |
No (Replaced by cloud-connected dynamic caching within Pivi Pro architecture) |
No (Replaced by cloud-connected dynamic caching within Pivi Pro architecture) |
No (Replaced by cloud-connected dynamic caching within Pivi Pro architecture) |
No (Replaced by cloud-connected dynamic caching within Pivi Pro architecture) |
No (Replaced by cloud-connected dynamic caching within Pivi Pro architecture) |
No (Cloud-Based Profile Ecosystem Storage Integration via Pivi Pro) |
No (Cloud-Based Profile Ecosystem Storage Integration via Pivi Pro) |
No (Cloud-Based Profile Ecosystem Storage Integration via Pivi Pro) |
No (Cloud-Based Profile Ecosystem Storage Integration via Pivi Pro) |
No (Cloud-Based Profile Ecosystem Storage Integration via Pivi Pro) |
No (Cloud-Based Profile Ecosystem Storage Integration via Pivi Pro) |
| USB Compatibility |
Yes (High-Speed Type-A & Type-C Interface Slots) |
Yes (High-Speed Type-A & Type-C Interface Slots) |
Yes (High-Speed Type-A & Type-C Interface Slots) |
Yes (High-Speed Type-A & Type-C Interface Slots) |
Yes (High-Speed Type-A & Type-C Interface Slots) |
Yes (High-Speed Type-A & Type-C Interface Slots) |
Yes (Multiple USB-A and USB-C Data & High-Power Charging Ports across all 3 rows) |
Yes (Multiple USB-A and USB-C Data & High-Power Charging Ports across all zones) |
Yes (Multiple USB-A and USB-C Data & High-Power Charging Ports across all 3 rows) |
Yes (Multiple USB-A and USB-C Data & High-Power Charging Ports across all 3 rows) |
Yes (Multiple USB-A and USB-C Data & High-Power Charging Ports across all zones) |
Yes (Multiple USB-A and USB-C Data & High-Power Charging Ports across all zones) |
| Speakers |
10 Speakers + 1 Subwoofer (400W Meridian Sound System Setup) |
10 Speakers + 1 Subwoofer (400W Meridian Sound System Setup) |
14 Speakers + 1 Subwoofer (700W Meridian Surround Sound System Setup) |
14 Speakers + 1 Subwoofer (700W Meridian Surround Sound System Setup) |
14 Speakers + 1 Subwoofer (700W Meridian Surround Sound System Setup) |
14 Speakers + 1 Subwoofer (700W Meridian Surround Sound System Setup) |
10 Speakers + Subwoofer (400W Meridian Sound System Standard) |
14 Speakers + Subwoofer (700W Meridian Surround Sound System Standard) |
14 Speakers + Subwoofer (700W Meridian Surround Sound System Standard) |
14 Speakers + Subwoofer (700W Meridian Surround Sound System Standard) |
14 Speakers + Subwoofer (700W Meridian Surround Sound System Standard) |
14 Speakers + Subwoofer (700W Meridian Surround Sound System Standard) |
| AM/FM Radio |
Yes |
Yes |
Yes |
Yes |
Yes |
Yes |
Yes (FM Multiplex and DAB+ Digital Radio System Architecture) |
Yes (FM Multiplex and DAB+ Digital Radio System Architecture) |
Yes (FM Multiplex and DAB+ Digital Radio System Architecture) |
Yes (FM Multiplex and DAB+ Digital Radio System Architecture) |
Yes (FM Multiplex and DAB+ Digital Radio System Architecture) |
Yes (FM Multiplex and DAB+ Digital Radio System Architecture) |
| Apple CarPlay |
Yes (Wireless) |
Yes (Wireless) |
Yes (Wireless) |
Yes (Wireless) |
Yes (Wireless) |
Yes (Wireless) |
Yes (Wireless Apple CarPlay Integration) |
Yes (Wireless Apple CarPlay Integration) |
Yes (Wireless Apple CarPlay Integration) |
Yes (Wireless Apple CarPlay Integration) |
Yes (Wireless Apple CarPlay Integration) |
Yes (Wireless Apple CarPlay Integration) |
| Voice Command |
Yes (Advanced Voice Control Suite) |
Yes (Advanced Voice Control Suite) |
Yes (Advanced Voice Control Suite) |
Yes (Advanced Voice Control Suite) |
Yes (Advanced Voice Control Suite) |
Yes (Advanced Voice Control Suite) |
Yes (Pivi Pro Natural Language Voice Control System Engine) |
Yes (Pivi Pro Natural Language Voice Control System Engine) |
Yes (Pivi Pro Natural Language Voice Control System Engine) |
Yes (Pivi Pro Natural Language Voice Control System Engine) |
Yes (Pivi Pro Natural Language Voice Control System Engine) |
Yes (Pivi Pro Natural Language Voice Control System Engine) |
| Steering-mounted controls |
Yes (Steering Mounted Audio, Phone, Cruise & Interactive MID Cluster Controls) |
Yes (Steering Mounted Audio, Phone, Cruise & Interactive MID Cluster Controls) |
Yes (Steering Mounted Audio, Phone, Cruise & Interactive MID Cluster Controls) |
Yes (Steering Mounted Audio, Phone, Cruise & Interactive MID Cluster Controls) |
Yes (Steering Mounted Audio, Phone, Cruise & Interactive MID Cluster Controls) |
Yes (Steering Mounted Audio, Phone, Cruise & Interactive MID Cluster Controls) |
Yes (Multifunction Controls with Configurable Mechanical/Capacitive Toggles) |
Yes (Multifunction Controls with Configurable Mechanical/Capacitive Toggles) |
Yes (Multifunction Controls with Configurable Mechanical/Capacitive Toggles) |
Yes (Multifunction Controls with Configurable Mechanical/Capacitive Toggles) |
Yes (Multifunction Controls with Configurable Mechanical/Capacitive Toggles) |
Yes (Multifunction Controls with Configurable Mechanical/Capacitive Toggles) |
| Wireless Charger |
Yes (Front Row Center Console induction charging slot) |
Yes (Front Row Center Console induction charging slot) |
Yes (Front Row Center Console induction charging slot) |
Yes (Front Row Center Console induction charging slot) |
Yes (Front Row Center Console induction charging slot) |
Yes (Front Row Center Console induction charging slot) |
Yes (Wireless Smartphone Charging Deck with Signal Booster Module) |
Yes (Wireless Smartphone Charging Deck with Signal Booster Module) |
Yes (Wireless Smartphone Charging Deck with Signal Booster Module) |
Yes (Wireless Smartphone Charging Deck with Signal Booster Module) |
Yes (Wireless Smartphone Charging Deck with Signal Booster Module) |
Yes (Wireless Smartphone Charging Deck with Signal Booster Module) |
| AUX Compatibility |
No |
No |
No |
No |
No |
No |
No |
No |
No |
No |
No |
No |
| Bluetooth Compatibility |
Yes (With Multi-Device Audio Streaming & Phone Calling Support) |
Yes (With Multi-Device Audio Streaming & Phone Calling Support) |
Yes (With Multi-Device Audio Streaming & Phone Calling Support) |
Yes (With Multi-Device Audio Streaming & Phone Calling Support) |
Yes (With Multi-Device Audio Streaming & Phone Calling Support) |
Yes (With Multi-Device Audio Streaming & Phone Calling Support) |
Yes (Simultaneous Dual-Device Bluetooth Pairing Ecosystem) |
Yes (Simultaneous Dual-Device Bluetooth Pairing Ecosystem) |
Yes (Simultaneous Dual-Device Bluetooth Pairing Ecosystem) |
Yes (Simultaneous Dual-Device Bluetooth Pairing Ecosystem) |
Yes (Simultaneous Dual-Device Bluetooth Pairing Ecosystem) |
Yes (Simultaneous Dual-Device Bluetooth Pairing Ecosystem) |
| Display |
11.4-inch Pivi Pro Touchscreen + 12.3-inch Interactive Driver Display Display Screen Layout |
11.4-inch Pivi Pro Touchscreen + 12.3-inch Interactive Driver Display Display Screen Layout |
11.4-inch Pivi Pro Touchscreen + 12.3-inch Interactive Driver Display Display Screen Layout |
11.4-inch Pivi Pro Touchscreen + 12.3-inch Interactive Driver Display Display Screen Layout |
11.4-inch Pivi Pro Touchscreen + 12.3-inch Interactive Driver Display Display Screen Layout |
11.4-inch Pivi Pro Touchscreen + 12.3-inch Interactive Driver Display Display Screen Layout |
Digital Display (Pivi Pro Connected Architecture Platform) |
Digital Display (Pivi Pro Connected Architecture Platform) |
Digital Display (Pivi Pro Connected Architecture Platform) |
Digital Display (Pivi Pro Connected Architecture Platform) |
Digital Display (Pivi Pro Connected Architecture Platform) |
Digital Display (Pivi Pro Connected Architecture Platform) |
| Integrated (in-dash) Music System |
Yes (Pivi Pro Infotainment Music System Setup) |
Yes (Pivi Pro Infotainment Music System Setup) |
Yes (Pivi Pro Infotainment Music System Setup) |
Yes (Pivi Pro Infotainment Music System Setup) |
Yes (Pivi Pro Infotainment Music System Setup) |
Yes (Pivi Pro Infotainment Music System Setup) |
Yes (Flush Structural Magnesium Transverse Beam Dashboard Unit) |
Yes (Flush Structural Magnesium Transverse Beam Dashboard Unit) |
Yes (Flush Structural Magnesium Transverse Beam Dashboard Unit) |
Yes (Flush Structural Magnesium Transverse Beam Dashboard Unit) |
Yes (Flush Structural Magnesium Transverse Beam Dashboard Unit) |
Yes (Flush Structural Magnesium Transverse Beam Dashboard Unit) |
| Smart Connectivity |
Yes (InControl Remote Connected Application Suite) |
Yes (InControl Remote Connected Application Suite) |
Yes (InControl Remote Connected Application Suite) |
Yes (InControl Remote Connected Application Suite) |
Yes (InControl Remote Connected Application Suite) |
Yes (InControl Remote Connected Application Suite) |
Yes (InControl Remote Smart Connected Ecosystem Apps) |
Yes (InControl Remote Smart Connected Ecosystem Apps) |
Yes (InControl Remote Smart Connected Ecosystem Apps) |
Yes (InControl Remote Smart Connected Ecosystem Apps) |
Yes (InControl Remote Smart Connected Ecosystem Apps) |
Yes (InControl Remote Smart Connected Ecosystem Apps) |
| Android Auto |
Yes (Wireless) |
Yes (Wireless) |
Yes (Wireless) |
Yes (Wireless) |
Yes (Wireless) |
Yes (Wireless) |
Yes (Wireless Android Auto Integration) |
Yes (Wireless Android Auto Integration) |
Yes (Wireless Android Auto Integration) |
Yes (Wireless Android Auto Integration) |
Yes (Wireless Android Auto Integration) |
Yes (Wireless Android Auto Integration) |
| Head Unit Size |
11.4 inches |
11.4 inches |
11.4 inches |
11.4 inches |
11.4 inches |
11.4 inches |
Not Applicable (Integrated Floating High-Definition Curved Screen Profile) |
Not Applicable (Integrated Floating High-Definition Curved Screen Profile) |
Not Applicable (Integrated Floating High-Definition Curved Screen Profile) |
Not Applicable (Integrated Floating High-Definition Curved Screen Profile) |
Not Applicable (Integrated Floating High-Definition Curved Screen Profile) |
Not Applicable (Integrated Floating High-Definition Curved Screen Profile) |
| iPod Compatibility |
Yes |
Yes |
Yes |
Yes |
Yes |
Yes |
Yes (Fully Optimized Data Stream Over Type-C Ports) |
Yes (Fully Optimized Data Stream Over Type-C Ports) |
Yes (Fully Optimized Data Stream Over Type-C Ports) |
Yes (Fully Optimized Data Stream Over Type-C Ports) |
Yes (Fully Optimized Data Stream Over Type-C Ports) |
Yes (Fully Optimized Data Stream Over Type-C Ports) |
| GPS Navigation System |
Yes (Connected Navigation Pro with 3D Mapping & Real-Time Traffic Updates) |
Yes (Connected Navigation Pro with 3D Mapping & Real-Time Traffic Updates) |
Yes (Connected Navigation Pro with 3D Mapping & Real-Time Traffic Updates) |
Yes (Connected Navigation Pro with 3D Mapping & Real-Time Traffic Updates) |
Yes (Connected Navigation Pro with 3D Mapping & Real-Time Traffic Updates) |
Yes (Connected Navigation Pro with 3D Mapping & Real-Time Traffic Updates) |
Yes (Built-in Connected Navigation Pro with 3D Terrain Mapping) |
Yes (Built-in Connected Navigation Pro with 3D Terrain Mapping) |
Yes (Built-in Connected Navigation Pro with 3D Terrain Mapping) |
Yes (Built-in Connected Navigation Pro with 3D Terrain Mapping) |
Yes (Built-in Connected Navigation Pro with 3D Terrain Mapping) |
Yes (Built-in Connected Navigation Pro with 3D Terrain Mapping) |
| Emergency Call |
Yes (Automated SOS e-Call Emergency Response Notification) |
Yes (Automated SOS e-Call Emergency Response Notification) |
Yes (Automated SOS e-Call Emergency Response Notification) |
Yes (Automated SOS e-Call Emergency Response Notification) |
Yes (Automated SOS e-Call Emergency Response Notification) |
Yes (Automated SOS e-Call Emergency Response Notification) |
Yes (Automated Crash Network Signal Transmission upon Airbag Event Deployment) |
Yes (Automated Crash Network Signal Transmission upon Airbag Event Deployment) |
Yes (Automated Crash Network Signal Transmission upon Airbag Event Deployment) |
Yes (Automated Crash Network Signal Transmission upon Airbag Event Deployment) |
Yes (Automated Crash Network Signal Transmission upon Airbag Event Deployment) |
Yes (Automated Crash Network Signal Transmission upon Airbag Event Deployment) |
| Mobile App Features |
| Find My Car |
Yes |
Yes |
Yes |
Yes |
Yes |
Yes |
Yes (Real-time GPS Tracking via Land Rover Remote Smartphone App) |
Yes (Real-time GPS Tracking via Land Rover Remote Smartphone App) |
Yes (Real-time GPS Tracking via Land Rover Remote Smartphone App) |
Yes (Real-time GPS Tracking via Land Rover Remote Smartphone App) |
Yes (Real-time GPS Tracking via Land Rover Remote Smartphone App) |
Yes (Real-time GPS Tracking via Land Rover Remote Smartphone App) |
| Remote AC: On / Off via App |
Yes (Remote Climate Engine Start Pre-Conditioning Layout Setup) |
Yes (Remote Climate Engine Start Pre-Conditioning Layout Setup) |
Yes (Remote Climate Engine Start Pre-Conditioning Layout Setup) |
Yes (Remote Climate Engine Start Pre-Conditioning Layout Setup) |
Yes (Remote Climate Engine Start Pre-Conditioning Layout Setup) |
Yes (Remote Climate Engine Start Pre-Conditioning Layout Setup) |
Yes (Remote Cabin Pre-conditioning and AC Control via Smartphone App) |
Yes (Remote Cabin Pre-conditioning and AC Control via Smartphone App) |
Yes (Remote Cabin Pre-conditioning and AC Control via Smartphone App) |
Yes (Remote Cabin Pre-conditioning and AC Control via Smartphone App) |
Yes (Remote Cabin Pre-conditioning and AC Control via Smartphone App) |
Yes (Remote Cabin Pre-conditioning and AC Control via Smartphone App) |
| Emergency Call Button |
Yes |
Yes |
Yes |
Yes |
Yes |
Yes |
Yes (Roof Console Emergency SOS Button Grid System) |
Yes (Roof Console Emergency SOS Button Grid System) |
Yes (Roof Console Emergency SOS Button Grid System) |
Yes (Roof Console Emergency SOS Button Grid System) |
Yes (Roof Console Emergency SOS Button Grid System) |
Yes (Roof Console Emergency SOS Button Grid System) |
| Alexa Compatibility |
Yes |
Yes |
Yes |
Yes |
Yes |
Yes |
Yes (Direct Amazon Alexa Embedded Ecosystem Support) |
Yes (Direct Amazon Alexa Embedded Ecosystem Support) |
Yes (Direct Amazon Alexa Embedded Ecosystem Support) |
Yes (Direct Amazon Alexa Embedded Ecosystem Support) |
Yes (Direct Amazon Alexa Embedded Ecosystem Support) |
Yes (Direct Amazon Alexa Embedded Ecosystem Support) |
| Remote Sunroof: Open / Close via App |
Yes (Remote Sunroof Venting and Closure functionality via application mapping) |
Yes (Remote Sunroof Venting and Closure functionality via application mapping) |
Yes (Remote Sunroof Venting and Closure functionality via application mapping) |
Yes (Remote Sunroof Venting and Closure functionality via application mapping) |
Yes (Remote Sunroof Venting and Closure functionality via application mapping) |
Yes (Remote Sunroof Venting and Closure functionality via application mapping) |
No |
No |
No |
No |
No |
No |
| Over The Air (OTA) Updates |
Yes (Over-The-Air Software Updates Support) |
Yes (Over-The-Air Software Updates Support) |
Yes (Over-The-Air Software Updates Support) |
Yes (Over-The-Air Software Updates Support) |
Yes (Over-The-Air Software Updates Support) |
Yes (Over-The-Air Software Updates Support) |
Yes (SOTA Over-The-Air Software Module Deployments) |
Yes (SOTA Over-The-Air Software Module Deployments) |
Yes (SOTA Over-The-Air Software Module Deployments) |
Yes (SOTA Over-The-Air Software Module Deployments) |
Yes (SOTA Over-The-Air Software Module Deployments) |
Yes (SOTA Over-The-Air Software Module Deployments) |
| Check Vehicle Status via App |
Yes (Real-Time Diagnostic Fluid Levels, Security Monitoring Data, and Status App) |
Yes (Real-Time Diagnostic Fluid Levels, Security Monitoring Data, and Status App) |
Yes (Real-Time Diagnostic Fluid Levels, Security Monitoring Data, and Status App) |
Yes (Real-Time Diagnostic Fluid Levels, Security Monitoring Data, and Status App) |
Yes (Real-Time Diagnostic Fluid Levels, Security Monitoring Data, and Status App) |
Yes (Real-Time Diagnostic Fluid Levels, Security Monitoring Data, and Status App) |
Yes (Monitors Range, Fuel Level, Lock Status, and Windows via App) |
Yes (Monitors Range, Fuel Level, Lock Status, and Windows via App) |
Yes (Monitors Range, Fuel Level, Lock Status, and Windows via App) |
Yes (Monitors Range, Fuel Level, Lock Status, and Windows via App) |
Yes (Monitors Range, Fuel Level, Lock Status, and Windows via App) |
Yes (Monitors Range, Fuel Level, Lock Status, and Windows via App) |
| Geo-fence |
Yes |
Yes |
Yes |
Yes |
Yes |
Yes |
Yes (Geofence Perimeter and Valet Boundary Alert Software) |
Yes (Geofence Perimeter and Valet Boundary Alert Software) |
Yes (Geofence Perimeter and Valet Boundary Alert Software) |
Yes (Geofence Perimeter and Valet Boundary Alert Software) |
Yes (Geofence Perimeter and Valet Boundary Alert Software) |
Yes (Geofence Perimeter and Valet Boundary Alert Software) |
| Remote Car Lock/Unlock via App |
Yes |
Yes |
Yes |
Yes |
Yes |
Yes |
Yes (Secure Remote Lock and Unlock Interface via Mobile Device) |
Yes (Secure Remote Lock and Unlock Interface via Mobile Device) |
Yes (Secure Remote Lock and Unlock Interface via Mobile Device) |
Yes (Secure Remote Lock and Unlock Interface via Mobile Device) |
Yes (Secure Remote Lock and Unlock Interface via Mobile Device) |
Yes (Secure Remote Lock and Unlock Interface via Mobile Device) |
| Car Light Flashing & Honking via App |
Yes |
Yes |
Yes |
Yes |
Yes |
Yes |
Yes (Remote Horn and Indicator Light Signal Control via App) |
Yes (Remote Horn and Indicator Light Signal Control via App) |
Yes (Remote Horn and Indicator Light Signal Control via App) |
Yes (Remote Horn and Indicator Light Signal Control via App) |
Yes (Remote Horn and Indicator Light Signal Control via App) |
Yes (Remote Horn and Indicator Light Signal Control via App) |
| Instrumentation |
| Door Ajar Warning |
Yes |
Yes |
Yes |
Yes |
Yes |
Yes |
Yes (3D Vehicle Graphic Schematic Cluster Alarm Matrix) |
Yes (3D Vehicle Graphic Schematic Cluster Alarm Matrix) |
Yes (3D Vehicle Graphic Schematic Cluster Alarm Matrix) |
Yes (3D Vehicle Graphic Schematic Cluster Alarm Matrix) |
Yes (3D Vehicle Graphic Schematic Cluster Alarm Matrix) |
Yes (3D Vehicle Graphic Schematic Cluster Alarm Matrix) |
| Gear Indicator |
Yes (Digital Electronic Gear Selection Shifter Matrix Position Indicator) |
Yes (Digital Electronic Gear Selection Shifter Matrix Position Indicator) |
Yes (Digital Electronic Gear Selection Shifter Matrix Position Indicator) |
Yes (Digital Electronic Gear Selection Shifter Matrix Position Indicator) |
Yes (Digital Electronic Gear Selection Shifter Matrix Position Indicator) |
Yes (Digital Electronic Gear Selection Shifter Matrix Position Indicator) |
Yes (Displays Active Dynamic Range Selection in Digital Driver Display) |
Yes (Displays Active Dynamic Range Selection in Digital Driver Display) |
Yes (Displays Active Dynamic Range Selection in Digital Driver Display) |
Yes (Displays Active Dynamic Range Selection in Digital Driver Display) |
Yes (Displays Active Dynamic Range Selection in Digital Driver Display) |
Yes (Displays Active Dynamic Range Selection in Digital Driver Display) |
| Shift Indicator |
No (Not Applicable for Automatic / Torque-Converter Transmissions) |
No (Not Applicable for Automatic / Torque-Converter Transmissions) |
No (Not Applicable for Automatic / Torque-Converter Transmissions) |
No (Not Applicable for Automatic / Torque-Converter Transmissions) |
No (Not Applicable for Automatic / Torque-Converter Transmissions) |
No (Not Applicable for Automatic / Torque-Converter Transmissions) |
Yes (Efficiency Shift Calibration Indicators Embedded in Cluster View) |
No (Shift indicators typically omitted on premium high-performance torque-converter automatic V8 models) |
No (Shift indicators typically omitted on high-performance torque-converter automatic supercharged V8 layouts) |
No (Shift indicators typically omitted on high-performance torque-converter automatic supercharged V8 layouts) |
No (Shift indicators typically omitted on high-performance torque-converter automatic V8 layouts) |
No (Shift indicators typically omitted on high-performance torque-converter automatic V8 layouts) |
| Instantaneous Consumption |
Yes |
Yes |
Yes |
Yes |
Yes |
Yes |
Yes (Live L/100km or km/L Dynamic Engine Run Computations) |
Yes (Live L/100km or km/L Dynamic Engine Run Computations) |
Yes (Live L/100km or km/L Dynamic Engine Run Computations) |
Yes (Live L/100km or km/L Dynamic Engine Run Computations) |
Yes (Live L/100km or km/L Dynamic Engine Run Computations) |
Yes (Live L/100km or km/L Dynamic Engine Run Computations) |
| Average Fuel Consumption |
Yes |
Yes |
Yes |
Yes |
Yes |
Yes |
Yes (Dual Independent A/B Telemetry Engine Calculation Data Logs) |
Yes (Dual Independent A/B Telemetry Engine Calculation Data Logs) |
Yes (Dual Independent A/B Telemetry Engine Calculation Data Logs) |
Yes (Dual Independent A/B Telemetry Engine Calculation Data Logs) |
Yes (Dual Independent A/B Telemetry Engine Calculation Data Logs) |
Yes (Dual Independent A/B Telemetry Engine Calculation Data Logs) |
| Clock |
Yes (Digital Display Configuration) |
Yes (Digital Display Configuration) |
Yes (Digital Display Configuration) |
Yes (Digital Display Configuration) |
Yes (Digital Display Configuration) |
Yes (Digital Display Configuration) |
Yes (Satellite Auto-Sync Clock Interface) |
Yes (Satellite Auto-Sync Clock Interface) |
Yes (Satellite Auto-Sync Clock Interface) |
Yes (Satellite Auto-Sync Clock Interface) |
Yes (Satellite Auto-Sync Clock Interface) |
Yes (Satellite Auto-Sync Clock Interface) |
| Average Speed |
Yes |
Yes |
Yes |
Yes |
Yes |
Yes |
Yes (Evaluated Across Current Engine Trip Run Time Profiles) |
Yes (Evaluated Across Current Engine Trip Run Time Profiles) |
Yes (Evaluated Across Current Engine Trip Run Time Profiles) |
Yes (Evaluated Across Current Engine Trip Run Time Profiles) |
Yes (Evaluated Across Current Engine Trip Run Time Profiles) |
Yes (Evaluated Across Current Engine Trip Run Time Profiles) |
| Heads Up Display (HUD) |
Yes (Interactive Driver Projection Head-Up Display Layout) |
Yes (Interactive Driver Projection Head-Up Display Layout) |
Yes (Interactive Driver Projection Head-Up Display Layout) |
Yes (Interactive Driver Projection Head-Up Display Layout) |
Yes (Interactive Driver Projection Head-Up Display Layout) |
Yes (Interactive Driver Projection Head-Up Display Layout) |
Yes (High-Resolution Windscreen Projected HUD Configured) |
Yes (High-Resolution Windscreen Projected HUD Configured) |
Yes (High-Resolution Windscreen Projected HUD Configured) |
Yes (High-Resolution Windscreen Projected HUD Configured) |
Yes (High-Resolution Windscreen Projected HUD Configured) |
Yes (High-Resolution Windscreen Projected HUD Configured) |
| Tachometer |
Yes (Digital Rev Counter Layout Dial via Driver Cockpit Screen) |
Yes (Digital Rev Counter Layout Dial via Driver Cockpit Screen) |
Yes (Digital Rev Counter Layout Dial via Driver Cockpit Screen) |
Yes (Digital Rev Counter Layout Dial via Driver Cockpit Screen) |
Yes (Digital Rev Counter Layout Dial via Driver Cockpit Screen) |
Yes (Digital Rev Counter Layout Dial via Driver Cockpit Screen) |
Yes (Customizable Interactive Digital Gauge Profile Layouts) |
Yes (Customizable Interactive Digital Gauge Profile Layouts) |
Yes (Customizable Interactive Digital Gauge Profile Layouts) |
Yes (Customizable Interactive Digital Gauge Profile Layouts) |
Yes (Customizable Interactive Digital Gauge Profile Layouts) |
Yes (Customizable Interactive Digital Gauge Profile Layouts) |
| Adjustable Cluster Brightness |
Yes |
Yes |
Yes |
Yes |
Yes |
Yes |
Yes (Synchronized Menu Interface Display Management Controllers) |
Yes (Synchronized Menu Interface Display Management Controllers) |
Yes (Synchronized Menu Interface Display Management Controllers) |
Yes (Synchronized Menu Interface Display Management Controllers) |
Yes (Synchronized Menu Interface Display Management Controllers) |
Yes (Synchronized Menu Interface Display Management Controllers) |
| Instrument Cluster |
Fully Digital Multi-Screen Cockpit Console Layout |
Fully Digital Multi-Screen Cockpit Console Layout |
Fully Digital Multi-Screen Cockpit Console Layout |
Fully Digital Multi-Screen Cockpit Console Layout |
Fully Digital Multi-Screen Cockpit Console Layout |
Fully Digital Multi-Screen Cockpit Console Layout |
Digital (12.3-inch High-Definition Interactive Driver Display) |
Digital (12.3-inch High-Definition Interactive Driver Display) |
Digital (12.3-inch High-Definition Interactive Driver Display) |
Digital (12.3-inch High-Definition Interactive Driver Display) |
Digital (12.3-inch High-Definition Interactive Driver Display) |
Digital (12.3-inch High-Definition Interactive Driver Display) |
| Instrument Cluster Screen Type |
12.3-inch High-Definition Interactive Driver TFT Instrument Display Screen |
12.3-inch High-Definition Interactive Driver TFT Instrument Display Screen |
12.3-inch High-Definition Interactive Driver TFT Instrument Display Screen |
12.3-inch High-Definition Interactive Driver TFT Instrument Display Screen |
12.3-inch High-Definition Interactive Driver TFT Instrument Display Screen |
12.3-inch High-Definition Interactive Driver TFT Instrument Display Screen |
TFT High-Definition Multi-Theme Color Virtual Screen Matrix |
TFT High-Definition Multi-Theme Color Virtual Screen Matrix |
TFT High-Definition Multi-Theme Color Virtual Screen Matrix |
TFT High-Definition Multi-Theme Color Virtual Screen Matrix |
TFT High-Definition Multi-Theme Color Virtual Screen Matrix |
TFT High-Definition Multi-Theme Color Virtual Screen Matrix |
| Low Fuel Level Warning |
Yes |
Yes |
Yes |
Yes |
Yes |
Yes |
Yes (Illuminated Multi-Stage Cluster Warning Linked to Navigation Range Data) |
Yes (Illuminated Multi-Stage Cluster Warning Linked to Navigation Range Data) |
Yes (Illuminated Multi-Stage Cluster Warning Linked to Navigation Range Data) |
Yes (Illuminated Multi-Stage Cluster Warning Linked to Navigation Range Data) |
Yes (Illuminated Multi-Stage Cluster Warning Linked to Navigation Range Data) |
Yes (Illuminated Multi-Stage Cluster Warning Linked to Navigation Range Data) |
| Distance to Empty |
Yes |
Yes |
Yes |
Yes |
Yes |
Yes |
Yes (Dynamically Computed via Real-time Driving Telemetry Feeds) |
Yes (Dynamically Computed via Real-time Driving Telemetry Feeds) |
Yes (Dynamically Computed via Real-time Driving Telemetry Feeds) |
Yes (Dynamically Computed via Real-time Driving Telemetry Feeds) |
Yes (Dynamically Computed via Real-time Driving Telemetry Feeds) |
Yes (Dynamically Computed via Real-time Driving Telemetry Feeds) |
| Trip Meter |
Yes (Multi-Profile Electronic Trip Log Tracking) |
Yes (Multi-Profile Electronic Trip Log Tracking) |
Yes (Multi-Profile Electronic Trip Log Tracking) |
Yes (Multi-Profile Electronic Trip Log Tracking) |
Yes (Multi-Profile Electronic Trip Log Tracking) |
Yes (Multi-Profile Electronic Trip Log Tracking) |
Yes (Dual High-Accuracy Electronic Multi-Logs with Steering Menu Controls) |
Yes (Dual High-Accuracy Electronic Multi-Logs with Steering Menu Controls) |
Yes (Dual High-Accuracy Electronic Multi-Logs with Steering Menu Controls) |
Yes (Dual High-Accuracy Electronic Multi-Logs with Steering Menu Controls) |
Yes (Dual High-Accuracy Electronic Multi-Logs with Steering Menu Controls) |
Yes (Dual High-Accuracy Electronic Multi-Logs with Steering Menu Controls) |
| Manufacturer Warranty |
| Battery Warranty (In Kilometres) |
Standard Lead-Acid Battery Baseline Cover Option |
Standard Lead-Acid Battery Baseline Cover Option |
Standard Lead-Acid Battery Baseline Cover Option |
Standard Lead-Acid Battery Baseline Cover Option |
Standard Lead-Acid Battery Baseline Cover Option |
Standard Lead-Acid Battery Baseline Cover Option |
Not Applicable (Mild-Hybrid 48V MHEV Traction Battery System Unit Spec) |
Not Applicable (Standard internal combustion engine 12V system) |
Not Applicable (Standard internal combustion engine 12V system battery) |
Not Applicable (Standard internal combustion engine 12V system battery) |
Not Applicable (Mild-hybrid subsystem tracking values outside standard mileage boundaries) |
Not Applicable (Mild-hybrid traction battery metrics do not apply standard 12V terminal tracking rules) |
| Warranty (In Years) |
3 Years (Standard Land Rover India Protection Cover Package) |
3 Years (Standard Land Rover India Protection Cover Package) |
3 Years (Standard Land Rover India Protection Cover Package) |
3 Years (Standard Land Rover India Protection Cover Package) |
3 Years (Standard Land Rover India Protection Cover Package) |
3 Years (Standard Land Rover India Protection Cover Package) |
3 Years or 5 Years (Depending on Regional Importer Delivery Market Terms) |
3 Years or 5 Years (Depending on Regional Importer Delivery Market Terms) |
3 Years or 5 Years (Depending on Regional Importer Delivery Market Terms) |
3 Years or 5 Years (Depending on Regional Importer Delivery Market Terms) |
3 Years or 5 Years (Depending on Regional Importer Delivery Market Terms) |
3 Years or 5 Years (Depending on Regional Importer Delivery Market Terms) |
| Battery Warranty (In Years) |
1 Year |
1 Year |
1 Year |
1 Year |
1 Year |
1 Year |
5 Years or 8 Years (For the 48V MHEV Battery Subsystem Component Architecture) |
Not Applicable |
Not Applicable |
Not Applicable |
5 Years or 8 Years (For MHEV powertrain components) |
5 Years or 8 Years (For MHEV powertrain components) |
| Warranty (In Kilometres) |
1,00,000 km |
1,00,000 km |
1,00,000 km |
1,00,000 km |
1,00,000 km |
1,00,000 km |
100,000 km or 150,000 km (Varies According to Regional Dealership Frameworks) |
100,000 km or 150,000 km (Varies According to Regional Dealership Frameworks) |
100,000 km or 150,000 km (Varies According to Regional Dealership Frameworks) |
100,000 km or 150,000 km (Varies According to Regional Dealership Frameworks) |
100,000 km or 150,000 km (Varies According to Regional Dealership Frameworks) |
100,000 km or 150,000 km (Varies According to Regional Dealership Frameworks) |
| Storage |
| Cup Holders |
Yes (Front and Second Row Console Cup Holders) |
Yes (Front and Second Row Console Cup Holders) |
Yes (Front and Second Row Console Cup Holders) |
Yes (Front and Second Row Console Cup Holders) |
Yes (Front and Second Row Console Cup Holders) |
Yes (Front and Second Row Console Cup Holders) |
Yes (Oversized Channels Configured Across Rows 1, 2, and 3) |
Yes (Oversized Channels Configured Across Row 1 and Row 2) |
Yes (Oversized Channels Configured Across Rows 1, 2, and 3) |
Yes (Oversized Channels Configured Across Rows 1, 2, and 3) |
Yes (Oversized Channels Configured Across Row 1 and Row 2) |
Yes (Oversized Channels Configured Across Row 1 and Row 2) |
| Cooled Glovebox |
No (Replaced by Front Center Armrest Refrigerator Cooler Compartment Option) |
No (Replaced by Front Center Armrest Refrigerator Cooler Compartment Option) |
No (Replaced by Front Center Armrest Refrigerator Cooler Compartment Option) |
No (Replaced by Front Center Armrest Refrigerator Cooler Compartment Option) |
No (Replaced by Front Center Armrest Refrigerator Cooler Compartment Option) |
No (Replaced by Front Center Armrest Refrigerator Cooler Compartment Option) |
Yes (Variable Chilled Cool Air Flow Chamber Inside Main Dashboard Box) |
Yes (Variable Chilled Cool Air Flow Chamber Inside Main Dashboard Box) |
Yes (Variable Chilled Cool Air Flow Chamber Inside Main Dashboard Box) |
Yes (Variable Chilled Cool Air Flow Chamber Inside Main Dashboard Box) |
Yes (Variable Chilled Cool Air Flow Chamber Inside Main Dashboard Box) |
Yes (Variable Chilled Cool Air Flow Chamber Inside Main Dashboard Box) |
| Sunglass Holder |
No |
No |
No |
No |
No |
No |
No (Optimized Ceiling Panel Spaces for Sunroof Mechanics and eCall Blocks) |
No (Optimized Ceiling Panel Spaces for Sunroof Mechanics and eCall Blocks) |
No (Optimized Ceiling Panel Spaces for Sunroof Mechanics and eCall Blocks) |
No (Optimized Ceiling Panel Spaces for Sunroof Mechanics and eCall Blocks) |
No (Optimized Ceiling Panel Spaces for Sunroof Mechanics and eCall Blocks) |
No (Optimized Ceiling Panel Spaces for Sunroof Mechanics and eCall Blocks) |
| Driver Armrest Storage |
Yes (Spacious Under-Armrest Center Console Storage Tray) |
Yes (Spacious Under-Armrest Center Console Storage Tray) |
Yes (Spacious Under-Armrest Center Console Storage Tray) |
Yes (Spacious Under-Armrest Center Console Storage Tray) |
Yes (Spacious Under-Armrest Center Console Storage Tray) |
Yes (Spacious Under-Armrest Center Console Storage Tray) |
Yes (Deep Multilayer Console Tray with Integrated Refrigerator Compartment Option) |
Yes (Deep Multilayer Console Tray with Integrated Refrigerator Compartment Option) |
Yes (Deep Multilayer Console Tray with Integrated Refrigerator Compartment Option) |
Yes (Deep Multilayer Console Tray with Integrated Refrigerator Compartment Option) |
Yes (Deep Multilayer Console Tray with Integrated Refrigerator Compartment Option) |
Yes (Deep Multilayer Console Tray with Integrated Refrigerator Compartment Option) |
| Cup Holders Position |
Front Central Floor Console & Second Row Fold-Down Center Armrest area |
Front Central Floor Console & Second Row Fold-Down Center Armrest area |
Front Central Floor Console & Second Row Fold-Down Center Armrest area |
Front Central Floor Console & Second Row Fold-Down Center Armrest area |
Front Central Floor Console & Second Row Fold-Down Center Armrest area |
Front Central Floor Console & Second Row Fold-Down Center Armrest area |
Front Center Console, Rear Armrest, Side Wall Panels for Row 3 |
Front Center Console and Rear Seat Center Armrest |
Front Center Console, Rear Armrest, Side Wall Panels for Row 3 |
Front Center Console, Rear Armrest, Side Wall Panels for Row 3 |
Front Center Console and Rear Seat Center Armrest |
Front Center Console and Rear Seat Center Armrest |
| Comfort & Convenience |
| Cruise Control |
Yes (Adaptive Performance Cruise Control with Stop/Go Assist) |
Yes (Adaptive Performance Cruise Control with Stop/Go Assist) |
Yes (Adaptive Performance Cruise Control with Stop/Go Assist) |
Yes (Adaptive Performance Cruise Control with Stop/Go Assist) |
Yes (Adaptive Performance Cruise Control with Stop/Go Assist) |
Yes (Adaptive Performance Cruise Control with Stop/Go Assist) |
Yes (Adaptive Cruise Control with Steering Assist and Stop & Go Layout) |
Yes (Adaptive Cruise Control with Steering Assist and Stop & Go Layout) |
Yes (Adaptive Cruise Control with Steering Assist and Stop & Go Layout) |
Yes (Adaptive Cruise Control with Steering Assist and Stop & Go Layout) |
Yes (Adaptive Cruise Control with Steering Assist and Stop & Go Layout) |
Yes (Adaptive Cruise Control with Steering Assist and Stop & Go Layout) |
| Rear AC |
Yes (Rear B-Pillar & Center Console AC Vents with Independent Control) |
Yes (Rear B-Pillar & Center Console AC Vents with Independent Control) |
Yes (Rear B-Pillar & Center Console AC Vents with Independent Control) |
Yes (Rear B-Pillar & Center Console AC Vents with Independent Control) |
Yes (Rear B-Pillar & Center Console AC Vents with Independent Control) |
Yes (Rear B-Pillar & Center Console AC Vents with Independent Control) |
Yes (Dedicated Roof-Mounted Air Vents with Pillar Blowers for Rows 2 and 3) |
Yes (Dedicated pillar blowers and air distribution for row 2 passengers) |
Yes (Dedicated Roof-Mounted Air Vents with Pillar Blowers for Rows 2 and 3) |
Yes (Dedicated Roof-Mounted Air Vents with Pillar Blowers for Rows 2 and 3) |
Yes (Dedicated pillar blowers and air distribution for row 2 passengers) |
Yes (Dedicated pillar blowers and air distribution for row 2 passengers) |
| Heater |
Yes |
Yes |
Yes |
Yes |
Yes |
Yes |
Yes (High-Capacity Positive Temperature Coefficient PTC Auxiliary Core Element) |
Yes (High-Capacity Positive Temperature Coefficient PTC Auxiliary Core Element) |
Yes (High-Capacity Positive Temperature Coefficient PTC Auxiliary Core Element) |
Yes (High-Capacity Positive Temperature Coefficient PTC Auxiliary Core Element) |
Yes (High-Capacity Positive Temperature Coefficient PTC Auxiliary Core Element) |
Yes (High-Capacity Positive Temperature Coefficient PTC Auxiliary Core Element) |
| Air Conditioner- Automatic/Zones |
Yes (3-Zone Automatic Climate Control Integration Setup) |
Yes (3-Zone Automatic Climate Control Integration Setup) |
Yes (3-Zone Automatic Climate Control Integration Setup) |
Yes (3-Zone Automatic Climate Control Integration Setup) |
Yes (3-Zone Automatic Climate Control Integration Setup) |
Yes (3-Zone Automatic Climate Control Integration Setup) |
Yes (Four-Zone Automatic Climate Control System Architecture) |
Yes (Three-Zone Automatic Climate Control System Architecture) |
Yes (Four-Zone Automatic Climate Control System Architecture) |
Yes (Four-Zone Automatic Climate Control System Architecture) |
Yes (Three-Zone Automatic Climate Control System Architecture) |
Yes (Three-Zone Automatic Climate Control System Architecture) |
| Electronic Parking Brake |
Yes (With Automatic Auto-Hold System Assist) |
Yes (With Automatic Auto-Hold System Assist) |
Yes (With Automatic Auto-Hold System Assist) |
Yes (With Automatic Auto-Hold System Assist) |
Yes (With Automatic Auto-Hold System Assist) |
Yes (With Automatic Auto-Hold System Assist) |
Yes (Electronic Parking Brake with Auto Hill-Release Safety Automation) |
Yes (Electronic Parking Brake with Auto Hill-Release Safety Automation) |
Yes (Electronic Parking Brake with Auto Hill-Release Safety Automation) |
Yes (Electronic Parking Brake with Auto Hill-Release Safety Automation) |
Yes (Electronic Parking Brake with Auto Hill-Release Safety Automation) |
Yes (Electronic Parking Brake with Auto Hill-Release Safety Automation) |
| Cabin Boot Access |
Yes (Spacious Rear Loadspace Area accessibility layout) |
Yes (Spacious Rear Loadspace Area accessibility layout) |
Yes (Spacious Rear Loadspace Area accessibility layout) |
Yes (Spacious Rear Loadspace Area accessibility layout) |
Yes (Spacious Rear Loadspace Area accessibility layout) |
Yes (Spacious Rear Loadspace Area accessibility layout) |
Yes (Highly Configurable Fold-Down Rear Row Configurations Entry) |
Yes (Rear seat middle pass-through layout access to cargo floor area) |
Yes (Highly Configurable Fold-Down Rear Row Configurations Entry) |
Yes (Highly Configurable Fold-Down Rear Row Configurations Entry) |
Yes (Rear seat middle pass-through layout access to cargo floor area) |
Yes (Rear seat middle pass-through layout access to cargo floor area) |
| Parking Assist |
3D Surround Camera View System with Front & Rear Sensors Matrix Feed |
3D Surround Camera View System with Front & Rear Sensors Matrix Feed |
3D Surround Camera View System with Front & Rear Sensors Matrix Feed |
3D Surround Camera View System with Front & Rear Sensors Matrix Feed |
3D Surround Camera View System with Front & Rear Sensors Matrix Feed |
3D Surround Camera View System with Front & Rear Sensors Matrix Feed |
Yes (3D Surround Camera System with 360-Degree Park Distance Sensing Matrix) |
Yes (3D Surround Camera System with 360-Degree Park Distance Sensing Matrix) |
Yes (3D Surround Camera System with 360-Degree Park Distance Sensing Matrix) |
Yes (3D Surround Camera System with 360-Degree Park Distance Sensing Matrix) |
Yes (3D Surround Camera System with 360-Degree Park Distance Sensing Matrix) |
Yes (3D Surround Camera System with 360-Degree Park Distance Sensing Matrix) |
| Air Purifier |
Yes (Cabin Air Purification Plus Setup with PM2.5 Filtration) |
Yes (Cabin Air Purification Plus Setup with PM2.5 Filtration) |
Yes (Cabin Air Purification Plus Setup with PM2.5 Filtration) |
Yes (Cabin Air Purification Plus Setup with PM2.5 Filtration) |
Yes (Cabin Air Purification Plus Setup with PM2.5 Filtration) |
Yes (Cabin Air Purification Plus Setup with PM2.5 Filtration) |
Yes (Cabin Air Purification Plus System with PM2.5 Filtration and Nanoe-X Engine) |
Yes (Cabin Air Purification Plus System with PM2.5 Filtration and Nanoe-X Engine) |
Yes (Cabin Air Purification Plus System with PM2.5 Filtration and Nanoe-X Engine) |
Yes (Cabin Air Purification Plus System with PM2.5 Filtration and Nanoe-X Engine) |
Yes (Cabin Air Purification Plus System with PM2.5 Filtration and Nanoe-X Engine) |
Yes (Cabin Air Purification Plus System with PM2.5 Filtration and Nanoe-X Engine) |
| Third Row AC Zone |
Not Applicable (Strictly 5-Seater Cabin Layout Configuration) |
Not Applicable (Strictly 5-Seater Cabin Layout Configuration) |
Not Applicable (Strictly 5-Seater Cabin Layout Configuration) |
Not Applicable (Strictly 5-Seater Cabin Layout Configuration) |
Not Applicable (Strictly 5-Seater Cabin Layout Configuration) |
Not Applicable (Strictly 5-Seater Cabin Layout Configuration) |
Yes (Independent climate zone with controls for Third Row occupants) |
No (Dedicated 5-Seater variant configuration) |
Yes (Independent climate zone with controls for Third Row occupants) |
Yes (Independent climate zone with controls for Third Row occupants) |
No (Dedicated 5-Seater variant configuration) |
No (Dedicated 5-Seater variant configuration) |
| Keyless Start/ Button Start |
Yes (Keyless Entry with Push Button Start/Stop Switch Ignition System) |
Yes (Keyless Entry with Push Button Start/Stop Switch Ignition System) |
Yes (Keyless Entry with Push Button Start/Stop Switch Ignition System) |
Yes (Keyless Entry with Push Button Start/Stop Switch Ignition System) |
Yes (Keyless Entry with Push Button Start/Stop Switch Ignition System) |
Yes (Keyless Entry with Push Button Start/Stop Switch Ignition System) |
Yes (Engine Start/Stop button positioned on dashboard center stack) |
Yes (Engine Start/Stop button positioned on dashboard center stack) |
Yes (Engine Start/Stop button positioned on dashboard center stack) |
Yes (Engine Start/Stop button positioned on dashboard center stack) |
Yes (Engine Start/Stop button positioned on dashboard center stack) |
Yes (Engine Start/Stop button positioned on dashboard center stack) |
| Vanity Mirrors on Sun Visors |
Yes (With Illuminated Driver & Passenger Side Vanity Mirrors Layout) |
Yes (With Illuminated Driver & Passenger Side Vanity Mirrors Layout) |
Yes (With Illuminated Driver & Passenger Side Vanity Mirrors Layout) |
Yes (With Illuminated Driver & Passenger Side Vanity Mirrors Layout) |
Yes (With Illuminated Driver & Passenger Side Vanity Mirrors Layout) |
Yes (With Illuminated Driver & Passenger Side Vanity Mirrors Layout) |
Yes (Illuminated vanity mirrors behind sun visor sliding covers) |
Yes (Illuminated vanity mirrors behind sun visor sliding covers) |
Yes (Illuminated vanity mirrors behind sun visor sliding covers) |
Yes (Illuminated vanity mirrors behind sun visor sliding covers) |
Yes (Illuminated vanity mirrors behind sun visor sliding covers) |
Yes (Illuminated vanity mirrors behind sun visor sliding covers) |
| Air Conditioner |
Yes (3-Zone Automatic Climate Control Setup) |
Yes (3-Zone Automatic Climate Control Setup) |
Yes (3-Zone Automatic Climate Control Setup) |
Yes (3-Zone Automatic Climate Control Setup) |
Yes (3-Zone Automatic Climate Control Setup) |
Yes (3-Zone Automatic Climate Control Setup) |
Yes (Four-Zone Automatic Climate Control with Air Purifier Plus System) |
Yes (Three-Zone Automatic Climate Control with Air Purifier Plus System) |
Yes (Four-Zone Automatic Climate Control with Air Purifier Plus System) |
Yes (Four-Zone Automatic Climate Control with Air Purifier Plus System) |
Yes (Three-Zone Automatic Climate Control with Air Purifier Plus System) |
Yes (Three-Zone Automatic Climate Control with Air Purifier Plus System) |
| 12V Power Outlets |
Yes (Front Center Console, Loadspace, and Row 2 Outlets Layout) |
Yes (Front Center Console, Loadspace, and Row 2 Outlets Layout) |
Yes (Front Center Console, Loadspace, and Row 2 Outlets Layout) |
Yes (Front Center Console, Loadspace, and Row 2 Outlets Layout) |
Yes (Front Center Console, Loadspace, and Row 2 Outlets Layout) |
Yes (Front Center Console, Loadspace, and Row 2 Outlets Layout) |
Yes (12V Ports in Front Row Center Console and Rear Luggage Area) |
Yes (12V Ports in Front Row Center Console and Rear Luggage Area) |
Yes (12V Ports in Front Row Center Console and Rear Luggage Area) |
Yes (12V Ports in Front Row Center Console and Rear Luggage Area) |
Yes (12V Ports in Front Row Center Console and Rear Luggage Area) |
Yes (12V Power Outlets inside Front Row Center Console and Rear Luggage Area) |
| Anti-glare Mirrors |
Yes (ClearSight Digital Rear-View Mirror & Auto-Dimming Door Mirrors) |
Yes (ClearSight Digital Rear-View Mirror & Auto-Dimming Door Mirrors) |
Yes (ClearSight Digital Rear-View Mirror & Auto-Dimming Door Mirrors) |
Yes (ClearSight Digital Rear-View Mirror & Auto-Dimming Door Mirrors) |
Yes (ClearSight Digital Rear-View Mirror & Auto-Dimming Door Mirrors) |
Yes (ClearSight Digital Rear-View Mirror & Auto-Dimming Door Mirrors) |
Yes (Auto-Dimming Rearview & Driver-Side Mirrors + ClearSight Digital Mirror) |
Yes (Auto-Dimming Rearview & Driver-Side Mirrors + ClearSight Digital Mirror) |
Yes (Auto-Dimming Rearview & Driver-Side Mirrors + ClearSight Digital Mirror) |
Yes (Auto-Dimming Rearview & Driver-Side Mirrors + ClearSight Digital Mirror) |
Yes (Auto-Dimming Rearview & Driver-Side Mirrors + ClearSight Digital Mirror) |
Yes (Auto-Dimming Rearview & Driver-Side Mirrors + ClearSight Digital Mirror) |
| Front AC |
Yes |
Yes |
Yes |
Yes |
Yes |
Yes |
Yes (Dual-Zone Front Air Conditioning with Digital Control Array) |
Yes (Dual-Zone Front Air Conditioning with Digital Control Array) |
Yes (Dual-Zone Front Air Conditioning with Digital Control Array) |
Yes (Dual-Zone Front Air Conditioning with Digital Control Array) |
Yes (Dual-Zone Front Air Conditioning with Digital Control Array) |
Yes (Dual-Zone Front Air Conditioning with Digital Control Array Interface) |
| Headlight and Ignition on Reminder |
Yes |
Yes |
Yes |
Yes |
Yes |
Yes |
Yes (Acoustic Notification with On-Screen Dash Alert Prompts) |
Yes (Acoustic Notification with On-Screen Dash Alert Prompts) |
Yes (Acoustic Notification with On-Screen Dash Alert Prompts) |
Yes (Acoustic Notification with On-Screen Dash Alert Prompts) |
Yes (Acoustic Notification with On-Screen Dash Alert Prompts) |
Yes (Acoustic Notification accompanied by an On-Screen Dash Alert Prompt) |
| Steering Adjustment |
Yes (Electrically Adjustable Steering Column for Tilt & Reach) |
Yes (Electrically Adjustable Steering Column for Tilt & Reach) |
Yes (Electrically Adjustable Steering Column for Tilt & Reach) |
Yes (Electrically Adjustable Steering Column for Tilt & Reach) |
Yes (Electrically Adjustable Steering Column for Tilt & Reach) |
Yes (Electrically Adjustable Steering Column for Tilt & Reach) |
Yes (Electric Tilt & Reach Variable Adjusting Steering Column with Memory) |
Yes (Electric Tilt & Reach Variable Adjusting Steering Column with Memory) |
Yes (Electric Tilt & Reach Variable Adjusting Steering Column with Memory) |
Yes (Electric Tilt & Reach Variable Adjusting Steering Column with Memory) |
Yes (Electric Tilt & Reach Variable Adjusting Steering Column with Memory) |
Yes (Electric Tilt & Reach Variable Adjusting Steering Column with Memory) |
| Umbrella Storage in Door |
No |
No |
No |
No |
No |
No |
No (Deep Industrial Lower Door Storage Channels with Drainage Inlets Only) |
No (Deep Industrial Lower Door Storage Channels with Drainage Inlets Only) |
No (Deep Industrial Lower Door Storage Channels with Drainage Inlets Only) |
No (Deep Industrial Lower Door Storage Channels with Drainage Inlets Only) |
No (Deep Industrial Lower Door Storage Channels with Drainage Inlets Only) |
No (Deep Industrial Lower Door Storage Channels with Drainage Inlets Only) |
| Parking Sensors |
Yes (360 Degree Parking Aid view overlay setup feed) |
Yes (360 Degree Parking Aid view overlay setup feed) |
Yes (360 Degree Parking Aid view overlay setup feed) |
Yes (360 Degree Parking Aid view overlay setup feed) |
Yes (360 Degree Parking Aid view overlay setup feed) |
Yes (360 Degree Parking Aid view overlay setup feed) |
Yes (360-Degree Park Distance Control Sensors with 3D Surround Camera View) |
Yes (360-Degree Park Distance Control Sensors with 3D Surround Camera View) |
Yes (360-Degree Park Distance Control Sensors with 3D Surround Camera View) |
Yes (360-Degree Park Distance Control Sensors with 3D Surround Camera View) |
Yes (360-Degree Park Distance Control Sensors with 3D Surround Camera View) |
Yes (360-Degree Park Distance Control Sensors with 3D Surround Camera View) |
| Lighting |
| Automatic Headlamps |
Yes (Dusk-Sensing Automatic Activation System) |
Yes (Dusk-Sensing Automatic Activation System) |
Yes (Dusk-Sensing Automatic Activation System) |
Yes (Dusk-Sensing Automatic Activation System) |
Yes (Dusk-Sensing Automatic Activation System) |
Yes (Dusk-Sensing Automatic Activation System) |
Yes (Dusk-Sensing Auto Headlamp Sensor System Setup) |
Yes (Dusk-Sensing Auto Headlamp Sensor System Setup) |
Yes (Dusk-Sensing Auto Headlamp Sensor System Setup) |
Yes (Dusk-Sensing Auto Headlamp Sensor System Setup) |
Yes (Dusk-Sensing Auto Headlamp Sensor System Setup) |
Yes (Dusk-Sensing Auto Headlamp Sensor System Configuration Setup) |
| Taillights |
Premium LED Tail Lamps Layout with Signature Geometric Design |
Premium LED Tail Lamps Layout with Signature Geometric Design |
Premium LED Tail Lamps Layout with Signature Geometric Design |
Premium LED Tail Lamps Layout with Signature Geometric Design |
Premium LED Tail Lamps Layout with Signature Geometric Design |
Premium LED Tail Lamps Layout with Signature Geometric Design |
LED (Signature High-Mount Smoked Square Clusters with Dynamic Indicators) |
LED (Signature High-Mount Smoked Square Clusters with Dynamic Indicators) |
LED (Signature High-Mount Smoked Square Clusters with Dynamic Indicators) |
LED (Signature High-Mount Smoked Square Clusters with Dynamic Indicators) |
LED (Signature High-Mount Smoked Square Clusters with Dynamic Indicators) |
LED (Signature High-Mount Smoked Square Clusters with Dynamic Indicators) |
| Fog Lights |
Yes (Front & Rear Premium LED Fog Lights fitted) |
Yes (Front & Rear Premium LED Fog Lights fitted) |
Yes (Front & Rear Premium LED Fog Lights fitted) |
Yes (Front & Rear Premium LED Fog Lights fitted) |
Yes (Front & Rear Premium LED Fog Lights fitted) |
Yes (Front & Rear Premium LED Fog Lights fitted) |
Yes (Premium Integrated All-Weather High-Output Lower Bumper LEDs) |
Yes (Premium Integrated All-Weather High-Output Lower Bumper LEDs) |
Yes (Premium Integrated All-Weather High-Output Lower Bumper LEDs) |
Yes (Premium Integrated All-Weather High-Output Lower Bumper LEDs) |
Yes (Premium Integrated All-Weather High-Output Lower Bumper LEDs) |
Yes (Premium Integrated All-Weather High-Output Lower Bumper LEDs) |
| Daytime Running Lights |
Yes (Signature Graphic LED Daytime Running Lights) |
Yes (Signature Graphic LED Daytime Running Lights) |
Yes (Signature Graphic LED Daytime Running Lights) |
Yes (Signature Graphic LED Daytime Running Lights) |
Yes (Signature Graphic LED Daytime Running Lights) |
Yes (Signature Graphic LED Daytime Running Lights) |
LED (Distinctive Outer Square Signature Halo DRL Patterns) |
LED (Distinctive Outer Square Signature Halo DRL Patterns) |
LED (Distinctive Outer Square Signature Halo DRL Patterns) |
LED (Distinctive Outer Square Signature Halo DRL Patterns) |
LED (Distinctive Outer Square Signature Halo DRL Patterns) |
LED (Distinctive Outer Square Signature Halo DRL Patterns) |
| Glovebox Lamp |
Yes |
Yes |
Yes |
Yes |
Yes |
Yes |
Yes (Cool White LED Area Illumination Module) |
Yes (Bright LED Module Housed Inside Main Dashboard Box) |
Yes (Bright LED Module Housed Inside Main Dashboard Box) |
Yes (Bright LED Module Housed Inside Main Dashboard Box) |
Yes (Bright LED Module Housed Inside Main Dashboard Box) |
Yes (Bright LED Module Housed Seamlessly Inside Main Dashboard Box) |
| Follow Me Home Headlamps |
Yes |
Yes |
Yes |
Yes |
Yes |
Yes |
Yes (Configurable Pathway Delay Settings Programmed via Pivi Pro) |
Yes (Configurable Pathway Delay Settings Programmed via Pivi Pro) |
Yes (Configurable Pathway Delay Settings Programmed via Pivi Pro) |
Yes (Configurable Pathway Delay Settings Programmed via Pivi Pro) |
Yes (Configurable Pathway Delay Settings Programmed via Pivi Pro) |
Yes (Configurable Pathway Delay Settings Programmed directly via Pivi Pro) |
| Rear Reading Lamp |
Yes (Second Row Individual Overhead Premium Map Lights Layout) |
Yes (Second Row Individual Overhead Premium Map Lights Layout) |
Yes (Second Row Individual Overhead Premium Map Lights Layout) |
Yes (Second Row Individual Overhead Premium Map Lights Layout) |
Yes (Second Row Individual Overhead Premium Map Lights Layout) |
Yes (Second Row Individual Overhead Premium Map Lights Layout) |
Yes (Touch-Activated Independent Overhead Reading LED Modules for Row 2 & 3) |
Yes (Touch-Activated Independent Overhead Reading LED Modules for Row 2) |
Yes (Touch-Activated Independent Overhead Reading LED Modules for Row 2 & 3) |
Yes (Touch-Activated Independent Overhead Reading LED Modules for Row 2 & 3) |
Yes (Touch-Activated Independent Overhead Reading LED Modules for Row 2) |
Yes (Touch-Activated Independent Overhead Reading LED Modules for Row 2 Passenger Space) |
| Puddle Lamps |
Yes (Premium Approach LED Puddle Lamps Under Side Mirror Cases) |
Yes (Premium Approach LED Puddle Lamps Under Side Mirror Cases) |
Yes (Premium Approach LED Puddle Lamps Under Side Mirror Cases) |
Yes (Premium Approach LED Puddle Lamps Under Side Mirror Cases) |
Yes (Premium Approach LED Puddle Lamps Under Side Mirror Cases) |
Yes (Premium Approach LED Puddle Lamps Under Side Mirror Cases) |
Yes (Downward Mirror Projections with Distinctive Defender Graphic Silhouette) |
Yes (Downward Mirror Projections with Distinctive Defender Graphic Silhouette) |
Yes (Downward Mirror Projections with Distinctive Defender Graphic Silhouette) |
Yes (Downward Mirror Projections with Distinctive Defender Graphic Silhouette) |
Yes (Downward Mirror Projections with Distinctive Defender Graphic Silhouette) |
Yes (Downward Mirror Projections with Distinctive Defender Graphic Silhouette) |
| Cabin Lamps |
Yes |
Yes |
Yes |
Yes |
Yes |
Yes |
Yes (Full Extended Premium LED Dimmable Ambient Configuration System) |
Yes (Full Extended Premium LED Dimmable Ambient Configuration System) |
Yes (Full Extended Premium LED Dimmable Ambient Configuration System) |
Yes (Full Extended Premium LED Dimmable Ambient Configuration System) |
Yes (Full Extended Premium LED Dimmable Ambient Configuration System) |
Yes (Full Extended Premium LED Dimmable Ambient Configuration System Layout) |
| Cabin Lamps Position |
Front Overhead, Center Console, Side Handles, and Loadspace Positions |
Front Overhead, Center Console, Side Handles, and Loadspace Positions |
Front Overhead, Center Console, Side Handles, and Loadspace Positions |
Front Overhead, Center Console, Side Handles, and Loadspace Positions |
Front Overhead, Center Console, Side Handles, and Loadspace Positions |
Front Overhead, Center Console, Side Handles, and Loadspace Positions |
Front Overhead Structure, Mid Pillar Lining, and Rear Side Wall Trim Panels |
Front Overhead Structure, Mid Pillar Lining, and Rear Side Wall Trim Panels |
Front Overhead Structure, Mid Pillar Lining, and Rear Side Wall Trim Panels |
Front Overhead Structure, Mid Pillar Lining, and Rear Side Wall Trim Panels |
Front Overhead Structure, Mid Pillar Lining, and Rear Side Wall Trim Panels |
Front Overhead Structure, Mid Pillar Lining, and Rear Side Wall Trim Panels |
| Ambient Interior Lighting |
Yes (Configurable Premium Multi-Colour Ambient LED Architecture) |
Yes (Configurable Premium Multi-Colour Ambient LED Architecture) |
Yes (Configurable Premium Multi-Colour Ambient LED Architecture) |
Yes (Configurable Premium Multi-Colour Ambient LED Architecture) |
Yes (Configurable Premium Multi-Colour Ambient LED Architecture) |
Yes (Configurable Premium Multi-Colour Ambient LED Architecture) |
Yes (Premium Multi-Zone Configurable Multi-Colour Cabin Ambient Light Strips) |
Yes (Premium Multi-Zone Configurable Multi-Colour Cabin Ambient Light Strips) |
Yes (Premium Multi-Zone Configurable Multi-Colour Cabin Ambient Light Strips) |
Yes (Premium Multi-Zone Configurable Multi-Colour Cabin Ambient Light Strips) |
Yes (Premium Multi-Zone Configurable Multi-Colour Cabin Ambient Light Strips) |
Yes (Premium Multi-Zone Configurable Multi-Colour Cabin Ambient Light Strips Grid) |
| Headlights |
Premium Matrix LED Headlamps Setup with Signature DRL |
Premium Matrix LED Headlamps Setup with Signature DRL |
Premium Matrix LED Headlamps Setup with Signature DRL |
Premium Matrix LED Headlamps Setup with Signature DRL |
Premium Matrix LED Headlamps Setup with Signature DRL |
Premium Matrix LED Headlamps Setup with Signature DRL |
Matrix LED (High-Definition Auto-Levelling Adaptive Driving Beam Modules) |
Matrix LED (High-Definition Auto-Levelling Adaptive Driving Beam Modules) |
Matrix LED (High-Definition Auto-Levelling Adaptive Driving Beam Modules) |
Matrix LED (High-Definition Auto-Levelling Adaptive Driving Beam Modules) |
Matrix LED (High-Definition Auto-Levelling Adaptive Driving Beam Modules) |
Matrix LED (High-Definition Auto-Levelling Adaptive Driving Beam System Modules) |
| Reading Lamp |
Yes (Front Map Reading & Rear Row Passengers Task Illumination Array) |
Yes (Front Map Reading & Rear Row Passengers Task Illumination Array) |
Yes (Front Map Reading & Rear Row Passengers Task Illumination Array) |
Yes (Front Map Reading & Rear Row Passengers Task Illumination Array) |
Yes (Front Map Reading & Rear Row Passengers Task Illumination Array) |
Yes (Front Map Reading & Rear Row Passengers Task Illumination Array) |
Yes (Premium Capacitive Touch-Activated Overhead Map and Cab Lights) |
Yes (Premium Capacitive Touch-Activated Overhead Map and Cab Lights) |
Yes (Premium Capacitive Touch-Activated Overhead Map and Cab Lights) |
Yes (Premium Capacitive Touch-Activated Overhead Map and Cab Lights) |
Yes (Premium Capacitive Touch-Activated Overhead Map and Cab Lights) |
Yes (Premium Capacitive Touch-Activated Overhead Map and General Cab Lights) |
| Cornering Headlights |
Yes (Dynamic Static Bending Headlight Turning System Setup) |
Yes (Dynamic Static Bending Headlight Turning System Setup) |
Yes (Dynamic Static Bending Headlight Turning System Setup) |
Yes (Dynamic Static Bending Headlight Turning System Setup) |
Yes (Dynamic Static Bending Headlight Turning System Setup) |
Yes (Dynamic Static Bending Headlight Turning System Setup) |
Yes (Dynamic Predictive Steering Active Curve Tracking Headlamp System) |
Yes (Dynamic Predictive Steering Active Curve Tracking Headlamp System) |
Yes (Dynamic Predictive Steering Active Curve Tracking Headlamp System) |
Yes (Dynamic Predictive Steering Active Curve Tracking Headlamp System) |
Yes (Dynamic Predictive Steering Active Curve Tracking Headlamp System) |
Yes (Dynamic Predictive Steering Active Curve Tracking Headlamp System Integration) |
| Light on Vanity Mirrors |
Yes (Illuminated Driver & Passenger Sun Visor Vanity Mirror Units) |
Yes (Illuminated Driver & Passenger Sun Visor Vanity Mirror Units) |
Yes (Illuminated Driver & Passenger Sun Visor Vanity Mirror Units) |
Yes (Illuminated Driver & Passenger Sun Visor Vanity Mirror Units) |
Yes (Illuminated Driver & Passenger Sun Visor Vanity Mirror Units) |
Yes (Illuminated Driver & Passenger Sun Visor Vanity Mirror Units) |
Yes (High-Intensity LED Array Blocks linked to Visor Panel Covers) |
Yes (High-Intensity LED Array Blocks linked to Visor Panel Covers) |
Yes (High-Intensity LED Array Blocks linked to Visor Panel Covers) |
Yes (High-Intensity LED Array Blocks linked to Visor Panel Covers) |
Yes (High-Intensity LED Array Blocks linked to Visor Panel Covers) |
Yes (High-Intensity LED Array Blocks linked to Visor Slider Sensor Panels) |
| Braking & Traction |
| Hill Descent Control |
Yes (Integrated Hill Descent Control HDC with Terrain Response Framework) |
Yes (Integrated Hill Descent Control HDC with Terrain Response Framework) |
Yes (Integrated Hill Descent Control HDC with Terrain Response Framework) |
Yes (Integrated Hill Descent Control HDC with Terrain Response Framework) |
Yes (Integrated Hill Descent Control HDC with Terrain Response Framework) |
Yes (Integrated Hill Descent Control HDC with Terrain Response Framework) |
Yes (All-Terrain Adaptive Response Hill Descent Control System Array) |
Yes (All-Terrain Adaptive Response Hill Descent Control System Array) |
Yes (All-Terrain Adaptive Response Hill Descent Control System Array) |
Yes (All-Terrain Adaptive Response Hill Descent Control System Array) |
Yes (All-Terrain Adaptive Response Hill Descent Control System Array) |
Yes (All-Terrain Adaptive Response Hill Descent Control Software Braking Array) |
| Differential Lock |
Yes (Electronic Active Rear Locking Differential Setup Integration) |
Yes (Electronic Active Rear Locking Differential Setup Integration) |
Yes (Electronic Active Rear Locking Differential Setup Integration) |
Yes (Electronic Active Rear Locking Differential Setup Integration) |
Yes (Electronic Active Rear Locking Differential Setup Integration) |
Yes (Electronic Active Rear Locking Differential Setup Integration) |
Yes (Electronic Active Center Diff Lock & Active Rear Locking Differential) |
Yes (Electronic Active Center Diff Lock & Active Rear Locking Differential) |
Yes (Electronic Active Center Diff Lock & Active Rear Locking Differential) |
Yes (Electronic Active Center Diff Lock & Active Rear Locking Differential) |
Yes (Electronic Active Center Diff Lock & Active Rear Locking Differential) |
Yes (Electronic Active Center Diff Lock & Active Rear Locking Differential Modules) |
| Anti-Lock Braking System (ABS) |
Yes (4-Channel Off-Road Optimized ABS Integration) |
Yes (4-Channel Off-Road Optimized ABS Integration) |
Yes (4-Channel Off-Road Optimized ABS Integration) |
Yes (4-Channel Off-Road Optimized ABS Integration) |
Yes (4-Channel Off-Road Optimized ABS Integration) |
Yes (4-Channel Off-Road Optimized ABS Integration) |
Yes (Heavy-Duty Off-Road Multi-Channel Anti-Lock Logic Braking Matrix) |
Yes (Heavy-Duty Off-Road Multi-Channel Anti-Lock Logic Braking Matrix) |
Yes (Heavy-Duty Off-Road Multi-Channel Anti-Lock Logic Braking Matrix) |
Yes (Heavy-Duty Off-Road Multi-Channel Anti-Lock Logic Braking Matrix) |
Yes (Heavy-Duty Off-Road Multi-Channel Anti-Lock Logic Braking Matrix) |
Yes (Heavy-Duty Off-Road Multi-Channel Anti-Lock Logic Braking Safety Matrix) |
| Brake Assist (BA) |
Yes (Emergency Brake Assist EBA & Dynamic Brake Support Infrastructure) |
Yes (Emergency Brake Assist EBA & Dynamic Brake Support Infrastructure) |
Yes (Emergency Brake Assist EBA & Dynamic Brake Support Infrastructure) |
Yes (Emergency Brake Assist EBA & Dynamic Brake Support Infrastructure) |
Yes (Emergency Brake Assist EBA & Dynamic Brake Support Infrastructure) |
Yes (Emergency Brake Assist EBA & Dynamic Brake Support Infrastructure) |
Yes (Advanced Emergency Brake Assist Safety Mitigation Computer Modules) |
Yes (Advanced Emergency Brake Assist Safety Mitigation Computer Modules) |
Yes (Advanced Emergency Brake Assist Safety Mitigation Computer Modules) |
Yes (Advanced Emergency Brake Assist Safety Mitigation Computer Modules) |
Yes (Advanced Emergency Brake Assist Safety Mitigation Computer Modules) |
Yes (Advanced Emergency Brake Assist Safety Mitigation Computer Modules Core) |
| Hill Hold Control |
Yes |
Yes |
Yes |
Yes |
Yes |
Yes |
Yes (Gradient Torque-Holding Anti-Roll Back Safety Assist Module) |
Yes (Gradient Torque-Holding Anti-Roll Back Safety Assist Module) |
Yes (Gradient Torque-Holding Anti-Roll Back Safety Assist Module) |
Yes (Gradient Torque-Holding Anti-Roll Back Safety Assist Module) |
Yes (Gradient Torque-Holding Anti-Roll Back Safety Assist Module) |
Yes (Gradient Torque-Holding Anti-Roll Back Safety Assist Electronic Module) |
| Ride Height Adjustment |
Yes (Electronic Air Suspension with Automatic Variable Level Control Architecture) |
Yes (Electronic Air Suspension with Automatic Variable Level Control Architecture) |
Yes (Electronic Air Suspension with Automatic Variable Level Control Architecture) |
Yes (Electronic Air Suspension with Automatic Variable Level Control Architecture) |
Yes (Electronic Air Suspension with Automatic Variable Level Control Architecture) |
Yes (Electronic Air Suspension with Automatic Variable Level Control Architecture) |
Yes (Electronic Braking Electronic Air Suspension - Lowers/Raises 40mm to 75mm) |
Yes (Electronic Air Suspension - Adjusts Entry, Off-Road, and Maximum Clearance Heights) |
Yes (Electronic Air Suspension - Adjusts Entry, Off-Road, and Maximum Clearance Heights) |
Yes (Electronic Air Suspension - Adjusts Entry, Off-Road, and Maximum Clearance Heights) |
Yes (Advanced 6D Dynamics Suspension System - Hydraulically Interlinked Semiactive Air Set) |
Yes (Advanced 6D Dynamics Suspension System - Hydraulically Interlinked Air Layout) |
| Electronic Brake-force Distribution (EBD) |
Yes |
Yes |
Yes |
Yes |
Yes |
Yes |
Yes (Cornering Brake Control and Electronic Force Balancing Subsystems) |
Yes (Cornering Brake Control and Electronic Force Balancing Subsystems) |
Yes (Cornering Brake Control and Electronic Force Balancing Subsystems) |
Yes (Cornering Brake Control and Electronic Force Balancing Subsystems) |
Yes (Cornering Brake Control and Electronic Force Balancing Subsystems) |
Yes (Cornering Brake Control and Electronic Force Balancing Subsystems Matrix) |
| Electronic Stability Program (ESP) |
Yes (Dynamic Stability Control DSC with Off-Road Terrain Traction Tuning) |
Yes (Dynamic Stability Control DSC with Off-Road Terrain Traction Tuning) |
Yes (Dynamic Stability Control DSC with Off-Road Terrain Traction Tuning) |
Yes (Dynamic Stability Control DSC with Off-Road Terrain Traction Tuning) |
Yes (Dynamic Stability Control DSC with Off-Road Terrain Traction Tuning) |
Yes (Dynamic Stability Control DSC with Off-Road Terrain Traction Tuning) |
Yes (Dynamic Stability Control with Configurable Terrain Response 2 Programs) |
Yes (Dynamic Stability Control with Configurable Terrain Response 2 Dynamic Programs) |
Yes (Dynamic Stability Control with Configurable Terrain Response 2 Dynamic Programs) |
Yes (Dynamic Stability Control with Configurable Terrain Response 2 Dynamic Programs) |
Yes (Dynamic Stability Control with Configurable Terrain Response 2 Dynamic Performance Programs) |
Yes (Dynamic Stability Control with Configurable Terrain Response 2 Dynamic Performance Programs) |