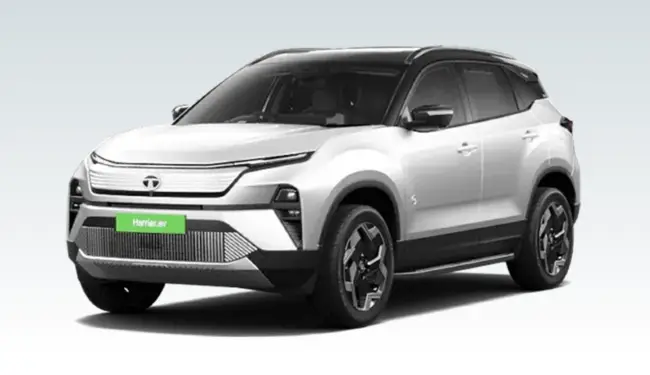
| Engine & Transmission |
| Engine |
Not Applicable (Electric Vehicle) |
— |
Not Applicable (Electric Vehicle) |
| Engine Type |
Liquid Cooled Permanent Magnet Synchronous Motor paired with acti.ev Prismatic Battery Architecture |
Dual Electric Motors (Front + Rear Axle) paired with acti.ev Prismatic Battery Architecture |
Liquid Cooled Permanent Magnet Synchronous Motor paired with acti.ev Prismatic Battery Architecture |
Dual Electric Motors (Front + Rear Axle) paired with acti.ev Prismatic Battery Architecture |
Liquid Cooled Permanent Magnet Synchronous Motor paired with acti.ev Prismatic Battery Architecture |
— |
Dual Electric Motors (Front + Rear Axle) paired with acti.ev Prismatic Battery Architecture |
| Fuel Type |
Electric |
Electric |
Electric |
Electric |
Electric |
Electric |
Electric |
Electric |
Electric |
Electric |
Electric |
Electric |
Electric |
Electric |
Electric |
— |
Electric |
| Acceleration (0-100 kmph) |
~7.5 seconds |
~7.5 seconds |
~7.5 seconds |
~7.5 seconds |
~7.5 seconds |
~7.5 seconds |
~7.3 seconds |
~7.3 seconds |
~6.2 seconds |
~7.3 seconds |
~7.3 seconds |
~6.2 seconds |
~6.2 seconds |
~7.3 seconds |
~7.3 seconds |
— |
~6.2 seconds |
| Alternate Fuel |
Not Applicable |
Not Applicable |
Not Applicable |
Not Applicable |
Not Applicable |
Not Applicable |
Not Applicable |
Not Applicable |
Not Applicable |
Not Applicable |
Not Applicable |
Not Applicable |
Not Applicable |
Not Applicable |
Not Applicable |
— |
Not Applicable |
| Mileage (ARAI) |
Not Applicable (EV Variant) |
— |
Not Applicable (EV Variant) |
| City Mileage |
Not Applicable |
Not Applicable |
Not Applicable |
Not Applicable |
Not Applicable |
Not Applicable |
Not Applicable |
Not Applicable |
Not Applicable |
Not Applicable |
Not Applicable |
Not Applicable |
Not Applicable |
Not Applicable |
Not Applicable |
— |
Not Applicable |
| Max Torque |
350 Nm |
350 Nm |
350 Nm |
350 Nm |
350 Nm |
350 Nm |
350 Nm |
350 Nm |
530 Nm (Combined) |
350 Nm |
350 Nm |
530 Nm (Combined) |
530 Nm (Combined) |
350 Nm |
350 Nm |
— |
530 Nm (Combined) |
| Max Motor Performance |
215 bhp (160 kW), 350 Nm |
286 bhp (Combined), 530 Nm |
215 bhp (160 kW), 350 Nm |
286 bhp (Combined), 530 Nm |
215 bhp (160 kW), 350 Nm |
— |
286 bhp (Combined), 530 Nm |
| Emission Standard |
Zero Emission Vehicle (ZEV) |
— |
Zero Emission Vehicle (ZEV) |
| Turbocharger / Supercharger |
Not Applicable |
Not Applicable |
Not Applicable |
Not Applicable |
Not Applicable |
Not Applicable |
Not Applicable |
Not Applicable |
Not Applicable |
Not Applicable |
Not Applicable |
Not Applicable |
Not Applicable |
Not Applicable |
Not Applicable |
— |
Not Applicable |
| Battery |
65.0 kWh Lithium Iron Phosphate (LFP) Battery |
75.0 kWh High-Density Lithium Iron Phosphate (LFP) Battery |
— |
75.0 kWh High-Density Lithium Iron Phosphate (LFP) Battery |
| Top Speed |
165 kmph |
165 kmph |
165 kmph |
165 kmph |
165 kmph |
165 kmph |
165 kmph |
165 kmph |
175 kmph |
165 kmph |
165 kmph |
175 kmph |
175 kmph |
165 kmph |
165 kmph |
— |
175 kmph |
| Highway Mileage |
Not Applicable |
Not Applicable |
Not Applicable |
Not Applicable |
Not Applicable |
Not Applicable |
Not Applicable |
Not Applicable |
Not Applicable |
Not Applicable |
Not Applicable |
Not Applicable |
Not Applicable |
Not Applicable |
Not Applicable |
— |
Not Applicable |
| Battery Charging |
DC Fast Charging: ~45 mins (10% to 80% via 60 kW+ DC Charger) | AC Home Charging capability supported via public grids/customer sourced endpoints (No inclusion of a dedicated AC Wallbox Charger unit inside vehicle invoice bundle) |
DC Fast Charging: ~45 mins (10% to 80% via 60 kW+ DC Charger) | AC Home Charging: ~9.5 hours via included 7.2 kW AC Wallbox Fast Charger (0% to 100%) |
DC Fast Charging: ~45 mins (10% to 80% via 60 kW+ DC Charger) | AC Home Charging capability supported via public grids/customer sourced endpoints (No inclusion of a dedicated AC Wallbox Charger unit inside vehicle invoice bundle) |
DC Fast Charging: ~45 mins (10% to 80% via 60 kW+ DC Charger) | AC Home Charging: ~9.5 hours via included 7.2 kW AC Wallbox Fast Charger (0% to 100%) |
DC Fast Charging: ~45 mins (10% to 80% via 60 kW+ DC Charger) | AC Home Charging capability supported via public grids/customer sourced endpoints (No inclusion of a dedicated AC Wallbox Charger unit inside vehicle invoice bundle) |
DC Fast Charging: ~45 mins (10% to 80% via 60 kW+ DC Charger) | AC Home Charging: ~9.5 hours via included 7.2 kW AC Wallbox Fast Charger (0% to 100%) |
DC Fast Charging: ~45 mins (10% to 80% via 80 kW+ High-Output DC Charger) | AC Home Charging capability supported via public grids/customer sourced endpoints (No inclusion of a dedicated AC Wallbox Charger unit inside vehicle invoice bundle) |
DC Fast Charging: ~45 mins (10% to 80% via 80 kW+ High-Output DC Charger) | AC Home Charging: ~11 hours via included 7.2 kW AC Wallbox Fast Charger (0% to 100%) |
DC Fast Charging: ~45 mins (10% to 80% via 80 kW+ High-Output DC Charger) | AC Home Charging capability supported via public grids/customer sourced endpoints (No inclusion of a dedicated AC Wallbox Charger unit inside vehicle invoice bundle) |
DC Fast Charging: ~45 mins (10% to 80% via 80 kW+ High-Output DC Charger) | AC Home Charging: ~11 hours via included 7.2 kW AC Wallbox Fast Charger (0% to 100%) |
DC Fast Charging: ~45 mins (10% to 80% via 80 kW+ High-Output DC Charger) | AC Home Charging capability supported via public grids/customer sourced endpoints (No inclusion of a dedicated AC Wallbox Charger unit inside vehicle invoice bundle) |
DC Fast Charging: ~45 mins (10% to 80% via 80 kW+ High-Output DC Charger) | AC Home Charging: ~11 hours via included 7.2 kW AC Wallbox Fast Charger (0% to 100%) |
DC Fast Charging: ~45 mins (10% to 80% via 80 kW+ High-Output DC Charger) | AC Home Charging capability supported via public grids/customer sourced endpoints (No inclusion of a dedicated AC Wallbox Charger unit inside vehicle invoice bundle) |
DC Fast Charging: ~45 mins (10% to 80% via 80 kW+ High-Output DC Charger) | AC Home Charging: ~11 hours via included 7.2 kW AC Wallbox Fast Charger (0% to 100%) |
— |
DC Fast Charging: ~45 mins (10% to 80% via 80 kW+ High-Output DC Charger) | AC Home Charging: ~11 hours via included 7.2 kW AC Wallbox Fast Charger (0% to 100%) |
| Drivetrain |
2WD (Front Wheel Drive) |
AWD (All-Wheel Drive / Dual Motor Layout) |
2WD (Front Wheel Drive) |
AWD (All-Wheel Drive / Dual Motor Layout) |
2WD (Front Wheel Drive) |
— |
AWD (All-Wheel Drive / Dual Motor Layout) |
| Performance on Alternate Fuel |
Not Applicable |
Not Applicable |
Not Applicable |
Not Applicable |
Not Applicable |
Not Applicable |
Not Applicable |
Not Applicable |
Not Applicable |
Not Applicable |
Not Applicable |
Not Applicable |
Not Applicable |
Not Applicable |
Not Applicable |
— |
Not Applicable |
| Electric Motor Assist |
Yes (Pure Electric Powertrain) |
— |
Yes (Pure Electric Powertrain) |
| Max Power (bhp@rpm) |
215 bhp @ 4500-11000 rpm |
286 bhp (Combined) |
215 bhp @ 4500-11000 rpm |
286 bhp (Combined) |
215 bhp @ 4500-11000 rpm |
— |
286 bhp (Combined) |
| Range |
510 km (MIDC/Claimed Range) |
610 km (MIDC/Claimed Range) |
560 km (MIDC/Claimed Range) |
610 km (MIDC/Claimed Range) |
560 km (MIDC/Claimed Range) |
610 km (MIDC/Claimed Range) |
— |
560 km (MIDC/Claimed Range) |
| Driving Range |
~360 km to 395 km (Estimated Real World Range) |
~430 km to 460 km (Estimated Real World Range) |
~380 km to 410 km (Estimated Real World Range) |
~430 km to 460 km (Estimated Real World Range) |
~380 km to 410 km (Estimated Real World Range) |
~430 km to 460 km (Estimated Real World Range) |
— |
~380 km to 410 km (Estimated Real World Range) |
| Others |
Multi-mode Regenerative Braking (Paddle Shifters control), Eco/City/Sport Drive Modes, V2V & V2L Charging Support, 10.25-inch Touchscreen Infotainment by HARMAN, 10.25-inch Digital Instrument Cluster, Acoustic Vehicle Alert System (AVAS), Excludes bundling of bundled physical standard garage wallbox charging apparatus |
Multi-mode Regenerative Braking (Paddle Shifters control), Eco/City/Sport Drive Modes, V2V & V2L Charging Support, 10.25-inch Touchscreen Infotainment by HARMAN, 10.25-inch Digital Instrument Cluster, Acoustic Vehicle Alert System (AVAS), Includes bundled retail 7.2 kW home wallbox charging unit |
Multi-mode Regenerative Braking (Paddle Shifters control), Eco/City/Sport Drive Modes, V2V & V2L Charging Support, 10.25-inch Touchscreen Infotainment by HARMAN, 10.25-inch Digital Instrument Cluster, Acoustic Vehicle Alert System (AVAS), Voice-Assisted Panoramic Sunroof ("S" Pack), Excludes bundling of physical standard garage wallbox charging apparatus |
Multi-mode Regenerative Braking (Paddle Shifters control), Eco/City/Sport Drive Modes, V2V & V2L Charging Support, 10.25-inch Touchscreen Infotainment by HARMAN, 10.25-inch Digital Instrument Cluster, Acoustic Vehicle Alert System (AVAS), Voice-Assisted Panoramic Sunroof ("S" Pack), Includes bundled retail 7.2 kW home wallbox charging unit |
Multi-mode Regenerative Braking (Paddle Shifters control), Eco/City/Sport Drive Modes, V2V & V2L Charging Support, 12.3-inch Cinematic Touchscreen by HARMAN, 10.25-inch Digital Cockpit, Panoramic Sunroof with Mood Lighting, Front Ventilated Seats, Level 2 ADAS Suite, Powered Tailgate with Gesture Control, Arcade.ev App Suite, Excludes bundling of physical standard garage wallbox charging apparatus |
Multi-mode Regenerative Braking (Paddle Shifters control), Eco/City/Sport Drive Modes, V2V & V2L Charging Support, 12.3-inch Cinematic Touchscreen by HARMAN, 10.25-inch Digital Cockpit, Panoramic Sunroof with Mood Lighting, Front Ventilated Seats, Level 2 ADAS Suite, Powered Tailgate with Gesture Control, Arcade.ev App Suite, Includes bundled retail 7.2 kW home wallbox charging unit |
Multi-mode Regenerative Braking (Paddle Shifters control), Eco/City/Sport Drive Modes, V2V & V2L Charging Support, 12.3-inch Cinematic Touchscreen by HARMAN, 10.25-inch Digital Cockpit, Panoramic Sunroof with Mood Lighting, Front Ventilated Seats, Level 2 ADAS Suite, Powered Tailgate with Gesture Control, Arcade.ev App Suite, Excludes bundling of physical standard garage wallbox charging apparatus |
Multi-mode Regenerative Braking (Paddle Shifters control), Eco/City/Sport Drive Modes, V2V & V2L Charging Support, 12.3-inch Cinematic Touchscreen by HARMAN, 10.25-inch Digital Cockpit, Panoramic Sunroof with Mood Lighting, Front Ventilated Seats, Level 2 ADAS Suite, Powered Tailgate with Gesture Control, Arcade.ev App Suite, Includes bundled retail 7.2 kW home wallbox charging unit |
Multi-mode Regenerative Braking (Paddle Shifters control), Intelligent Terrain Response Modes (Normal, Rough, Wet, Off-Road), V2V & V2L Charging Support, 12.3-inch Cinematic Touchscreen by HARMAN, 10.25-inch Digital Cockpit, Panoramic Sunroof with Mood Lighting, Front Ventilated Seats, Level 2 ADAS Suite, Powered Tailgate with Gesture Control, Arcade.ev App Suite, Excludes bundling of physical standard garage wallbox charging apparatus |
Multi-mode Regenerative Braking (Paddle Shifters control), Eco/City/Sport Drive Modes, V2V & V2L Charging Support, 12.3-inch Cinematic Touchscreen by HARMAN, 10.25-inch Digital Cockpit, Panoramic Sunroof with Mood Lighting, Front Ventilated Seats, Level 2 ADAS Suite, Powered Tailgate with Gesture Control, Arcade.ev App Suite, Premium Frunk Storage under bonnet, Excludes bundling of physical standard garage wallbox charging apparatus |
Multi-mode Regenerative Braking (Paddle Shifters control), Eco/City/Sport Drive Modes, V2V & V2L Charging Support, 12.3-inch Cinematic Touchscreen by HARMAN, 10.25-inch Digital Cockpit, Panoramic Sunroof with Mood Lighting, Front Ventilated Seats, Level 2 ADAS Suite, Powered Tailgate with Gesture Control, Arcade.ev App Suite, Premium Frunk Storage under bonnet, Includes bundled retail 7.2 kW home wallbox charging unit |
Multi-mode Regenerative Braking (Paddle Shifters control), Intelligent Terrain Response Modes (Normal, Rough, Wet, Off-Road), V2V & V2L Charging Support, 12.3-inch Cinematic Touchscreen by HARMAN, 10.25-inch Digital Cockpit, Panoramic Sunroof with Mood Lighting, Front Ventilated Seats, Level 2 ADAS Suite, Powered Tailgate with Gesture Control, Arcade.ev App Suite, Premium Frunk Storage under bonnet, Excludes bundling of physical standard garage wallbox charging apparatus |
Multi-mode Regenerative Braking (Paddle Shifters control), Intelligent Terrain Response Modes (Normal, Rough, Wet, Off-Road), V2V & V2L Charging Support, 12.3-inch Cinematic Touchscreen by HARMAN, 10.25-inch Digital Cockpit, Panoramic Sunroof with Mood Lighting, Front Ventilated Seats, Level 2 ADAS Suite, Powered Tailgate with Gesture Control, Arcade.ev App Suite, Premium Frunk Storage under bonnet, Includes bundled retail 7.2 kW home wallbox charging unit |
Multi-mode Regenerative Braking (Paddle Shifters control), Eco/City/Sport Drive Modes, V2V & V2L Charging Support, 12.3-inch Cinematic Touchscreen by HARMAN, 10.25-inch Digital Cockpit, Panoramic Sunroof with Mood Lighting, Front Ventilated Seats, Level 2 ADAS Suite, Powered Tailgate with Gesture Control, Arcade.ev App Suite, Premium Frunk Storage under bonnet, Signature Stealth Edition Dark-Themed Styling Highlights with Piano Black accents and De-chromed Exterior Elements, Excludes bundling of physical standard garage wallbox charging apparatus |
Multi-mode Regenerative Braking (Paddle Shifters control), Eco/City/Sport Drive Modes, V2V & V2L Charging Support, 12.3-inch Cinematic Touchscreen by HARMAN, 10.25-inch Digital Cockpit, Panoramic Sunroof with Mood Lighting, Front Ventilated Seats, Level 2 ADAS Suite, Powered Tailgate with Gesture Control, Arcade.ev App Suite, Premium Frunk Storage under bonnet, Signature Stealth Edition Dark-Themed Styling Highlights with Piano Black accents and De-chromed Exterior Elements, Includes bundled retail 7.2 kW home wallbox charging unit |
— |
Multi-mode Regenerative Braking (Paddle Shifters control), Intelligent Terrain Response Modes (Normal, Rough, Wet, Off-Road), V2V & V2L Charging Support, 12.3-inch Cinematic Touchscreen by HARMAN, 10.25-inch Digital Cockpit, Panoramic Sunroof with Mood Lighting, Front Ventilated Seats, Level 2 ADAS Suite, Powered Tailgate with Gesture Control, Arcade.ev App Suite, Premium Frunk Storage under bonnet, Signature Stealth Edition Dark-Themed Styling Highlights with Piano Black accents and De-chromed Exterior Elements, Includes bundled retail 7.2 kW home wallbox charging unit |
| Electric Motor |
1 Permanent Magnet Synchronous Motor Placed At Front Axle |
Dual Motors: 1 Permanent Magnet Synchronous Motor on Front Axle + 1 Induction Motor on Rear Axle |
1 Permanent Magnet Synchronous Motor Placed At Front Axle |
Dual Motors: 1 Permanent Magnet Synchronous Motor on Front Axle + 1 Induction Motor on Rear Axle |
1 Permanent Magnet Synchronous Motor Placed At Front Axle |
— |
Dual Motors: 1 Permanent Magnet Synchronous Motor on Front Axle + 1 Induction Motor on Rear Axle |
| Max Engine Torque (Nm@rpm) |
Not Applicable (Electric Motor Torque Only) |
— |
Not Applicable (Electric Motor Torque Only) |
| Pure Electric Driving Mode |
Yes (Always Pure Electric Mode) |
— |
Yes (Always Pure Electric Mode) |
| Transmission |
Automatic - 1 Gear Single Speed Transmission |
— |
Automatic - 1 Gear Single Speed Transmission |
| E20 Compatibility |
Not Applicable (Electric Vehicle) |
— |
Not Applicable (Electric Vehicle) |
| Direct Start in CNG |
Not Applicable |
Not Applicable |
Not Applicable |
Not Applicable |
Not Applicable |
Not Applicable |
Not Applicable |
Not Applicable |
Not Applicable |
Not Applicable |
Not Applicable |
Not Applicable |
Not Applicable |
Not Applicable |
Not Applicable |
— |
Not Applicable |
| Fuel Change Over Switch |
Not Applicable |
Not Applicable |
Not Applicable |
Not Applicable |
Not Applicable |
Not Applicable |
Not Applicable |
Not Applicable |
Not Applicable |
Not Applicable |
Not Applicable |
Not Applicable |
Not Applicable |
Not Applicable |
Not Applicable |
— |
Not Applicable |
| Suspensions, Brakes, Steering & Tyres |
| Spare Wheel |
Space Saver Spare Wheel provided (Mounted underbody) |
— |
Space Saver Spare Wheel provided (Mounted underbody) |
| Wheels |
18-inch Alloy Wheels with Aero Inserts |
18-inch Diamond Cut Alloy Wheels with Aero Inserts |
18-inch Charcoal Blackstone Alloy Wheels with Aero Inserts |
— |
18-inch Charcoal Blackstone Alloy Wheels with Aero Inserts |
| Steering Type |
Electric Power Steering (EPS) |
— |
Electric Power Steering (EPS) |
| Front Suspension |
Independent, Lower Wishbone, MacPherson Strut with Coil Spring & Anti-Roll Bar |
— |
Independent, Lower Wishbone, MacPherson Strut with Coil Spring & Anti-Roll Bar |
| Rear Brake Type |
Disc (All 4 Wheel Disc Brakes standard on Harrier EV platform) |
— |
Disc (All 4 Wheel Disc Brakes standard on Harrier EV platform) |
| Tyre Construction |
Radial - Tubeless |
Radial - Tubeless |
Radial - Tubeless |
Radial - Tubeless |
Radial - Tubeless |
Radial - Tubeless |
Radial - Tubeless |
Radial - Tubeless |
Radial - Tubeless |
Radial - Tubeless |
Radial - Tubeless |
Radial - Tubeless |
Radial - Tubeless |
Radial - Tubeless |
Radial - Tubeless |
— |
Radial - Tubeless |
| Front Tyres |
235 / 60 R18 |
235 / 60 R18 |
235 / 60 R18 |
235 / 60 R18 |
235 / 60 R18 |
235 / 60 R18 |
235 / 60 R18 |
235 / 60 R18 |
235 / 60 R18 |
235 / 60 R18 |
235 / 60 R18 |
235 / 60 R18 |
235 / 60 R18 |
235 / 60 R18 |
235 / 60 R18 |
— |
235 / 60 R18 |
| Minimum Turning Radius(m) |
5.7 metres |
5.7 metres |
5.7 metres |
5.7 metres |
5.7 metres |
5.7 metres |
5.7 metres |
5.7 metres |
5.7 metres |
5.7 metres |
5.7 metres |
5.7 metres |
5.7 metres |
5.7 metres |
5.7 metres |
— |
5.7 metres |
| Rear Suspension |
Semi-Independent Twist Blade with Panhard Rod & Coil Spring |
Independent Multi-Link Suspension with Coil Spring & Anti-Roll Bar (Upgraded for AWD dual-motor setup) |
Semi-Independent Twist Blade with Panhard Rod & Coil Spring |
Independent Multi-Link Suspension with Coil Spring & Anti-Roll Bar (Upgraded for AWD dual-motor setup) |
Semi-Independent Twist Blade with Panhard Rod & Coil Spring |
— |
Independent Multi-Link Suspension with Coil Spring & Anti-Roll Bar (Upgraded for AWD dual-motor setup) |
| Front Brake Type |
Disc |
Disc |
Disc |
Disc |
Disc |
Disc |
Disc |
Disc |
Disc |
Disc |
Disc |
Disc |
Disc |
Disc |
Disc |
— |
Disc |
| Four Wheel Steering |
No |
No |
No |
No |
No |
No |
No |
No |
No |
No |
No |
No |
No |
No |
No |
— |
No |
| Rear Tyres |
235 / 60 R18 |
235 / 60 R18 |
235 / 60 R18 |
235 / 60 R18 |
235 / 60 R18 |
235 / 60 R18 |
235 / 60 R18 |
235 / 60 R18 |
235 / 60 R18 |
235 / 60 R18 |
235 / 60 R18 |
235 / 60 R18 |
235 / 60 R18 |
235 / 60 R18 |
235 / 60 R18 |
— |
235 / 60 R18 |
| Dimensions & Weight |
| Kerb Weight(kg) |
~1920 kg |
~1920 kg |
~1930 kg |
~1930 kg |
~1940 kg |
~1940 kg |
~1985 kg |
~1985 kg |
~2080 kg |
~1985 kg |
~1985 kg |
~2080 kg |
~2080 kg |
~1985 kg |
~1985 kg |
— |
~2080 kg |
| Height(mm) |
1720 mm |
1720 mm |
1720 mm |
1720 mm |
1720 mm |
1720 mm |
1720 mm |
1720 mm |
1720 mm |
1720 mm |
1720 mm |
1720 mm |
1720 mm |
1720 mm |
1720 mm |
— |
1720 mm |
| Width(mm) |
1922 mm |
1922 mm |
1922 mm |
1922 mm |
1922 mm |
1922 mm |
1922 mm |
1922 mm |
1922 mm |
1922 mm |
1922 mm |
1922 mm |
1922 mm |
1922 mm |
1922 mm |
— |
1922 mm |
| Length(mm) |
4605 mm |
4605 mm |
4605 mm |
4605 mm |
4605 mm |
4605 mm |
4605 mm |
4605 mm |
4605 mm |
4605 mm |
4605 mm |
4605 mm |
4605 mm |
4605 mm |
4605 mm |
— |
4605 mm |
| Ground Clearance |
190 mm |
190 mm |
190 mm |
190 mm |
190 mm |
190 mm |
190 mm |
190 mm |
190 mm |
190 mm |
190 mm |
190 mm |
190 mm |
190 mm |
190 mm |
— |
190 mm |
| Wheelbase(mm) |
2741 mm |
2741 mm |
2741 mm |
2741 mm |
2741 mm |
2741 mm |
2741 mm |
2741 mm |
2741 mm |
2741 mm |
2741 mm |
2741 mm |
2741 mm |
2741 mm |
2741 mm |
— |
2741 mm |
| Capacity |
| Fuel Tank Capacity(L) |
Not Applicable (Electric Vehicle) |
— |
Not Applicable (Electric Vehicle) |
| Doors |
5 Doors |
5 Doors |
5 Doors |
5 Doors |
5 Doors |
5 Doors |
5 Doors |
5 Doors |
5 Doors |
5 Doors |
5 Doors |
5 Doors |
5 Doors |
5 Doors |
5 Doors |
— |
5 Doors |
| Bootspace(L) |
445 Litres |
445 Litres |
445 Litres |
445 Litres |
445 Litres |
445 Litres |
445 Litres |
445 Litres |
445 Litres |
445 Litres |
445 Litres |
445 Litres |
445 Litres |
445 Litres |
445 Litres |
— |
445 Litres |
| Seating Capacity |
5 Seats |
5 Seats |
5 Seats |
5 Seats |
5 Seats |
5 Seats |
5 Seats |
5 Seats |
5 Seats |
5 Seats |
5 Seats |
5 Seats |
5 Seats |
5 Seats |
5 Seats |
— |
5 Seats |
| No of Rows |
2 Rows |
2 Rows |
2 Rows |
2 Rows |
2 Rows |
2 Rows |
2 Rows |
2 Rows |
2 Rows |
2 Rows |
2 Rows |
2 Rows |
2 Rows |
2 Rows |
2 Rows |
— |
2 Rows |
| Dimensions |
| Fuel Tank Capacity |
— |
— |
— |
— |
— |
— |
— |
— |
— |
— |
— |
— |
— |
— |
— |
15 Litres |
— |